Storm Watch 101: How to Document Roof Damage After High Winds
High winds are one of the leading causes of roof damage in Minnesota, yet many homeowners don’t notice the problem until weeks or even months later—when leaks, water stains, or higher energy bills start showing up. By that point, what could have been an easy fix may turn into a costly repair.
That’s why documenting roof damage right after a windstorm is so important. Not only does it help keep your home safe, but it also ensures you have the proof you need if you file an insurance claim. At Right Now Roofing and Restoration, we’ve helped countless homeowners navigate this process—and we’re here to break down everything you need to know.
Why Documenting Roof Damage Matters
When high winds roll through, documenting roof damage quickly and accurately matters for three key reasons:
– Insurance claims – Proper documentation increases the likelihood of your claim being approved and helps avoid disputes with your insurance provider. Without proof, you may be stuck covering repair costs yourself.
– Safety concerns – Wind damage often goes unnoticed. Missing shingles, cracked flashing, or loose roof structures can quickly lead to leaks, mold, or even structural compromise.
– Resale value – A home with well-documented repairs maintains its value. If you decide to sell your property in the future, having a clear record of professional roof maintenance builds trust with buyers.
Safety First: Before You Inspect
Before you grab your phone and start snapping photos, remember that safety comes first.
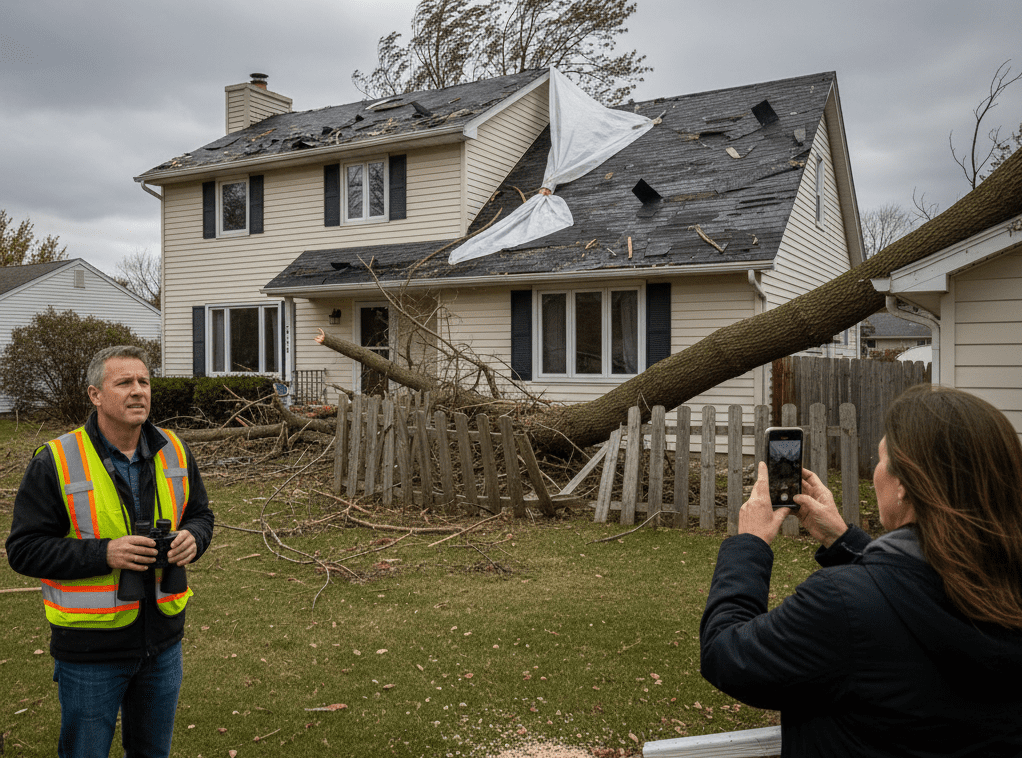
– Stay on the ground for your initial inspection. A pair of binoculars can help you spot lifted or missing shingles without climbing a ladder.
– Avoid climbing onto a wet or unstable roof. Wind damage often weakens roofing materials, making it dangerous to walk on.
– Call a professional roofer if you notice serious or widespread damage. Roofers have the tools and training to safely inspect areas you can’t reach.
Step 1: Take Clear, Detailed Photos
Your phone is your best friend after a storm. High-quality images provide undeniable evidence for your insurance company.
– Take wide shots of the entire roof from different angles.
– Snap close-ups of missing shingles, debris, or visible cracks.
– Capture surrounding damage, such as broken fences, fallen trees, or siding damage.
– Make sure your photos are date-stamped. Most smartphones do this automatically, but double-check.
Pro Tip: Take photos in good lighting and from multiple angles. The more evidence you collect, the stronger your case will be.
Step 2: Look for Common Signs of Wind Damage
Even if your roof looks fine from the ground, subtle signs of damage may still be present. After high winds, keep an eye out for:
– Missing or lifted shingles – This is one of the most common indicators of roof damage.
– Granule loss – Check gutters and downspouts for small granules from asphalt shingles.
– Damaged flashing – Look around chimneys, skylights, and vents.
– Fallen debris – Branches, limbs, or other objects may have left dents or punctures.
– Indoor warning signs – Water stains on ceilings, bubbling paint, or drafts are often linked to roof issues.
Step 3: Keep Written Notes
Photos are powerful, but written notes can tell the story in more detail.
– Record the date and time of the storm.
– Write down what you noticed during and after the storm (e.g., “Heard shingles flapping on the west side of the house”).
– Note any temporary fixes you performed, such as placing a tarp.
– Save receipts for supplies, temporary repairs, or cleanup costs.
This written record makes your insurance claim much stronger.
Step 4: Contact Your Insurance Company
Once you have your photos and notes, contact your insurance provider.
– File your claim as soon as possible.
– Provide all supporting evidence—photos, notes, and receipts.
– Ask about next steps and whether they require a professional roof inspection.
Insurance adjusters often look for reasons to minimize claims. Thorough documentation gives you leverage and ensures you’re treated fairly.
Step 5: Schedule a Professional Roof Inspection
Even the best DIY inspection can miss hidden damage. That’s why hiring a professional is crucial.
At Right Now Roofing and Restoration, we offer comprehensive inspections after storms. Our team knows how to spot damage that’s easy to overlook, such as subtle flashing issues, sealant cracks, or underlying water penetration.
We also provide detailed inspection reports, which can be shared directly with your insurance adjuster. This not only speeds up your claim but also helps ensure your roof gets the repairs it truly needs.
Preventative Steps for the Future
Minnesota homeowners know storms are inevitable—but you can take steps to reduce the risk of future roof damage:
– Schedule regular roof inspections – Catching small issues before they escalate saves money in the long run.
– Trim trees near your home – Overhanging branches are a major hazard during high winds.
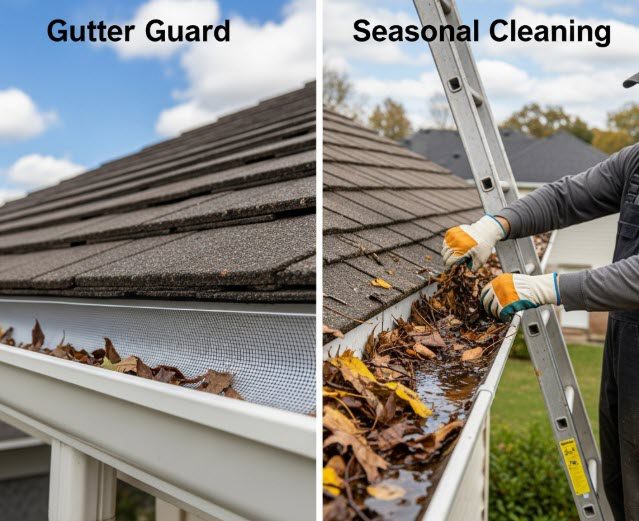
– Keep gutters clean – Clear gutters prevent water backup and roof deterioration.
– Reinforce vulnerable areas – Ask your roofer about wind-resistant materials and upgraded flashing.
FAQs
Will my insurance cover wind damage?
Most homeowner’s insurance policies cover wind damage, but coverage depends on the extent of damage and your deductible. Documentation is key.
What if I don’t see visible damage?
Hidden issues are common. Always schedule a professional inspection after strong winds, even if your roof looks fine.
Can I make temporary repairs myself?
Yes—but do so safely. Using a tarp to prevent water intrusion is fine, but avoid climbing on the roof. Call a professional for permanent fixes.
Conclusion: Protect Your Home and Your Wallet
High winds can do more damage than you think. By documenting issues immediately, you protect your home, strengthen your insurance claim, and ensure that repairs happen before small problems turn into big headaches.
At Right Now Roofing and Restoration, we specialize in helping Minnesota homeowners recover quickly after storms. Whether you need a free inspection, help with insurance claims, or emergency repairs, our team is ready to assist.
Call us today for a free roof inspection and storm damage consultation.

Commercial Roof Prep: How Property Managers Should Winterize Flat Roofs
When Minnesota winters roll in, flat roofs face some of the harshest conditions imaginable. Heavy snow, ice dams, fluctuating temperatures, and pounding winds put enormous stress on commercial roofing systems. For property managers, these seasonal challenges can mean the difference between a building that weathers the winter without issue—or one riddled with leaks, costly emergency repairs, and frustrated tenants.
The good news? With proactive preparation, you can prevent most winter roofing issues before they ever occur. Winterizing a flat roof isn’t just about shoveling snow—it’s a comprehensive strategy that includes inspection, maintenance, drainage improvements, and emergency readiness. In this post, we’ll walk through everything property managers should do to protect their flat roofs this winter.
Why Winterizing Flat Roofs Matters
Flat roofs are widely used in commercial buildings because they are affordable, practical, and provide space for HVAC units and other equipment. But winter introduces unique threats:
– Snow Load Stress: Accumulating snow can weigh thousands of pounds, risking structural damage.
– Freeze-Thaw Cycles: Melting and refreezing water creates cracks in membranes and expands small flaws.
– Ice Dams: Heat escaping from inside the building melts snow, which refreezes near edges, trapping water on the roof.
– Drainage Issues: Blocked drains lead to ponding water, which quickly freezes and worsens membrane damage.
Failing to prepare means facing higher repair costs, tenant complaints, and business disruptions. Proactive winterization protects not just the building—but also your investment, reputation, and bottom line.
Step 1: Conduct a Pre-Winter Roof Inspection
The first and most important step is a thorough inspection by a professional roofer. Even minor issues can become major problems once snow and ice arrive.
A pre-winter inspection should cover:
– Roof Membrane: Look for cracks, blisters, punctures, or loose seams.
– Flashing & Seals: Ensure flashing around penetrations (vents, HVAC, skylights) is tight and sealed.
– Drains & Gutters: Confirm they’re clear and undamaged.
– Roof Edges: Inspect for gaps where wind and moisture could infiltrate.
Pro Tip: Document your inspection with photos and written notes. Not only will this help prioritize repairs, but it also strengthens insurance claims if damage occurs later.
Step 2: Clean and Clear Debris
Leaves, branches, dirt, and trash may seem harmless, but they can clog drains and create ponding water that freezes into ice sheets. Clearing debris ensures water flows properly off the roof.
– Remove all organic material from the surface.
– Check downspouts and scuppers for clogs.
– Trim nearby tree branches to minimize ongoing debris buildup.
This step is quick and inexpensive but pays huge dividends by preventing water blockages during storms.
Step 3: Improve Drainage Systems
Flat roofs live and die by their drainage systems. If water can’t escape, it will pool, freeze, and cause leaks.
Drainage preparation includes:
– Inspecting internal drains, scuppers, and gutters for cracks, corrosion, or misalignment.
– Installing heating cables in gutters or downspouts to prevent ice blockages.
– Confirming slope is adequate for water runoff.
Pro Tip: If you’ve had ponding issues in past winters, consider installing tapered insulation systems to improve slope and reduce standing water.
Step 4: Check Insulation and Energy Efficiency
Winterization isn’t just about stopping leaks—it’s also about controlling heat flow. Poor insulation leads to heat loss, which increases energy bills and contributes to ice dam formation.
– Inspect roof insulation for damage or wet spots.
– Seal gaps around HVAC units and roof penetrations.
– Ensure roof hatches and skylights are airtight.
Improved insulation keeps warm air inside, snow frozen in place, and energy costs manageable.
Step 5: Plan for Snow and Ice Management
Minnesota winters guarantee snow—often a lot of it. That means property managers need a safe snow removal plan.
– Hire Professionals: Snow removal on flat roofs should never be done by untrained staff. Using shovels, salt, or heavy equipment improperly can damage membranes.
– Use Roof-Friendly Tools: Professionals use plastic shovels or snow blowers with non-abrasive blades.
– Know Your Load Limits: Every roof has a weight capacity. Partner with your roofer to monitor snow loads and schedule removal before weight exceeds safe limits.
Pro Tip: Create a written snow management agreement in advance with your roofing contractor. This ensures fast response when heavy storms hit.
Step 6: Emergency Preparedness
Even with the best planning, emergencies happen. Having a clear plan reduces downtime and protects tenants.
– Have a Roofer on Call: Establish a relationship with a local contractor before winter starts.
– Stock Emergency Supplies: Keep tarps, buckets, and wet/dry vacuums on hand.
– Tenant Communication: Have a notification process in place to update tenants if leaks occur.
– Insurance Documentation: Keep records of inspections, maintenance, and repairs to support claims.
Step 7: Partnering with a Professional Roofing Company
For property managers, one of the smartest decisions is to form a maintenance partnership with a trusted roofing company.
Benefits include:
– Scheduled inspections before and after winter.
– Priority emergency response during storms.
– Peace of mind knowing experts familiar with your building are on standby.
Right Now Roofing & Restoration specializes in flat roof systems built to withstand Minnesota’s toughest winters. Partnering with us means fewer surprises, lower repair costs, and confidence that your property is protected.
Winter is coming—don’t wait until the first snowfall to think about your commercial flat roof. By inspecting, cleaning, improving drainage, checking insulation, and creating snow and emergency plans, property managers can prevent costly issues and keep tenants happy.
Schedule your winter prep inspection today with Right Now Roofing & Restoration—and ensure your building is ready for everything a Minnesota winter throws at it.
Visual Aid Suggestion: Flat Roof Winter Prep Checklist
Create a simple checklist graphic for property managers, with items such as:
– Roof inspection complete
– Debris cleared
– Drains/gutters checked
– Insulation verified
– Snow removal plan in place
– Emergency contacts updated
This can double as a downloadable PDF lead magnet.
FAQs
Q: How often should I inspect my flat roof in winter?
A: At least once before winter, once after major snowstorms, and again in spring. More frequent inspections are ideal if your building has a history of leaks.
Q: Can my maintenance crew handle roof prep instead of hiring a roofer?
A: While basic cleaning can be done in-house, professional inspections and repairs are critical to catch hidden issues and ensure safety.
Q: What’s the average cost of winter prep vs. emergency repairs?
A: Preventative winter prep typically costs a fraction of emergency repairs. For example, a routine inspection and maintenance may cost a few hundred dollars, while emergency flat roof repairs can run into the thousands.
Q: Is snow removal always necessary?
A: Not always. It depends on the roof’s load capacity and the type of snow. Your roofing partner can determine when removal is required to prevent overload.

