Storm Watch 101: How to Document Roof Damage After High Winds
High winds are one of the leading causes of roof damage in Minnesota, yet many homeowners don’t notice the problem until weeks or even months later—when leaks, water stains, or higher energy bills start showing up. By that point, what could have been an easy fix may turn into a costly repair.
That’s why documenting roof damage right after a windstorm is so important. Not only does it help keep your home safe, but it also ensures you have the proof you need if you file an insurance claim. At Right Now Roofing and Restoration, we’ve helped countless homeowners navigate this process—and we’re here to break down everything you need to know.
Why Documenting Roof Damage Matters
When high winds roll through, documenting roof damage quickly and accurately matters for three key reasons:
– Insurance claims – Proper documentation increases the likelihood of your claim being approved and helps avoid disputes with your insurance provider. Without proof, you may be stuck covering repair costs yourself.
– Safety concerns – Wind damage often goes unnoticed. Missing shingles, cracked flashing, or loose roof structures can quickly lead to leaks, mold, or even structural compromise.
– Resale value – A home with well-documented repairs maintains its value. If you decide to sell your property in the future, having a clear record of professional roof maintenance builds trust with buyers.
Safety First: Before You Inspect
Before you grab your phone and start snapping photos, remember that safety comes first.
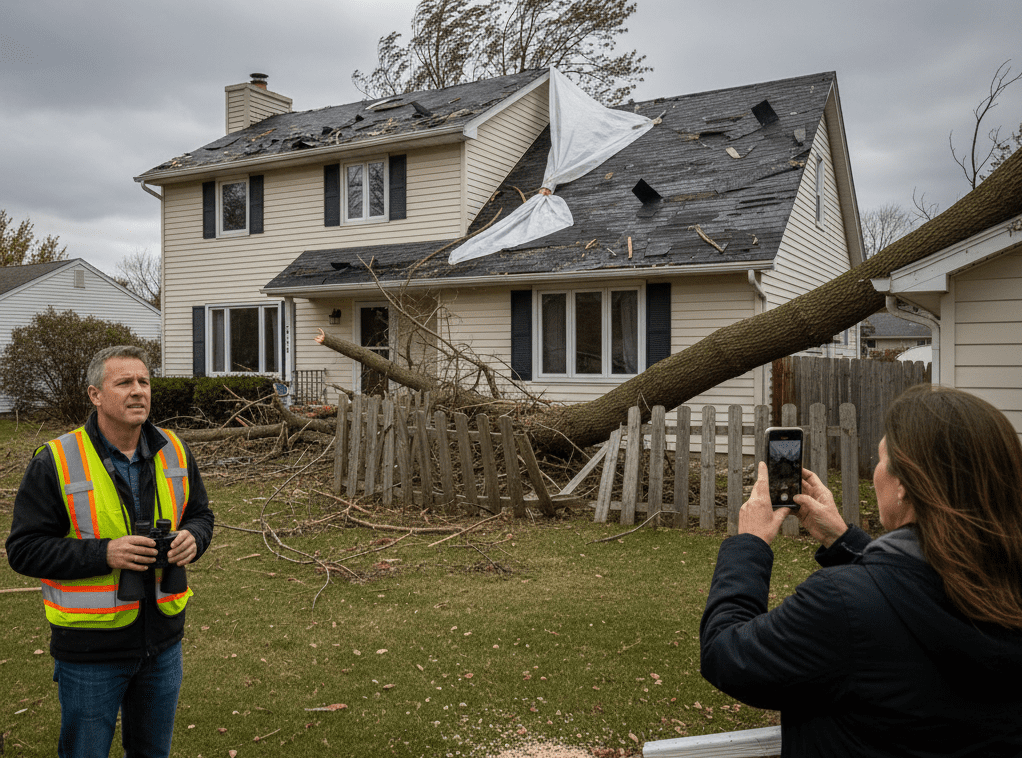
– Stay on the ground for your initial inspection. A pair of binoculars can help you spot lifted or missing shingles without climbing a ladder.
– Avoid climbing onto a wet or unstable roof. Wind damage often weakens roofing materials, making it dangerous to walk on.
– Call a professional roofer if you notice serious or widespread damage. Roofers have the tools and training to safely inspect areas you can’t reach.
Step 1: Take Clear, Detailed Photos
Your phone is your best friend after a storm. High-quality images provide undeniable evidence for your insurance company.
– Take wide shots of the entire roof from different angles.
– Snap close-ups of missing shingles, debris, or visible cracks.
– Capture surrounding damage, such as broken fences, fallen trees, or siding damage.
– Make sure your photos are date-stamped. Most smartphones do this automatically, but double-check.
Pro Tip: Take photos in good lighting and from multiple angles. The more evidence you collect, the stronger your case will be.
Step 2: Look for Common Signs of Wind Damage
Even if your roof looks fine from the ground, subtle signs of damage may still be present. After high winds, keep an eye out for:
– Missing or lifted shingles – This is one of the most common indicators of roof damage.
– Granule loss – Check gutters and downspouts for small granules from asphalt shingles.
– Damaged flashing – Look around chimneys, skylights, and vents.
– Fallen debris – Branches, limbs, or other objects may have left dents or punctures.
– Indoor warning signs – Water stains on ceilings, bubbling paint, or drafts are often linked to roof issues.
Step 3: Keep Written Notes
Photos are powerful, but written notes can tell the story in more detail.
– Record the date and time of the storm.
– Write down what you noticed during and after the storm (e.g., “Heard shingles flapping on the west side of the house”).
– Note any temporary fixes you performed, such as placing a tarp.
– Save receipts for supplies, temporary repairs, or cleanup costs.
This written record makes your insurance claim much stronger.
Step 4: Contact Your Insurance Company
Once you have your photos and notes, contact your insurance provider.
– File your claim as soon as possible.
– Provide all supporting evidence—photos, notes, and receipts.
– Ask about next steps and whether they require a professional roof inspection.
Insurance adjusters often look for reasons to minimize claims. Thorough documentation gives you leverage and ensures you’re treated fairly.
Step 5: Schedule a Professional Roof Inspection
Even the best DIY inspection can miss hidden damage. That’s why hiring a professional is crucial.
At Right Now Roofing and Restoration, we offer comprehensive inspections after storms. Our team knows how to spot damage that’s easy to overlook, such as subtle flashing issues, sealant cracks, or underlying water penetration.
We also provide detailed inspection reports, which can be shared directly with your insurance adjuster. This not only speeds up your claim but also helps ensure your roof gets the repairs it truly needs.
Preventative Steps for the Future
Minnesota homeowners know storms are inevitable—but you can take steps to reduce the risk of future roof damage:
– Schedule regular roof inspections – Catching small issues before they escalate saves money in the long run.
– Trim trees near your home – Overhanging branches are a major hazard during high winds.
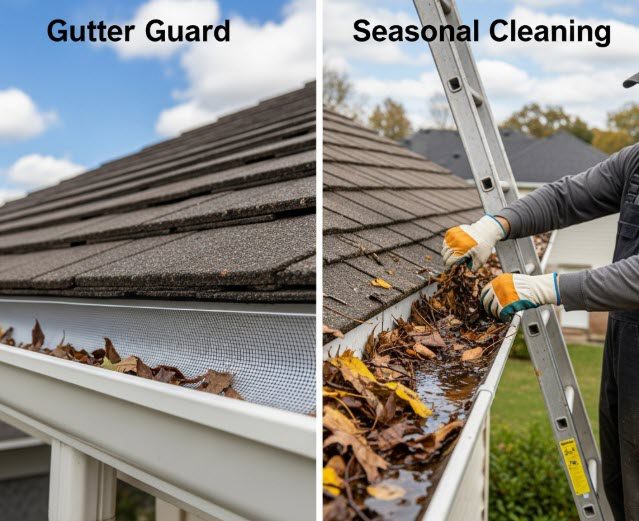
– Keep gutters clean – Clear gutters prevent water backup and roof deterioration.
– Reinforce vulnerable areas – Ask your roofer about wind-resistant materials and upgraded flashing.
FAQs
Will my insurance cover wind damage?
Most homeowner’s insurance policies cover wind damage, but coverage depends on the extent of damage and your deductible. Documentation is key.
What if I don’t see visible damage?
Hidden issues are common. Always schedule a professional inspection after strong winds, even if your roof looks fine.
Can I make temporary repairs myself?
Yes—but do so safely. Using a tarp to prevent water intrusion is fine, but avoid climbing on the roof. Call a professional for permanent fixes.
Conclusion: Protect Your Home and Your Wallet
High winds can do more damage than you think. By documenting issues immediately, you protect your home, strengthen your insurance claim, and ensure that repairs happen before small problems turn into big headaches.
At Right Now Roofing and Restoration, we specialize in helping Minnesota homeowners recover quickly after storms. Whether you need a free inspection, help with insurance claims, or emergency repairs, our team is ready to assist.
Call us today for a free roof inspection and storm damage consultation.

Justin Hansen is a seasoned professional in the roofing and siding industry, boasting over 15 years of hands-on experience. Starting his career in residential roofing, Justin quickly established a reputation for meticulous attention to detail and superior craftsmanship. His commitment to quality and excellence propelled him into more complex commercial projects, where he consistently delivered outstanding results.
Commercial Roof Prep: How Property Managers Should Winterize Flat Roofs
When Minnesota winters roll in, flat roofs face some of the harshest conditions imaginable. Heavy snow, ice dams, fluctuating temperatures, and pounding winds put enormous stress on commercial roofing systems. For property managers, these seasonal challenges can mean the difference between a building that weathers the winter without issue—or one riddled with leaks, costly emergency repairs, and frustrated tenants.
The good news? With proactive preparation, you can prevent most winter roofing issues before they ever occur. Winterizing a flat roof isn’t just about shoveling snow—it’s a comprehensive strategy that includes inspection, maintenance, drainage improvements, and emergency readiness. In this post, we’ll walk through everything property managers should do to protect their flat roofs this winter.
Why Winterizing Flat Roofs Matters
Flat roofs are widely used in commercial buildings because they are affordable, practical, and provide space for HVAC units and other equipment. But winter introduces unique threats:
– Snow Load Stress: Accumulating snow can weigh thousands of pounds, risking structural damage.
– Freeze-Thaw Cycles: Melting and refreezing water creates cracks in membranes and expands small flaws.
– Ice Dams: Heat escaping from inside the building melts snow, which refreezes near edges, trapping water on the roof.
– Drainage Issues: Blocked drains lead to ponding water, which quickly freezes and worsens membrane damage.
Failing to prepare means facing higher repair costs, tenant complaints, and business disruptions. Proactive winterization protects not just the building—but also your investment, reputation, and bottom line.
Step 1: Conduct a Pre-Winter Roof Inspection
The first and most important step is a thorough inspection by a professional roofer. Even minor issues can become major problems once snow and ice arrive.
A pre-winter inspection should cover:
– Roof Membrane: Look for cracks, blisters, punctures, or loose seams.
– Flashing & Seals: Ensure flashing around penetrations (vents, HVAC, skylights) is tight and sealed.
– Drains & Gutters: Confirm they’re clear and undamaged.
– Roof Edges: Inspect for gaps where wind and moisture could infiltrate.
Pro Tip: Document your inspection with photos and written notes. Not only will this help prioritize repairs, but it also strengthens insurance claims if damage occurs later.
Step 2: Clean and Clear Debris
Leaves, branches, dirt, and trash may seem harmless, but they can clog drains and create ponding water that freezes into ice sheets. Clearing debris ensures water flows properly off the roof.
– Remove all organic material from the surface.
– Check downspouts and scuppers for clogs.
– Trim nearby tree branches to minimize ongoing debris buildup.
This step is quick and inexpensive but pays huge dividends by preventing water blockages during storms.
Step 3: Improve Drainage Systems
Flat roofs live and die by their drainage systems. If water can’t escape, it will pool, freeze, and cause leaks.
Drainage preparation includes:
– Inspecting internal drains, scuppers, and gutters for cracks, corrosion, or misalignment.
– Installing heating cables in gutters or downspouts to prevent ice blockages.
– Confirming slope is adequate for water runoff.
Pro Tip: If you’ve had ponding issues in past winters, consider installing tapered insulation systems to improve slope and reduce standing water.
Step 4: Check Insulation and Energy Efficiency
Winterization isn’t just about stopping leaks—it’s also about controlling heat flow. Poor insulation leads to heat loss, which increases energy bills and contributes to ice dam formation.
– Inspect roof insulation for damage or wet spots.
– Seal gaps around HVAC units and roof penetrations.
– Ensure roof hatches and skylights are airtight.
Improved insulation keeps warm air inside, snow frozen in place, and energy costs manageable.
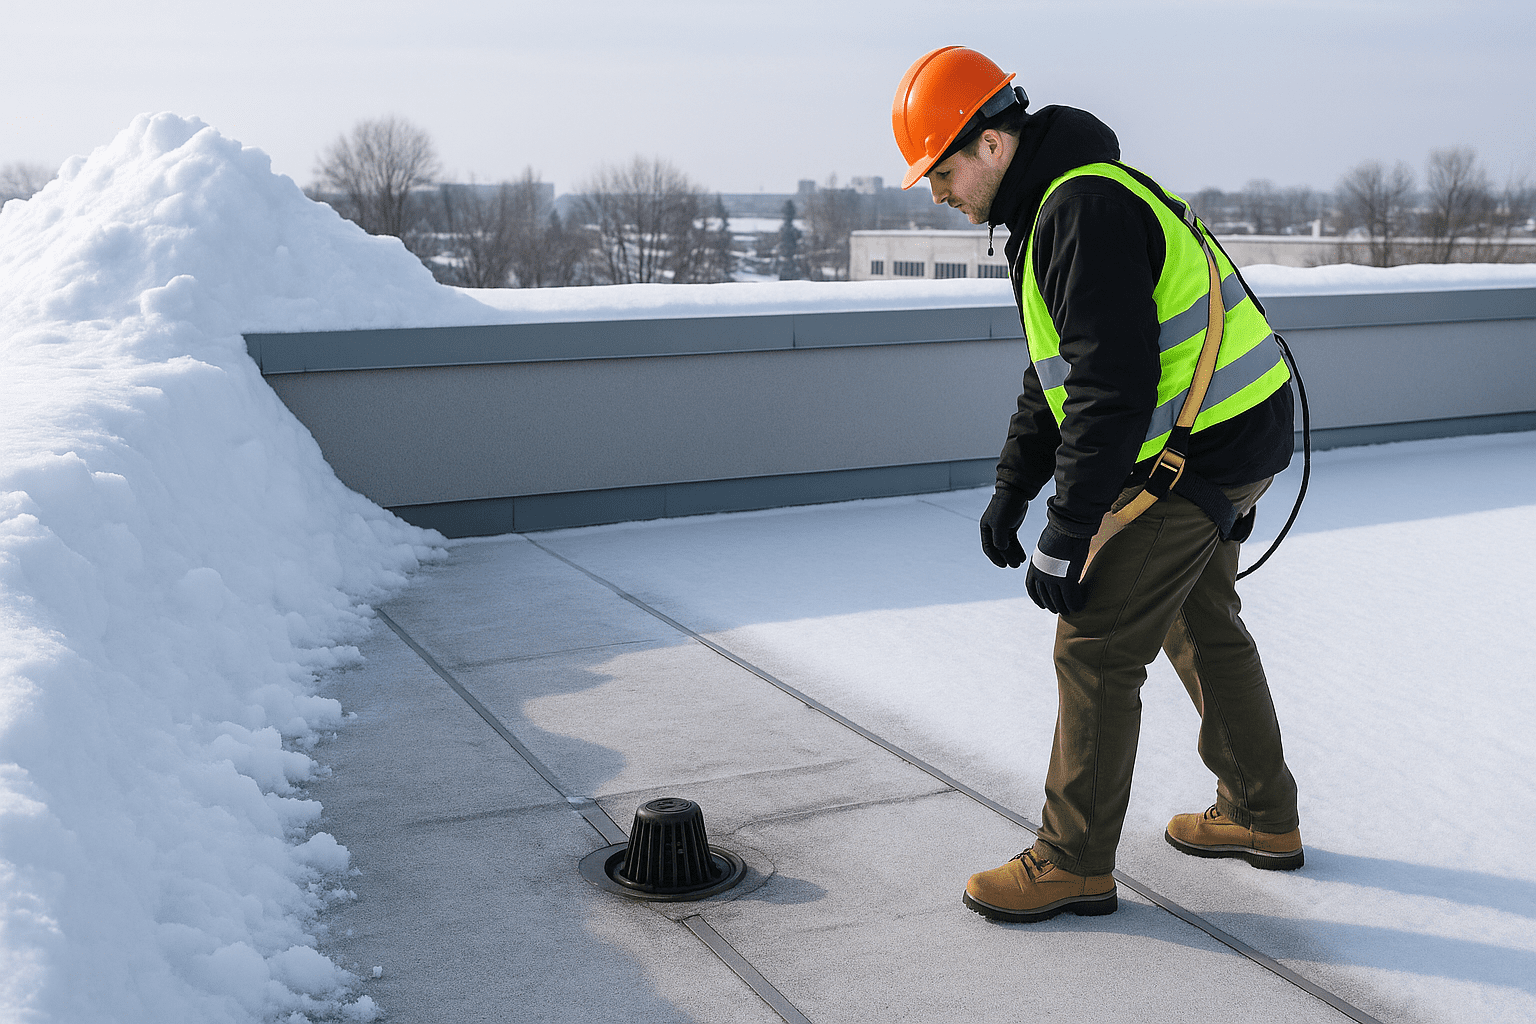
Step 5: Plan for Snow and Ice Management
Minnesota winters guarantee snow—often a lot of it. That means property managers need a safe snow removal plan.
– Hire Professionals: Snow removal on flat roofs should never be done by untrained staff. Using shovels, salt, or heavy equipment improperly can damage membranes.
– Use Roof-Friendly Tools: Professionals use plastic shovels or snow blowers with non-abrasive blades.
– Know Your Load Limits: Every roof has a weight capacity. Partner with your roofer to monitor snow loads and schedule removal before weight exceeds safe limits.
Pro Tip: Create a written snow management agreement in advance with your roofing contractor. This ensures fast response when heavy storms hit.
Step 6: Emergency Preparedness
Even with the best planning, emergencies happen. Having a clear plan reduces downtime and protects tenants.
– Have a Roofer on Call: Establish a relationship with a local contractor before winter starts.
– Stock Emergency Supplies: Keep tarps, buckets, and wet/dry vacuums on hand.
– Tenant Communication: Have a notification process in place to update tenants if leaks occur.
– Insurance Documentation: Keep records of inspections, maintenance, and repairs to support claims.
Step 7: Partnering with a Professional Roofing Company
For property managers, one of the smartest decisions is to form a maintenance partnership with a trusted roofing company.
Benefits include:
– Scheduled inspections before and after winter.
– Priority emergency response during storms.
– Peace of mind knowing experts familiar with your building are on standby.
Right Now Roofing & Restoration specializes in flat roof systems built to withstand Minnesota’s toughest winters. Partnering with us means fewer surprises, lower repair costs, and confidence that your property is protected.
Winter is coming—don’t wait until the first snowfall to think about your commercial flat roof. By inspecting, cleaning, improving drainage, checking insulation, and creating snow and emergency plans, property managers can prevent costly issues and keep tenants happy.
Schedule your winter prep inspection today with Right Now Roofing & Restoration—and ensure your building is ready for everything a Minnesota winter throws at it.
Visual Aid Suggestion: Flat Roof Winter Prep Checklist
Create a simple checklist graphic for property managers, with items such as:
– Roof inspection complete
– Debris cleared
– Drains/gutters checked
– Insulation verified
– Snow removal plan in place
– Emergency contacts updated
This can double as a downloadable PDF lead magnet.
FAQs
Q: How often should I inspect my flat roof in winter?
A: At least once before winter, once after major snowstorms, and again in spring. More frequent inspections are ideal if your building has a history of leaks.
Q: Can my maintenance crew handle roof prep instead of hiring a roofer?
A: While basic cleaning can be done in-house, professional inspections and repairs are critical to catch hidden issues and ensure safety.
Q: What’s the average cost of winter prep vs. emergency repairs?
A: Preventative winter prep typically costs a fraction of emergency repairs. For example, a routine inspection and maintenance may cost a few hundred dollars, while emergency flat roof repairs can run into the thousands.
Q: Is snow removal always necessary?
A: Not always. It depends on the roof’s load capacity and the type of snow. Your roofing partner can determine when removal is required to prevent overload.
Justin Hansen is a seasoned professional in the roofing and siding industry, boasting over 15 years of hands-on experience. Starting his career in residential roofing, Justin quickly established a reputation for meticulous attention to detail and superior craftsmanship. His commitment to quality and excellence propelled him into more complex commercial projects, where he consistently delivered outstanding results.
The Hidden Dangers of Water Damage After Summer Storms in Minnesota
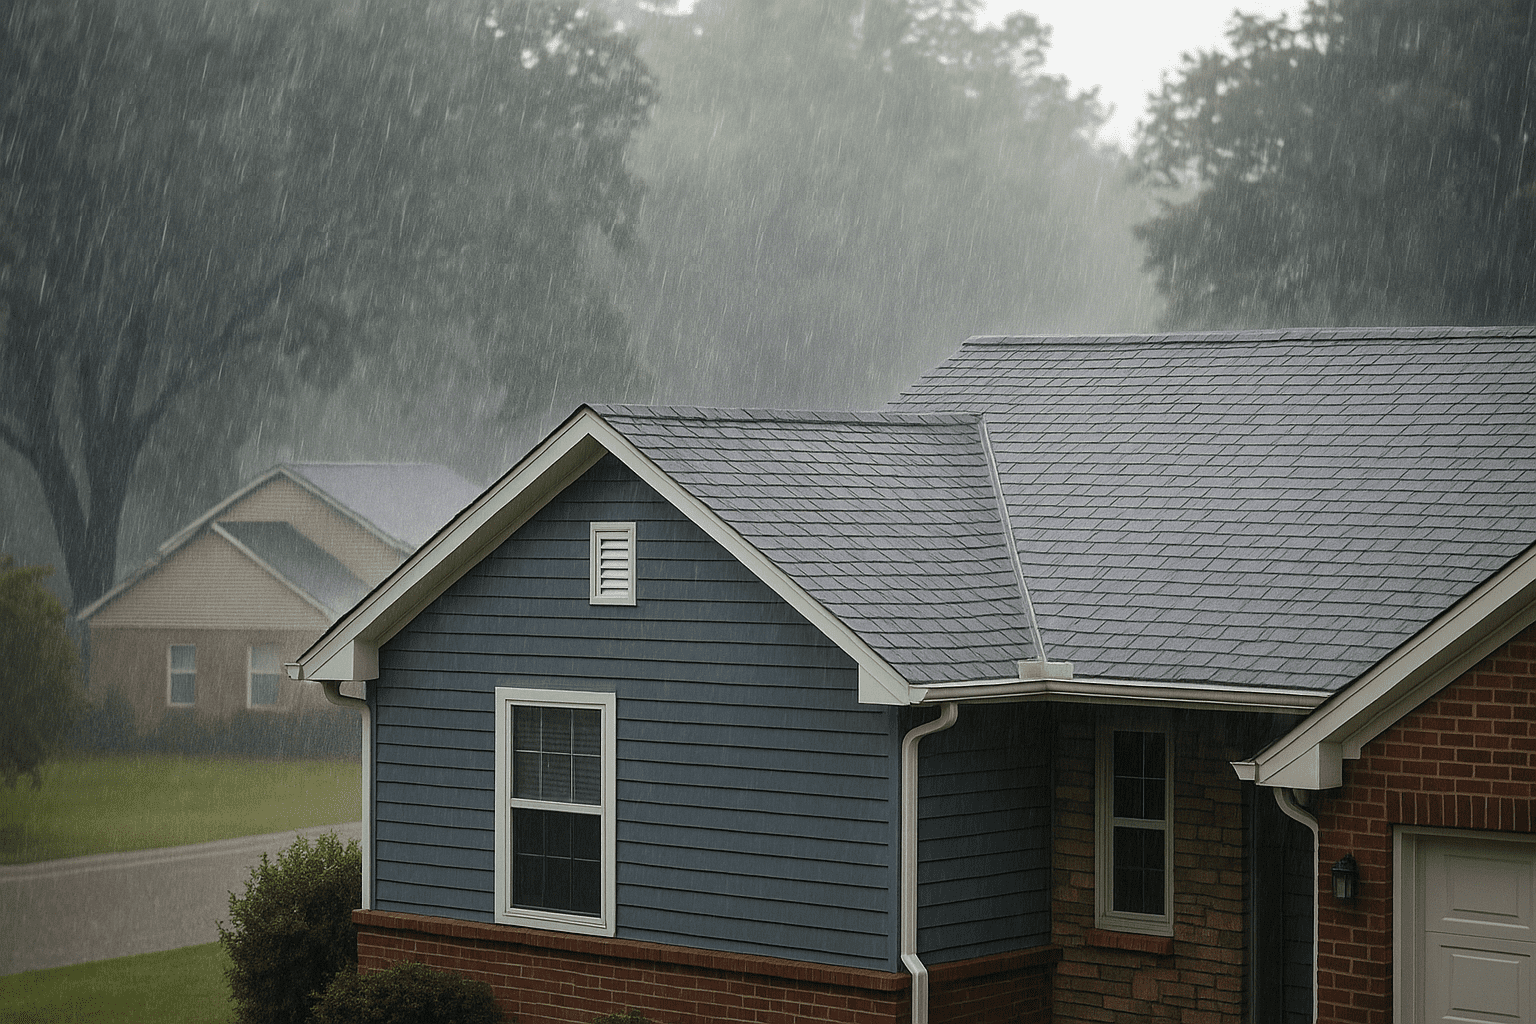
Picture this: a typical Minnesota summer afternoon turns dark, the sky rumbles, and within minutes a powerful storm drops inches of rain across the Twin Cities. Once the skies clear, most homeowners head outside, happy to see their homes still standing. But what many don’t realize is that water damage often works silently behind the scenes, showing up days or even months later.
Water damage after summer storms is more than an inconvenience—it can compromise structural integrity, create health hazards, and reduce property value. The challenge is that much of the damage is hidden, often overlooked until it becomes a major (and expensive) problem.
This guide explores the hidden dangers of water damage after Minnesota’s summer storms, what to watch for, and how to protect your home before the next storm rolls in.
Why Summer Storms in Minnesota Create Serious Water Damage Risks
Minnesota’s climate sets the stage for storm-related water issues. Heavy rainfall, flash flooding, and high humidity converge during the summer months, making homes vulnerable.
- Intense Thunderstorms: Summer in the Midwest frequently brings heavy rainfall, with some storms dropping several inches of rain in just a few hours.
- Flash Flooding: According to FEMA, flood damage is the most common and costly type of disaster in the U.S., affecting thousands of households every year . Minnesota’s low-lying areas and basements are particularly at risk.
- High Humidity: Moisture that lingers inside walls or flooring has an easier time developing into mold in Minnesota’s warm, damp summer conditions.
The reality is simple: even if your home doesn’t show visible flooding, hidden moisture may already be weakening your property.
The Hidden Dangers Homeowners Often Miss
The real risk of water damage is what you don’t see. Here are the most common hidden dangers after a summer storm:
1. Structural Damage
Water that seeps into a home’s foundation, crawl space, or basement can slowly compromise the structure. Concrete and wood expand, crack, and shift under repeated exposure. Over time, homeowners may notice uneven flooring or basement leaks—both signs of hidden storm damage.
2. Mold and Mildew Growth
Mold thrives in damp, dark environments and can begin forming within 24–48 hours of water intrusion . Once it spreads inside walls, attics, or basements, it can cause health problems such as allergies, asthma flare-ups, and respiratory irritation.
3. Electrical Hazards
When stormwater enters walls or ceilings, it often affects wiring and electrical panels. The dangers range from short circuits to fire hazards. Even if outlets and switches seem fine, moisture inside the system can create hidden risks.
4. HVAC and Insulation Damage
Wet insulation loses its ability to retain heat and cool air, driving up utility bills. Worse, moisture that infiltrates HVAC systems spreads mold spores throughout the entire home, creating long-term health concerns.
5. Decreased Property Value
Undetected water damage doesn’t just lead to repairs—it can decrease property value. Minnesota home sales require disclosure of prior water damage , and buyers often shy away from properties with water-related histories.
Warning Signs of Hidden Water Damage
Most homeowners only realize the extent of water damage once it becomes obvious. Here are subtle but critical signs to watch for:
- Musty Odors: Persistent damp smells in the basement, attic, or certain rooms often indicate hidden mold.
- Stains or Discoloration: Water rings on ceilings, bubbling paint, or dark patches on drywall signal ongoing leaks.
- Warped Floors or Buckling Wood: Even slight changes in flooring may be signs of water trapped underneath.
- Sudden Allergies or Respiratory Issues: Increased coughing, sneezing, or asthma symptoms indoors may indicate hidden mold.
- Rising Utility Bills: Wet insulation forces HVAC systems to work harder, driving up costs.
The earlier these signs are detected, the less expensive restoration will be.
How Professionals Detect and Fix Hidden Damage
DIY cleanup often overlooks the hidden dangers of water intrusion. Restoration professionals use advanced tools and proven techniques to find and fix damage thoroughly:
- Moisture Meters & Infrared Cameras: Detect water behind walls and under floors.
- Industrial Drying Equipment: High-capacity fans and dehumidifiers remove moisture quickly.
- Mold Remediation: Professionals safely remove contaminated materials and sanitize affected areas.
- Structural Repairs: Foundation cracks, damaged drywall, and weakened flooring are repaired or replaced.
Hiring experts ensures that damage doesn’t just look fixed—it is fixed.
Preventing Water Damage Before the Next Storm
While no one can control Minnesota weather, homeowners can take steps to protect their property:
- Clear Gutters and Downspouts: Prevent overflow that leads to foundation seepage.
- Proper Grading Around Foundation: Ensure water drains away from the home, not toward it.
- Install Sump Pumps with Backup Power: Crucial for basements prone to flooding.
- Schedule Annual Roof Inspections: Catch leaks before they become storm-related disasters.
- Create an Emergency Storm Plan: Know who to call, what to document, and how to safely shut off utilities after a storm.
Proactive maintenance goes a long way in saving money and stress.
Chart: Common Types of Hidden Water Damage After Minnesota Summer Storms
| Hidden Danger | Timeframe to Develop | Risk Level (1–5) | Long-Term Impact |
|---|---|---|---|
| Mold Growth | 24–48 hours | 5 | Severe health + structural damage |
| Foundation Cracks | Weeks–months | 4 | Costly structural repairs |
| Electrical System Damage | Immediate–weeks | 5 | Fire/shock hazard |
| Insulation Loss | Days–weeks | 3 | Higher energy bills |
| Property Value Decline | Months–years | 4 | Reduced resale value |
This chart helps visualize just how quickly hidden dangers can escalate.
Summer storms in Minnesota are inevitable—but long-term water damage doesn’t have to be. The real danger isn’t always what you see right after the rain stops, but the hidden problems that build up silently over time.
By knowing the risks, watching for signs, and calling in restoration professionals when needed, homeowners can avoid costly repairs and keep their homes safe.
Right Now Roofing & Restoration is here to help Minnesota homeowners recover quickly from water damage and storm events. Schedule a professional inspection today before hidden damage becomes tomorrow’s disaster.
References
- FEMA – Understanding Flood Risk
- EPA – Mold and Health: https://www.epa.gov/mold/mold-and-health
- CDC – Mold Cleanup After Disasters
- Minnesota Department of Commerce – Home Disclosures
- Insurance Information Institute – Water Damage Facts
Justin Hansen is a seasoned professional in the roofing and siding industry, boasting over 15 years of hands-on experience. Starting his career in residential roofing, Justin quickly established a reputation for meticulous attention to detail and superior craftsmanship. His commitment to quality and excellence propelled him into more complex commercial projects, where he consistently delivered outstanding results.
Preparing Your Roof for Minnesota’s Harsh Winter: Fall Maintenance Checklist
Minnesota winters are no joke. Between heavy snow, ice dams, high winds, and freezing temperatures, your roof takes a beating each year. For homeowners in White Bear Lake, fall is the ideal time to inspect, repair, and prepare your roof before the snow flies. A little preventative maintenance now can save you thousands in repairs come spring.
Here’s your fall roofing checklist to help ensure your home stays protected all winter long.
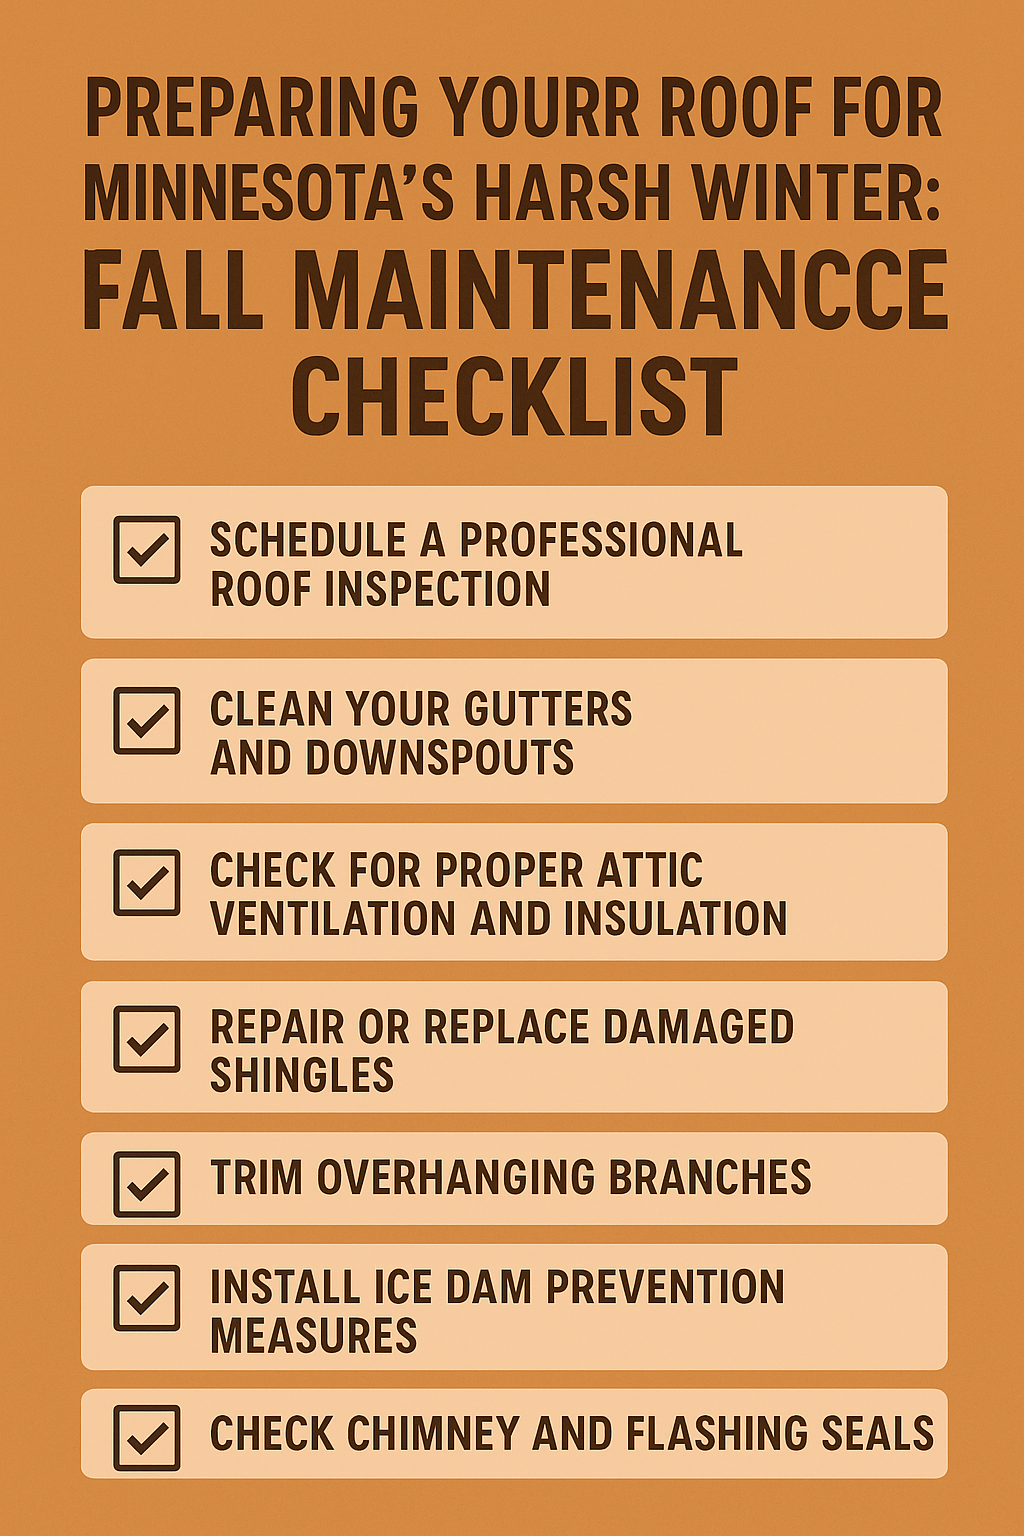
1. Schedule a Professional Roof Inspection
Even if your roof looks fine from the ground, hidden damage can lead to major problems once winter sets in. A professional roofing contractor will check for:
– Loose, cracked, or missing shingles
– Signs of water intrusion or rot
– Soft spots in the decking
– Flashing damage around chimneys, vents, and skylights
Pro Tip: Fall inspections allow you to make repairs before temperatures drop, which can make some roofing work more difficult.
2. Clean Your Gutters and Downspouts
Clogged gutters can cause melting snow to back up under shingles, leading to leaks and ice dams.
– Remove leaves, sticks, and debris
– Check for sagging or damaged sections
– Make sure downspouts direct water at least 3–5 feet away from your foundation
3. Check for Proper Attic Ventilation and Insulation
Poor ventilation traps warm, moist air in your attic, which contributes to ice dam formation and mold growth. In Minnesota’s climate, you want:
– Intake vents at the eaves/soffits
– Exhaust vents at or near the roof ridge
– Sufficient attic insulation (typically R-49 to R-60 for Minnesota, per U.S. DOE recommendations)
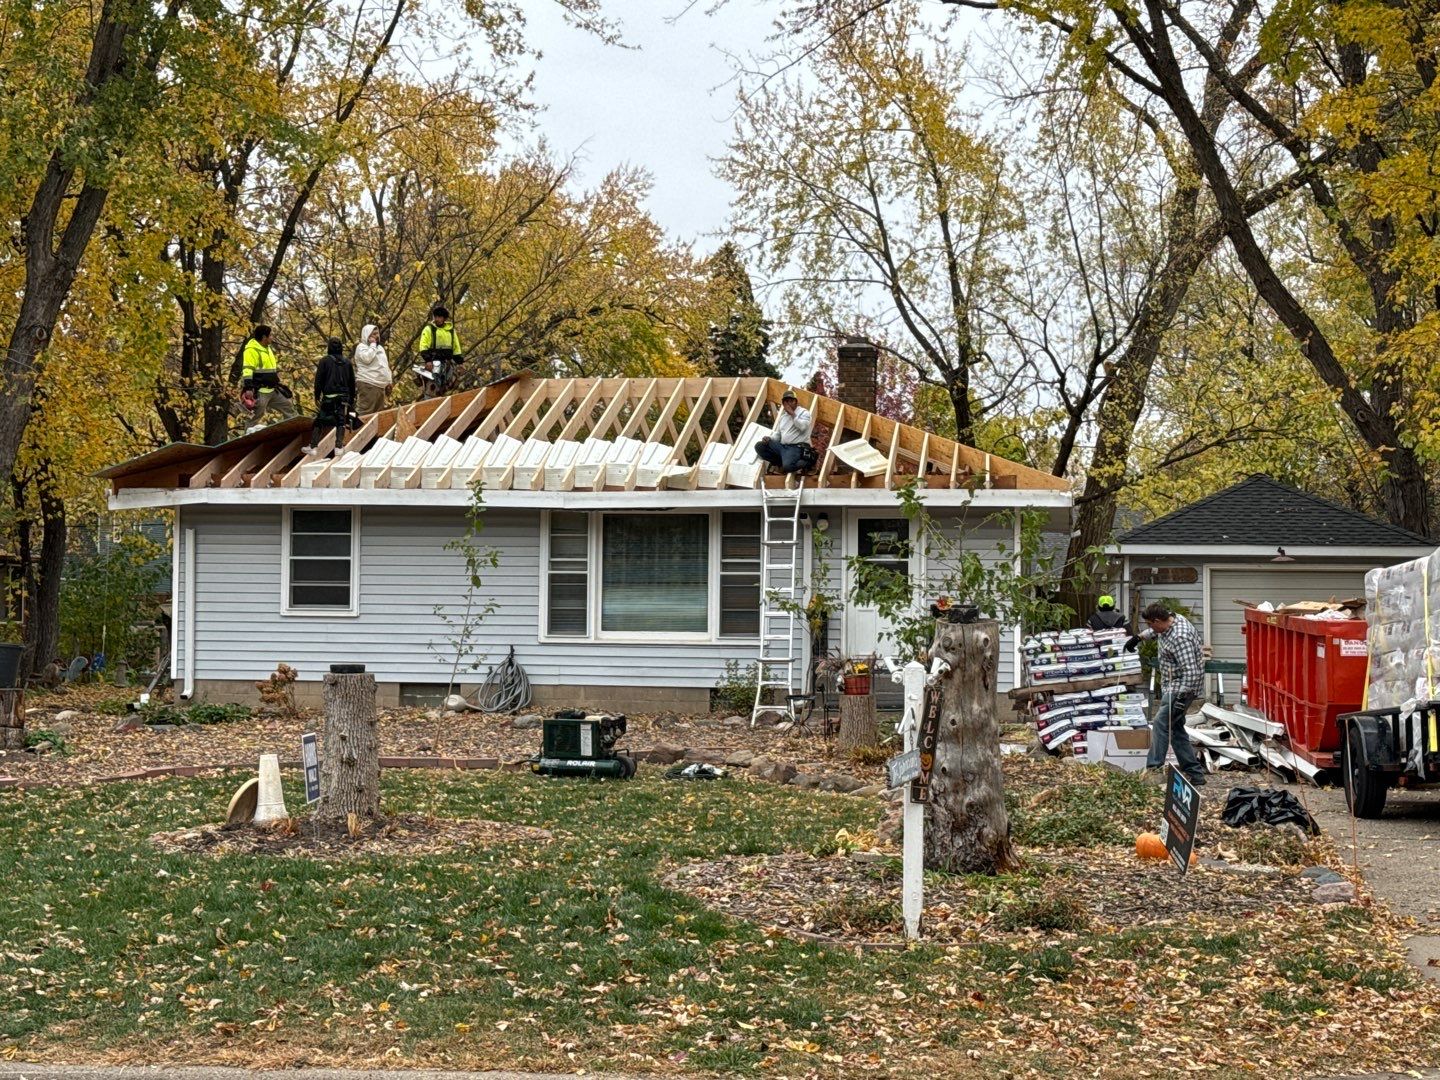
4. Repair or Replace Damaged Shingles
High winds and heavy snow can tear away already loose shingles. Replacing them in the fall ensures a tight seal before winter weather hits. Look for:
– Curling edges
– Cracks or missing granules
– Entire shingles missing from the roof
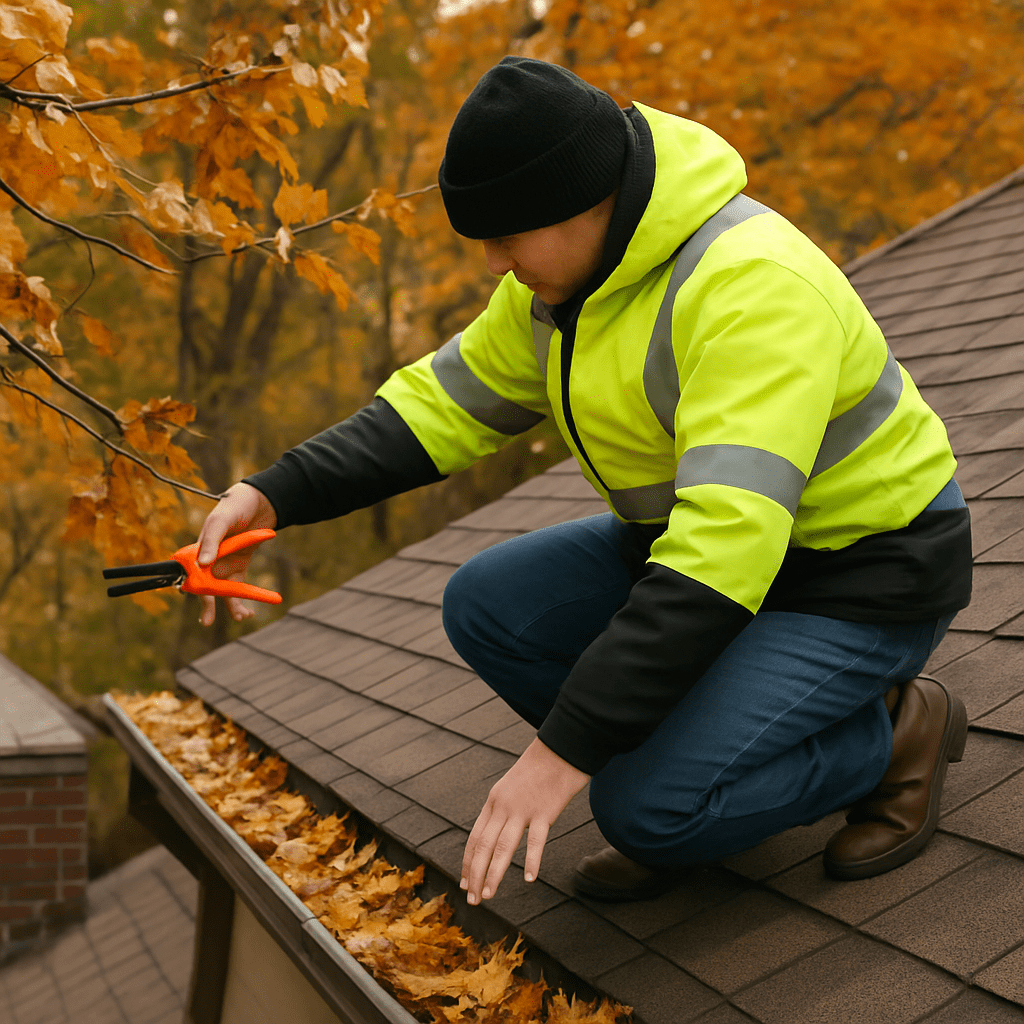
5. Trim Overhanging Branches
Branches can scrape your roof or break under the weight of snow and ice, causing damage. Trim back any limbs at least six feet from the roof surface to reduce this risk.
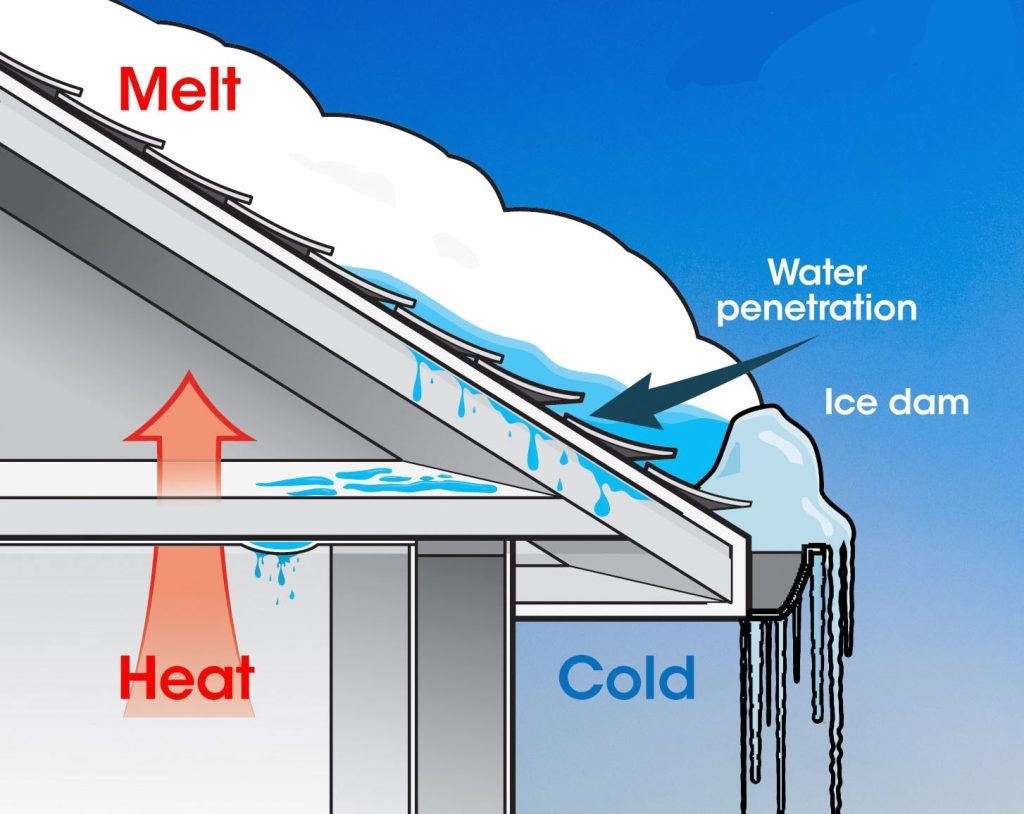
6. Install Ice Dam Prevention Measures
If you’ve had ice dams in past winters, fall is the time to address the root causes. Solutions may include:
– Improving attic insulation and ventilation
– Installing a waterproof underlayment
– Adding heat cables in problem areas
7. Check Chimney and Flashing Seals
Water often sneaks in through deteriorating flashing. Seal any gaps and repair damaged chimney mortar to prevent leaks during freeze–thaw cycles.
FAQ: Preparing Your Roof for Winter in Minnesota
Q: When is the best time to schedule a fall roof inspection?
A: September through early November is ideal. You want to avoid the freezing conditions that can limit certain repair work.
Q: Can I clean my own gutters, or should I hire a pro?
A: If you have a single-story home and feel comfortable on a ladder, you can do it yourself. For multi-story homes or heavy debris buildup, it’s safer to hire a professional.
Q: What’s the #1 cause of winter roof damage in Minnesota?
A: Ice dams are one of the biggest culprits. They form when heat escapes from your attic, melting snow that refreezes at the roof edge. This can back up water under your shingles and cause leaks.
Q: How do I know if my attic insulation is enough?
A: In Minnesota, you generally want 16–20 inches of fiberglass or cellulose insulation (R-49 to R-60). A roofing contractor or energy auditor can measure and confirm.
Your roof is your home’s first line of defense against Minnesota’s harsh winter weather. By tackling this checklist in the fall, you’ll minimize the risk of leaks, ice dams, and costly repairs — keeping your family warm and dry until spring.
Sources:
- U.S. Department of Energy – Recommended Insulation Levels
- Minnesota Department of Commerce – Ice Dam Prevention
- Insurance Institute for Business & Home Safety – Winter Roof Maintenance Tips
Justin Hansen is a seasoned professional in the roofing and siding industry, boasting over 15 years of hands-on experience. Starting his career in residential roofing, Justin quickly established a reputation for meticulous attention to detail and superior craftsmanship. His commitment to quality and excellence propelled him into more complex commercial projects, where he consistently delivered outstanding results.
Ice Dams in Minneapolis: Everything You Need to Know to Protect Your Roof
Call Us Now (651) 352-2679
Ice dams are a common yet hazardous problem for homeowners in Minneapolis and other areas with harsh winter climates. These ridges of ice form along the edges of your roof and can cause serious damage to your home if not addressed properly. In this guide, we’ll explore everything you need to know about ice dams, from their causes to prevention tips, so you can keep your home safe and your roof in excellent condition.
What Are Ice Dams?
Ice dams are barriers of ice that form at the edge of a roof, preventing melting snow from draining off. When the trapped water refreezes, it can damage shingles, gutters, and even your home’s interior.
Here’s how they form:
- Heat from inside the house escapes through the roof, melting the snow.
- The melted snow flows down the roof until it reaches the colder edges, where it refreezes.
- Over time, this creates a dam of ice that traps additional melting snow.
Signs of Ice Dams
Knowing the warning signs of ice dams can save you from costly repairs:
- Large icicles hanging from your roof’s edges.
- Water stains on interior walls or ceilings.
- Leaks or damp patches during the winter months.
If you notice any of these signs, it’s important to take action quickly to mitigate the damage.
Why Are Ice Dams a Problem?
Ice dams can cause a variety of issues, including:
- Roof Damage: The weight of the ice and trapped water can damage shingles and other roofing materials.
- Interior Water Damage: Water trapped by the ice dam can seep into your home, causing stains, peeling paint, or even mold growth.
- Higher Energy Costs: Heat loss through the roof not only contributes to ice dams but also increases heating bills.
Common Causes of Ice Dams
Several factors contribute to the formation of ice dams:
- Inadequate Attic Insulation:
- Warm air escaping into the attic heats the roof.
- Poor Ventilation:
- Without proper airflow, warm and cold spots develop on the roof.
- Snow Accumulation:
- Heavy snowfall provides the raw material for ice dams.
How to Prevent Ice Dams
Taking proactive steps can significantly reduce the likelihood of ice dams:
- Improve Attic Insulation: Ensure your attic has sufficient insulation to keep heat from escaping.
- Enhance Ventilation: Install ridge vents and soffit vents to maintain consistent attic temperatures.
- Clean Gutters: Keep gutters free of debris to allow for proper water drainage.
- Use Roof Rakes: Remove snow from your roof after heavy snowfall to prevent buildup.
DIY vs. Professional Solutions
While some homeowners attempt to tackle ice dams on their own, it’s important to consider the risks:
- DIY Methods:
- Chipping away at ice can damage shingles and lead to accidents.
- Salt-based deicers can corrode roofing materials and harm nearby plants.
- Professional Services:
- Steam-based ice dam removal is safe, effective, and prevents further damage.
Hiring professionals like Right Now Roofing ensures that the problem is addressed correctly and efficiently.
Real-Life Examples
One Minneapolis homeowner noticed water stains on their ceiling after a particularly snowy week. By contacting Right Now Roofing, they not only had the ice dam safely removed but also received tips on improving attic insulation, preventing future problems. Their quick action saved them thousands in potential repair costs.
How Right Now Roofing Can Help
At Right Now Roofing, we specialize in:
- Ice Dam Removal: Using steam to safely eliminate ice dams.
- Roof Inspections: Identifying areas of heat loss and other vulnerabilities.
- Insulation and Ventilation Improvements: Reducing the likelihood of future ice dams.
With years of experience in Minneapolis winters, our team understands the unique challenges local homeowners face.
FAQs
Q: How much does ice dam removal cost? A: The cost varies depending on the size and severity of the ice dam. Contact us for a free quote!
Q: Can ice dams damage my gutters? A: Yes, the weight of the ice can pull gutters away from the roofline and cause lasting damage.
Q: How quickly should I act if I notice an ice dam? A: As soon as possible. Early intervention can prevent extensive damage.
Don’t let ice dams put your home at risk this winter. Schedule a free roof inspection with Right Now Roofing today! Our experts are here to help you protect your home and stay warm all season long. Call us at [phone number] or visit [website link] to book your appointment.
Justin Hansen is a seasoned professional in the roofing and siding industry, boasting over 15 years of hands-on experience. Starting his career in residential roofing, Justin quickly established a reputation for meticulous attention to detail and superior craftsmanship. His commitment to quality and excellence propelled him into more complex commercial projects, where he consistently delivered outstanding results.
Case Study: Roseville, MN Roof Replacement – From Trusses to Custom Rafters
Location: Roseville, MN
Roof Design: Custom Rafter System
Materials Used: 2×10 Rafters, 2×10 Ridge, LVL Hips
Timeline: Completed despite a 6-week delay in truss availability
When a homeowner in Roseville, MN, reached out to Right Now Roofing, they were facing a unique challenge. After a tree fell on thier roof, due to supply chain delays, custom trusses that were needed to fix were unavailable for nearly six weeks. This could have easily delayed the entire project, but at Right Now Roofing, we pride ourselves on our adaptability and problem-solving approach. With some strategic planning and engineering expertise, we turned a potential setback into a unique custom roof solution.
Challenge: Truss Shortage and Project Delays
The initial design called for pre-manufactured trusses to complete the roof framework. However, like many industries, roofing suppliers have faced material shortages, and the trusses were backlogged for weeks. This could have easily thrown off our project timeline, leaving the homeowner to deal with unnecessary delays.
Solution: Custom-Engineered Rafter Design
Rather than waiting on trusses, we partnered with a structural engineer to design an alternative solution that would maintain the structural integrity of the home. The engineer recommended a rafter system, utilizing 2×10 rafters, a 2×10 ridge, and LVL (Laminated Veneer Lumber) hips to ensure strength and durability. This design not only met building codes but also provided a stable, long-lasting foundation for the roof.
Key Benefits of the Custom Rafter Solution:
- Increased Structural Strength: LVL hips and 2×10 rafters create a solid framework capable of withstanding Minnesota’s challenging weather conditions.
- Optimized for Speed: By adapting to readily available materials, we were able to avoid the six-week wait time and keep the project on track.
- Tailored Design: Custom-engineered to fit the unique specifications of the home, enhancing overall resilience and aesthetic appeal.
Project Highlights
In the video below, you’ll see our expert crew installing the custom rafters and ridge system, ensuring every piece fits perfectly. Each element, from the sturdy LVL hips to the carefully placed rafters, showcases our team’s commitment to quality craftsmanship.
Results
The Roseville homeowner now has a roof designed to stand the test of time. Despite initial setbacks, our team’s quick thinking and commitment to quality allowed us to complete the project efficiently, saving the homeowner time and potential headaches.
Final Thoughts
This project in Roseville, MN, is an example of how Right Now Roofing prioritizes client satisfaction and adapts to unforeseen challenges. We believe that every roofing project should be handled with expertise and creativity, no matter the obstacles.
Justin Hansen is a seasoned professional in the roofing and siding industry, boasting over 15 years of hands-on experience. Starting his career in residential roofing, Justin quickly established a reputation for meticulous attention to detail and superior craftsmanship. His commitment to quality and excellence propelled him into more complex commercial projects, where he consistently delivered outstanding results.