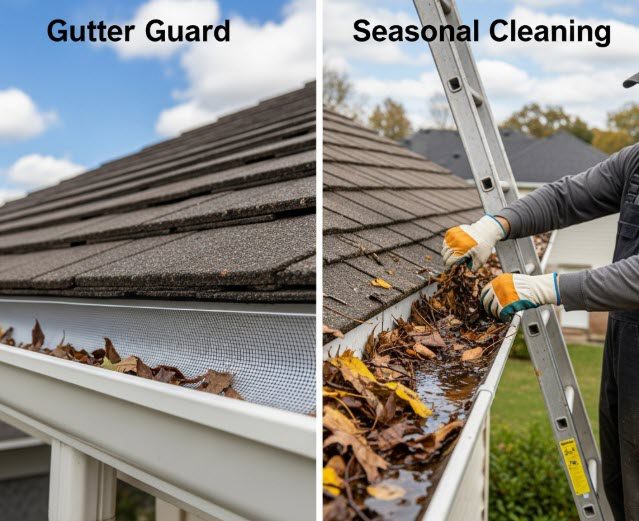
Gutter Guard vs. Seasonal Cleaning: What’s Best for Twin Cities Homes?
In the Twin Cities, our roofs and gutters face year-round challenges — from piles of fall leaves to heavy spring rains and melting winter snow. Keeping your gutters clear isn’t just about appearance; it’s about preventing water damage, protecting your foundation, and avoiding costly repairs. But here’s the big question: should you invest in gutter guards or stick with seasonal gutter cleaning?
Let’s break down the pros, cons, and costs so you can make the best choice for your Minnesota home.
Why Gutters Matter in Minnesota
- Protect Against Water Damage – Gutters keep rain and snowmelt flowing away from your foundation, preventing cracks and basement leaks.
- Stop Ice Dams Before They Form – Clogged gutters trap water, which freezes, leading to damaging ice dams.
- Save on Repairs – Water intrusion repairs can cost thousands. Regular gutter maintenance is a fraction of that.
Option 1: Seasonal Gutter Cleaning
What it is: Clearing leaves, twigs, and debris from your gutters 2–3 times per year, either DIY or by hiring a pro.
Pros:
– Low upfront cost
– Flexible (you only pay when you clean)
– Keeps gutters fully visible for inspection (leaks, pests, loose fasteners)
Cons:
– Needs to be done multiple times per year in Minnesota
– Labor-intensive or recurring service cost
– Ladder work can be dangerous, especially in icy conditions
Option 2: Gutter Guards
What they are: Mesh, screen, or helmet-style covers that block most debris while allowing water to pass through.
Pros:
– Reduces frequency of cleanings (often down to once a year)
– Prevents most leaf and pine needle clogs
– Helps minimize ice dam formation by improving drainage
– Safer since you’re not climbing ladders as often
Cons:
– Higher upfront cost
– Still require occasional rinsing and checks
– Effectiveness varies depending on debris type and roof slope
Minneapolis Area Gutter Guard Providers You Can Trust
If you’re considering installing gutter guards, here are some top local companies we’ve seen homeowners trust:
- Gutter Helmet of Minnesota – Their “Designer Series” system comes with a bold promise: if your gutters ever clog, they’ll clean them for free. Great peace-of-mind for Twin Cities weather.
- LeafFilter (Minneapolis) – Known for high-quality micro-mesh guards and lifetime warranties, designed specifically for local rainfall, foliage, and freeze–thaw cycles.
- Sela Gutter Connection – A well-established, family-run Minneapolis provider offering Leaf-X systems and seamless installation, with decades of trusted service.
- Gutter Filter – Offers a fully enclosed stainless-steel micro-screen, built to last and backed by a strong lifetime guarantee—ideal for homeowners tired of frequent clean-outs.
- Call The Gutter Guys – Local pros with knowledge of multiple guard options (EZ Gutter Guard, Leaf Blaster Pro, etc.), and helpful comparative advice to match your needs and price range.
Cost Comparison: Cleaning vs. Guards
- Seasonal Cleaning in Twin Cities: $150–$300 per visit, 2–3 times a year.
- Gutter Guards Installed: $7–$15 per linear foot installed (average home: $1,500–$3,000).
- Break-Even Point: Guards often pay for themselves in 5–7 years, depending on your home’s tree cover and cleaning frequency.
Which Is Best for Twin Cities Homes?
- Surrounded by Trees? Gutter guards are usually worth it.
- Few Trees or Tight Budget? Seasonal cleaning is perfectly fine.
- Commercial or Multifamily? Gutter guards reduce ongoing maintenance costs.
- Hybrid Approach: Many homeowners install guards but still schedule an annual pro cleaning for peace of mind.
Expert Advice from Right Now Roofing & Restoration
At Right Now Roofing & Restoration, we’ve seen it all: overflowing gutters that ruined siding, hidden ice dams causing attic mold, and clogged drains leading to flooded basements. Our advice? Don’t wait until you see water damage. Proactive gutter care is the best way to protect your biggest investment.
Whether you prefer seasonal cleaning or want to explore gutter guards, our team can help you choose what’s right for your home and budget.
Conclusion
Both gutter guards and seasonal cleaning have clear benefits — the right choice depends on your property and goals. The important thing is doing something before clogged gutters cause damage.
Schedule your free gutter and roof inspection today with Right Now Roofing & Restoration and find out which option is best for your Twin Cities home.
Do gutter guards prevent ice dams?
Not entirely, but by keeping water flowing they reduce the conditions that lead to ice dams. Proper attic insulation and ventilation are still key.
How often should gutters be cleaned in Minnesota?
Typically 2–3 times per year: once in spring, once in late fall, and sometimes mid-summer if you have lots of trees.
Can I install gutter guards myself?
Some types are DIY-friendly, but professional installation ensures better fit, performance, and warranty coverage.
Are gutter guards worth the cost?
If you have heavy tree cover or want a “set it and forget it” solution, they can pay for themselves over time. If you have minimal debris, seasonal cleaning may be more cost-effective.
Maurice Campbell brings over 20 years of extensive experience in the roofing and siding industry to his role as co-owner of Right Now Roofing. Maurice began his career in roofing installation, where his technical skills and problem-solving abilities set him apart. His career progressed into project management, where he successfully managed complex roofing and siding projects, ensuring they were completed on time and within budget.
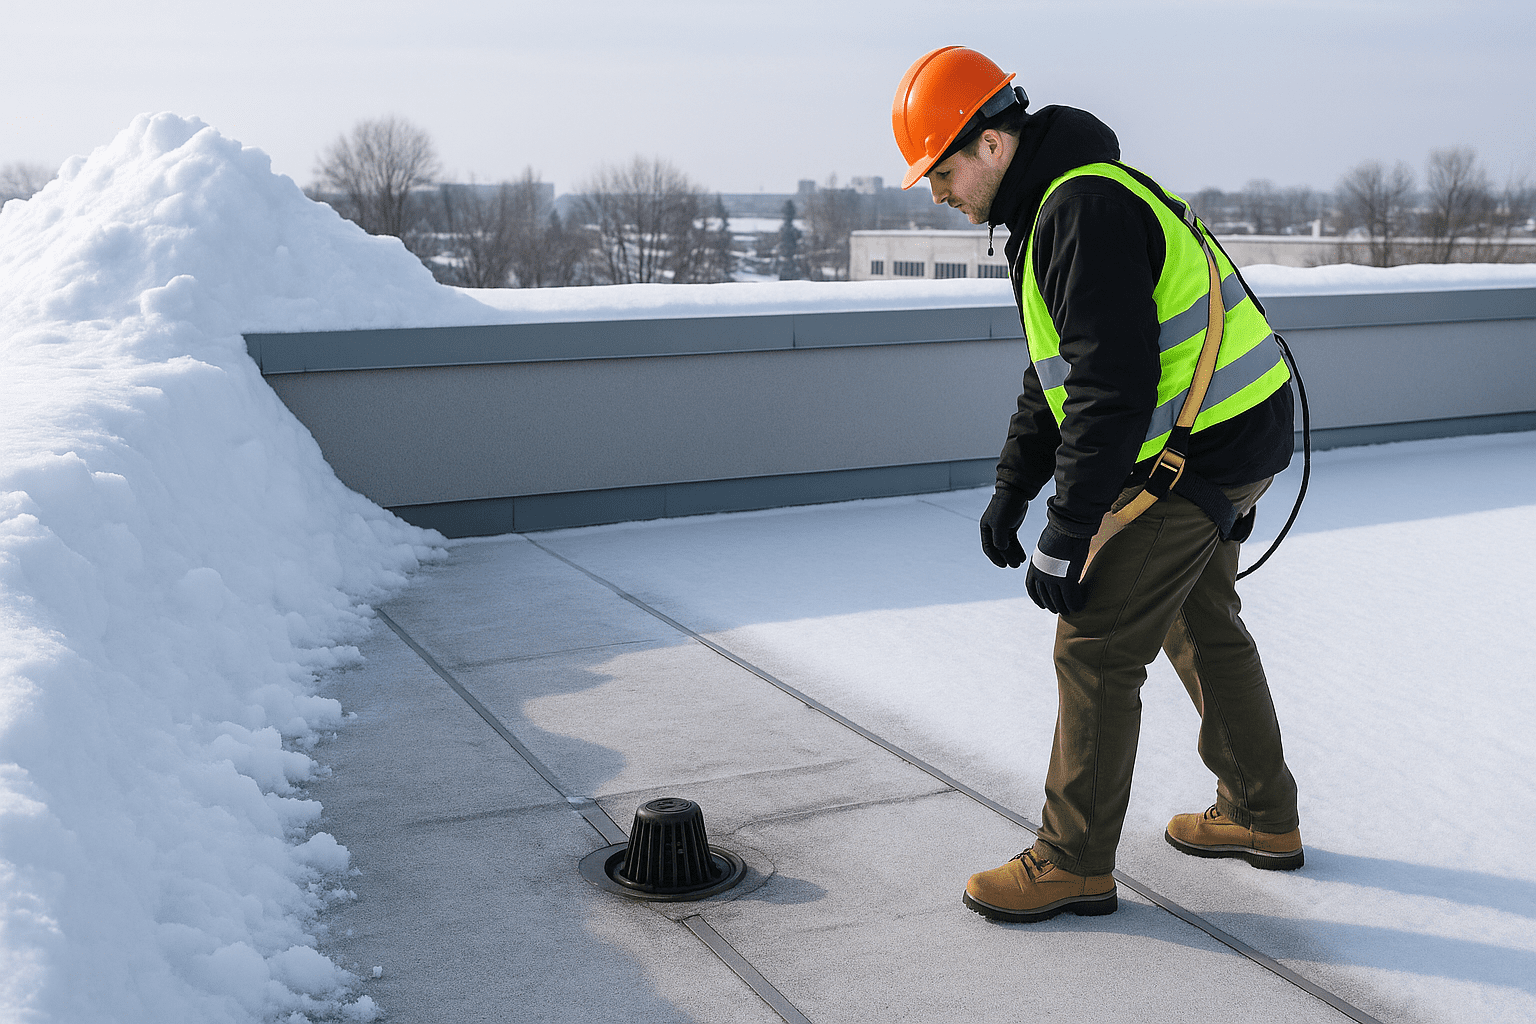
Winter Roof Maintenance Tips for Minneapolis Homeowners
Winter in Minneapolis, MN, brings its fair share of challenges, especially when it comes to your roof. Heavy snowfall, freezing temperatures, and ice accumulation can take a toll, making proper maintenance essential to avoid costly repairs. In this post, we’ll cover practical winter roof maintenance tips to protect your home during the cold months.
Why Winter Roof Maintenance is Crucial
- Prevention of Ice Dams: Ice dams can cause water to seep under shingles, leading to leaks and water damage inside your home.
- Prolonged Roof Life: Routine care reduces wear and tear, extending the lifespan of your roof.
- Energy Efficiency: A well-maintained roof improves insulation, reducing heating costs.
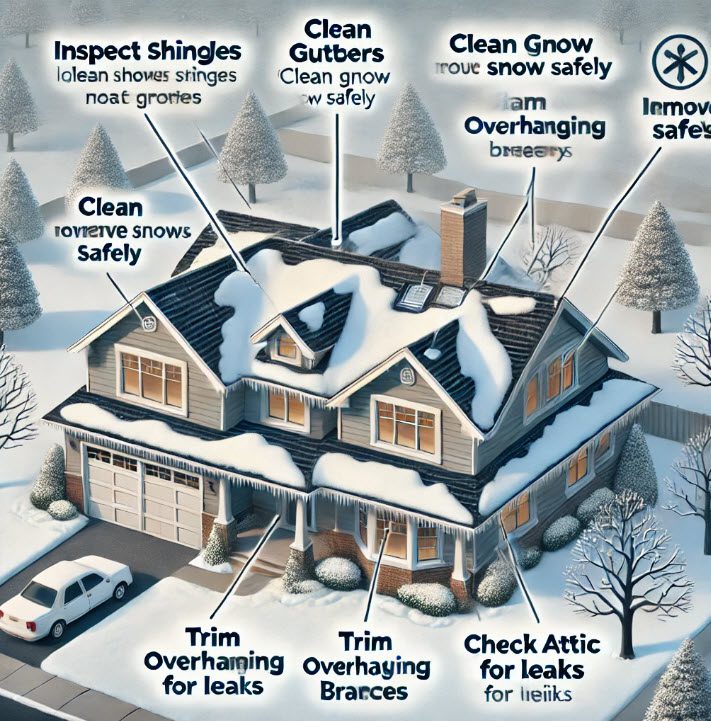
Essential Winter Roof Maintenance Tips
1. Inspect Your Roof Before the Snow Hits
Schedule a professional roof inspection in late fall to identify and address potential issues such as missing shingles, cracks, or weak spots.
2. Clean Gutters and Downspouts
Clogged gutters lead to water pooling and freezing, increasing the risk of ice dams. Clear leaves and debris regularly to maintain proper drainage.
3. Remove Snow Safely
Heavy snow can strain your roof structure. Use a roof rake to gently remove excess snow, starting from the edge and working upward. Avoid climbing onto your roof, as it can be slippery and dangerous.
4. Address Ice Dams
Consider installing heat cables along the roof’s edge to prevent ice dams. Additionally, ensure your attic is properly insulated and ventilated to regulate temperature and minimize ice buildup.
5. Trim Overhanging Branches
Snow-laden branches can break and damage your roof. Trim any trees close to your home to reduce the risk.
6. Check for Leaks Inside Your Home
Inspect your attic and ceilings for signs of water damage or leaks. Early detection can save you from more significant issues later on.
7. Schedule Routine Maintenance
Partner with a professional roofing company, like Right Now Roofing, to handle regular maintenance and repairs during the winter months.
Real-Life Example: Preventing Ice Dam Damage
One of our Minneapolis clients faced severe interior damage last winter due to ice dams. By adding attic insulation and installing heat cables, they avoided further issues this year. Their proactive approach saved them thousands of dollars in repair costs.
Winter Roof Maintenance FAQs
Q: How much snow is too much for my roof?
A: If snow accumulation exceeds 12 inches, it’s a good idea to remove it. Wet, heavy snow is particularly risky.
Q: How can I tell if I have an ice dam?
A: Look for icicles along your roof’s edge and water stains inside your home near exterior walls.
Q: Can I clear snow off my roof myself?
A: It’s best to use a roof rake or hire a professional. Climbing onto a snowy roof is unsafe.
Quick Tips Recap:
- Inspect your roof and clean gutters in the fall.
- Use a roof rake to remove excess snow.
- Ensure your attic is properly insulated.
- Trim overhanging branches.
- Address leaks promptly.
By following these winter roof maintenance tips, you can keep your Minneapolis home safe and sound all winter long. If you need expert help, Right Now Roofing is here to assist. Contact us today to schedule your winter maintenance service!
Maurice Campbell brings over 20 years of extensive experience in the roofing and siding industry to his role as co-owner of Right Now Roofing. Maurice began his career in roofing installation, where his technical skills and problem-solving abilities set him apart. His career progressed into project management, where he successfully managed complex roofing and siding projects, ensuring they were completed on time and within budget.
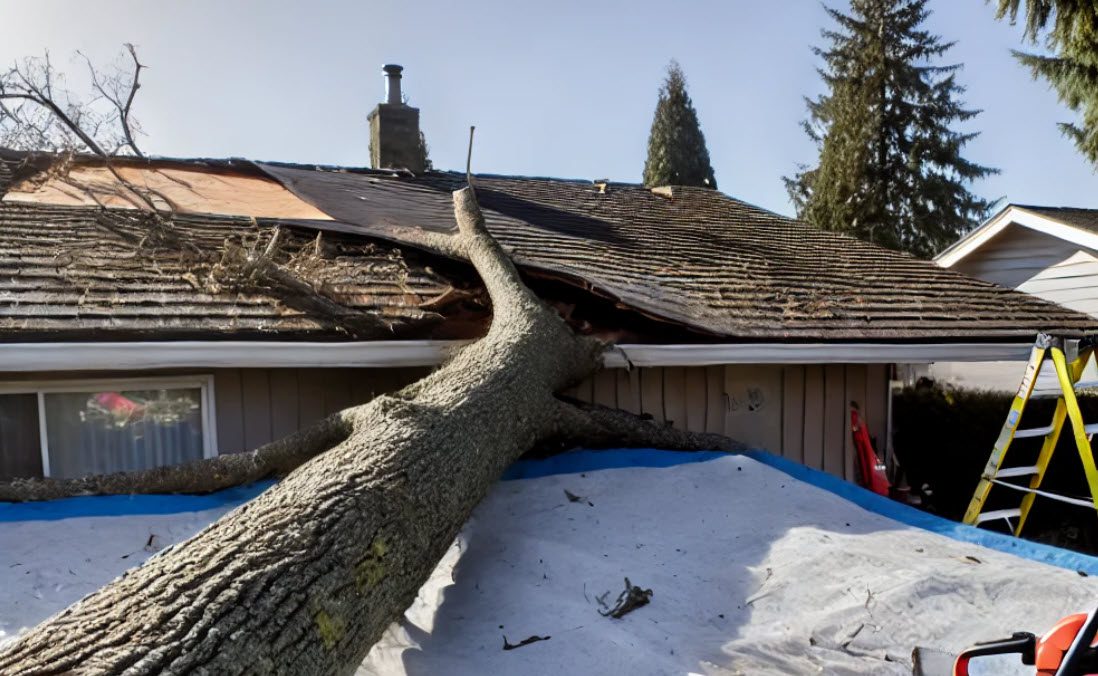
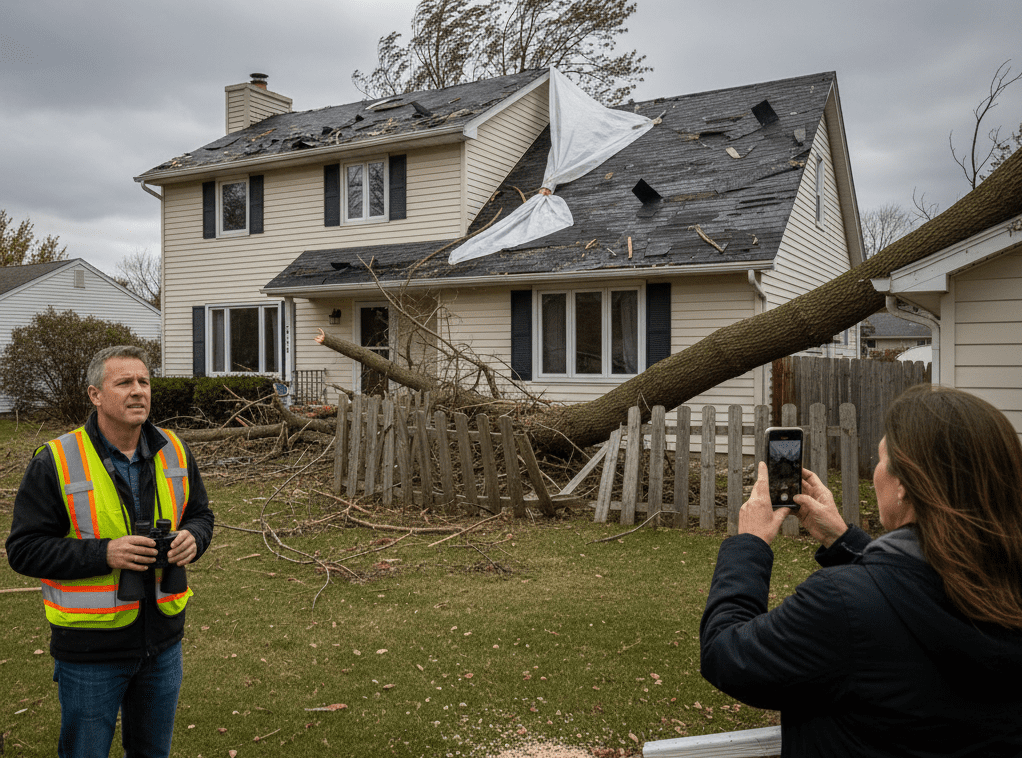
A Tree Just Fell On My Roof: What Are My Next Steps?
There’s nothing quite as unsettling as a tree crashing onto your roof. Whether it’s from one of our many Minnesota wind, rain, hail or snow storms or an unexpected fall, it can leave you feeling overwhelmed and unsure of what to do next. Having helped homeowners through similar situations, I wanted to provide a clear guide on the steps you should take immediately after a tree falls on your roof. Here’s what you need to know:
Step 1: Ensure Safety First
Before anything else, ensure everyone inside your home is safe. If the tree has caused structural damage, there’s a risk of further collapse, so evacuate the house if necessary. Do not attempt to inspect the damage yourself right away, especially if power lines are involved or the tree is large enough to affect multiple areas of your home.
Step 2: Contact Emergency Services (If Necessary)
If the tree has brought down power lines, there is immediate structural danger, or someone is injured, call 911. Electrical hazards and structural instability can be deadly, so always prioritize safety.
Step 3: Document the Damage!
Before any repairs begin, document the damage by taking photos and videos of the tree, the roof, and any additional parts of the house that may have been affected. This documentation will be essential when dealing with your insurance company.
Step 4: Contact a Trusted Roofing Company FIRST, Then Your Insurance Company
In our opinion, this is where many people go wrong. First you should contact a trusted roofing company before contacting the insurance company. Why? Because the roofing company will become your educated buffer to make sure that you get everything covered financially that you need to remove the tree and to fix the damage. Then, contact the insurance company to report the incident. Be prepared to provide them with the documentation and knowledge youve gained & gathered from the roofing company and follow their process for filing a claim. They will likely send an adjuster to assess the damage.
Step 5: Prevent Further Damage
If it’s safe, you’ll want to take immediate steps to prevent further damage. This might include covering the damaged area of your roof with a tarp to avoid water damage, especially if rain is expected. Most roofing companies, including ours at Right Now Roofing, can assist with temporary repairs while you wait for the insurance adjuster.
Step 6: Hire a Professional Roofing Company
Once you’ve spoken with your insurance company, it’s time to hire a professional roofing company to assess and repair the damage. At Right Now Roofing, we’ve handled countless cases like this, and we’ll work with your insurance adjuster to make sure the repairs are covered and done right. Our goal is to restore your roof and your peace of mind as quickly as possible.
Comparison Chart: Tree Damage vs. Other Common Roof Emergencies
| Type of Emergency | Immediate Action Required | Potential Roof Damage | Repair Time | Insurance Coverage |
|---|---|---|---|---|
| Tree Falling on Roof | Evacuate if unsafe, call a roofer | Structural, punctures, leaks | 1-3 weeks | Often covered |
| Hail Damage | Inspect, document, call roofer | Dents, cracks, missing shingles | 1-2 weeks | Covered if severe |
| Wind Damage | Check for loose shingles/debris | Missing shingles, leaks | 1-2 weeks | Often covered |
| Water Leaks | Prevent further water entry | Water damage to attic/ceiling | 1-2 weeks | Covered if sudden |
FAQs
1. Will my insurance cover tree damage to my roof?
Most homeowners’ insurance policies cover damage from fallen trees if the tree fell due to a covered peril (e.g., storm, wind). However, damage caused by lack of maintenance or negligence might not be covered.
2. How long will it take to repair my roof?
Repair times vary depending on the extent of the damage and the availability of materials, but typically it takes between 1 to 3 weeks for full roof restoration.
3. Do I need to remove the tree myself?
No, it’s essential to hire professionals to safely remove the tree. Trying to remove it yourself could cause more damage to your home or even personal injury.
4. Can you help with the insurance claim process?
Yes, at Right Now Roofing, we work closely with your insurance adjuster to make sure the claims process is smooth and that all necessary repairs are covered.
Maurice Campbell brings over 20 years of extensive experience in the roofing and siding industry to his role as co-owner of Right Now Roofing. Maurice began his career in roofing installation, where his technical skills and problem-solving abilities set him apart. His career progressed into project management, where he successfully managed complex roofing and siding projects, ensuring they were completed on time and within budget.
Do I Need to Pull a Permit to Replace my Roof in Minnapolis / St. Paul?
Replacing a roof is a significant home improvement project that often requires a building permit. Whether you need a permit or not can depend on the municipality where your property is located. In the Twin Cities metro area, the requirements for roofing permits vary across different cities and towns. This post will guide you through the process and help you understand where permits are required and where they are not.
Understanding Roofing Permits
A roofing permit ensures that the work complies with local building codes and safety standards. Permits are generally required for complete roof replacements and major repairs, but not always for minor repairs. Failing to obtain the necessary permit can result in fines, work stoppages, and potential issues with insurance claims.
Permit Requirements by Municipality
Below is a chart outlining the roofing permit requirements for various municipalities in the Twin Cities metro area. This information is based on the latest data from local government websites and building departments. Always verify with your local building department before starting your roofing project.
| Municipality | Permit Required | Notes |
|---|---|---|
| Minneapolis | Yes | Required for all roofing projects. |
| Saint Paul | Yes | Required for all roofing projects. |
| Bloomington | Yes | Required for roof replacements and major repairs. |
| Burnsville | Yes | Required for roof replacements. Minor repairs do not require a permit. |
| Eagan | Yes | Required for all roofing projects. |
| Eden Prairie | Yes | Required for roof replacements. |
| Edina | Yes | Required for all roofing projects. |
| Maple Grove | Yes | Required for roof replacements and significant repairs. |
| Plymouth | Yes | Required for all roofing projects. |
| Woodbury | Yes | Required for roof replacements and major repairs. |
| Apple Valley | Yes | Required for all roofing projects. |
| Blaine | Yes | Required for roof replacements. |
| Coon Rapids | Yes | Required for all roofing projects. |
| Lakeville | Yes | Required for roof replacements. |
| Minnetonka | Yes | Required for all roofing projects. |
| Savage | Yes | Required for roof replacements and significant repairs. |
| Shakopee | Yes | Required for roof replacements. |
| Inver Grove Heights | Yes | Required for all roofing projects. |
| Roseville | Yes | Required for roof replacements and major repairs. |
| Richfield | Yes | Required for all roofing projects. |
| Golden Valley | Yes | Required for roof replacements. |
| Hopkins | Yes | Required for all roofing projects. |
| Anoka | Yes | Required for roof replacements. |
| Brooklyn Center | Yes | Required for all roofing projects. |
| Brooklyn Park | Yes | Required for roof replacements. |
| Chanhassen | Yes | Required for all roofing projects. |
| Chaska | Yes | Required for roof replacements and significant repairs. |
| Fridley | Yes | Required for all roofing projects. |
| Maplewood | Yes | Required for roof replacements and major repairs. |
| New Brighton | Yes | Required for all roofing projects. |
| Oakdale | Yes | Required for roof replacements. |
| Ramsey | Yes | Required for all roofing projects. |
| Rosemount | Yes | Required for roof replacements. |
| St. Louis Park | Yes | Required for all roofing projects. |
| Stillwater | Yes | Required for roof replacements and significant repairs. |
| White Bear Lake | Yes | Required for all roofing projects. |
Steps to Obtain a Roofing Permit
- Contact Your Local Building Department: Start by reaching out to your local municipality’s building department. They can provide specific details on permit requirements and the application process.
- Complete the Application: Fill out the roofing permit application form, which may be available online or at the building department’s office. Be prepared to provide details about your roofing project, such as the scope of work, materials to be used, and contractor information.
- Submit Plans and Fees: Submit any required plans or documentation along with the permit application fee. Fees vary by municipality.
- Wait for Approval: The building department will review your application. This process can take anywhere from a few days to a couple of weeks, depending on the complexity of the project and the department’s workload.
- Schedule Inspections: Once your permit is approved, you will need to schedule inspections at various stages of the project. Inspections ensure that the work is being done according to code and the approved plans.
- Complete the Project: After passing the final inspection, your project will be officially complete, and you can enjoy your new roof with peace of mind.
Conclusion
Navigating the permit requirements for roofing projects in the Twin Cities metro area can be complex, but it is essential to ensure compliance with local regulations. This guide provides a general overview, but always check with your local building department for the most accurate and up-to-date information.
For more information, you can visit the following sources:
By following the guidelines provided, you can ensure your roofing project is compliant and completed without any legal or safety issues.
See if youre in our service area here.
Helpful Permit Links:
Maurice Campbell brings over 20 years of extensive experience in the roofing and siding industry to his role as co-owner of Right Now Roofing. Maurice began his career in roofing installation, where his technical skills and problem-solving abilities set him apart. His career progressed into project management, where he successfully managed complex roofing and siding projects, ensuring they were completed on time and within budget.
The Ultimate Guide to Dealing with Emergency Roof Repair
Hey there, I’m Maurice, one of the owners at Right Now Roofing. Today, I’m here to guide you through one of the most stressful situations a homeowner can face: an emergency roof repair. Picture this: It’s the middle of the night, and you find yourself staring at a leaking ceiling. Panic sets in. But fear not! With a little know-how and a calm approach, you can navigate this situation like a pro. Let’s dive in and ensure you’re well-prepared for any roofing emergency.
What Qualifies as a Roof Repair Emergency?
So, what exactly makes a roofing situation an emergency? Well, if your home’s interior or attic is exposed to the elements due to roof damage, that’s a clear sign. For example, if you can see daylight through your roof where you shouldn’t or water is pouring in, it’s time to act fast. Immediate attention is required if there’s structural damage that could worsen quickly.
Let me give you a scenario: Imagine a small trickle of water pouring directly onto your fuse box. Even a tiny amount of water can be a major hazard in this case, so don’t wait—call a roofer immediately. But if it’s just a minor drip in the living room, it might not be as urgent, though it still needs attention soon.
Types of Emergency Roof Leaks and Damage
Different types of damage can lead to emergency repairs. Here are some common scenarios:
- Pests and Animals: Believe it or not, those cute little squirrels can cause big problems. If they’ve chewed through your roof and a storm is coming, it’s an emergency. However, if it’s just a minor issue, you can wait until regular business hours.
- Neglect: Roofs that haven’t been maintained can develop serious leaks. Regular check-ups can prevent these emergencies.
- Fire Damage: If your roof has been exposed to flames, it’s likely compromised and needs immediate attention.
- Tree Damage: A fallen tree can be devastating. Even if it looks minor, always have it checked out.
- High Winds and Lightning Strikes: These can cause significant damage, leaving your home vulnerable.
- Other Weather Events: Hurricanes, tornadoes, and major storms can wreak havoc on your roof. Always inspect your roof after such events.
- Structural Collapse: Severe water damage or too much snow can lead to collapse risks. This is definitely an emergency.
- Ice Dams: These can cause leaks that may quickly become a big problem.
- Mold: Extreme mold growth due to poor ventilation can be an emergency. Improving ventilation is key here.
- Clogged Gutters: Severe clogs can cause leaks. Regular cleaning helps prevent this.
Non-Emergency Roof Damage
Not all roof issues are emergencies. Here’s a list of situations that can usually wait:
- Minor leaks or gaps in flashing.
- Hail damage.
- A few missing or broken shingles.
- Limited condensation in the attic.
- Small skylight leaks.
- Moss or algae growth.
Even though these aren’t immediate emergencies, they shouldn’t be ignored. Schedule a professional repair to prevent them from becoming bigger problems.
Helpful Table for Emergency Situations
| Situation | Emergency | Non-Emergency | Immediate Actions |
|---|---|---|---|
| Exposure to Elements | Yes | No | Call a roofer, use tarps to cover exposed areas |
| Structural Damage | Yes | No | Evacuate if necessary, call a roofer |
| High Risk of Major Damage | Yes | No | Call a roofer immediately, avoid using DIY fixes |
| Pests and Animals | Yes (severe) | No (minor) | Call a roofer if severe, address minor infestations during business hours |
| Neglect | Yes (serious leaks) | No (minor leaks) | Schedule a professional inspection |
| Fire Damage | Yes | No | Call a roofer, document damage for insurance |
| Tree Damage | Yes | No | Call a roofer, avoid the area if there are downed power lines |
| High Winds | Yes | No | Call a roofer, use temporary patches if safe |
| Lightning Strikes | Yes | No | Call a roofer, document damage |
| Other Weather Events | Yes | No | Call a roofer, use temporary measures to limit damage |
| Structural Collapse | Yes | No | Evacuate, call a roofer |
| Ice Dams | Yes (major) | No (minor) | Call a roofer, use de-icing measures |
| Mold | Yes (extreme) | No (minor) | Call a roofer, improve ventilation |
| Seriously Clogged Gutters | Yes (severe leak) | No (minor) | Clear gutters if safe, call a roofer if severe |
| Minor Leaks or Gaps | No | Yes | Schedule a professional repair |
| Hail Damage | No | Yes | Schedule a professional inspection |
| Missing or Broken Shingles | No | Yes | Schedule a professional repair |
| Limited Condensation in Attic | No | Yes | Improve ventilation, schedule inspection |
| Small Skylight Leaks | No | Yes | Schedule a professional repair |
| Moss or Algae Growth | No | Yes | Schedule a cleaning and inspection |
What To Do in an Emergency Roof Repair Situation
Finding yourself in an emergency roof situation can be overwhelming, but here’s a step-by-step guide to help you through it:
- Assess Danger: First and foremost, make sure everyone is safe. If the damage is severe and poses a risk of collapse, evacuate your home. Safety first, always.
- Do Not Attempt Repairs: I know it’s tempting to fix things yourself, but DIY repairs can be dangerous and might void your insurance. Leave it to the professionals.
- Call the Professionals: Many roofers, including us at Right Now Roofing, offer 24/7 emergency services. We’re just a call away, ready to help you out at any hour.
- Limit Damage Inside: While waiting for us to arrive, use buckets to catch water, run dehumidifiers, and move valuables to safer locations.
- Speak with Insurance: Document the damage with photos and inform your insurance agent. This helps smooth out the claims process.
What Will Roofers Do in an Emergency?
When you call us, here’s what you can expect:
- Assess the Damage: We’ll thoroughly inspect your roof to identify the damage and determine the best course of action.
- Add a Temporary Patch: To prevent further damage, we’ll place a tarp or temporary patch over the affected areas. This buys us time to plan and schedule the necessary repairs.
- Provide a Quote: You’ll receive a detailed estimate for the repairs needed. If you’re filing an insurance claim, we’ll provide photos and any other documentation required.
- Schedule Repairs: We’ll work with you to schedule the repairs as soon as possible. After major storms, we prioritize homes with the most severe damage.
Financing Your Roof in Emergencies
Emergency repairs can be costly, but don’t worry—there are financing options available:
- Personal Lines of Credit: These can provide immediate funds.
- Emergency Roof Repair Grants: Look into available grants. See the Dept of Agriculture link here.
- Roofer Financing: Many roofers offer financing through third parties. We can discuss these options to find the best fit for you.
Ways to Avoid Emergency Repairs
Preventative maintenance is your best defense:
- Regular Inspections: Have professionals inspect your roof annually to catch potential issues early.
- Gutter Cleaning: Keep your gutters clear to prevent water backflow.
- Familiarize Yourself with Your Roof: Knowing how your roof should look can help you spot issues early.
Conclusion
Dealing with emergency roof repairs can be daunting, but with the right knowledge and approach, you can manage it effectively. Remember, we’re here to help at Right Now Roofing. Stay safe, stay calm, and let’s keep that roof over your head in tip-top shape!
Maurice Campbell brings over 20 years of extensive experience in the roofing and siding industry to his role as co-owner of Right Now Roofing. Maurice began his career in roofing installation, where his technical skills and problem-solving abilities set him apart. His career progressed into project management, where he successfully managed complex roofing and siding projects, ensuring they were completed on time and within budget.

The Ultimate Guide to Cleaning Up Fireworks from Your Roof After the Fourth of July
The Fourth of July is a time for celebration, and fireworks are an integral part of the festivities. However, once the excitement dies down, homeowners may find themselves with a new concern: cleaning up the remnants of fireworks from their roofs. Firework debris can be hazardous, potentially causing damage or posing fire risks if not properly managed. In this guide, we will cover essential steps and best practices for safely cleaning your roof after a fireworks celebration.
Why Clean Your Roof After Fireworks?
Fireworks can leave behind various types of debris, including paper, plastic, and metal fragments. These remnants can clog gutters, damage roofing materials, and even start fires if they are not removed promptly. Cleaning your roof ensures that your home remains safe and maintains its structural integrity.
Safety First: Precautions Before Cleaning
- Wait for Daylight: Ensure that you perform the cleanup during the daytime for better visibility.
- Wear Protective Gear: Use gloves, safety goggles, and non-slip shoes to protect yourself from sharp debris and slips.
- Check Weather Conditions: Avoid cleaning on windy or rainy days to prevent accidents.
- Use Proper Equipment: Have a sturdy ladder, a roof rake, a broom, and a leaf blower handy.
Step-by-Step Cleanup Guide
1. Inspection
Start by inspecting your roof from the ground using binoculars. Look for visible debris, scorch marks, or any signs of damage. This initial inspection will help you plan your cleanup process more effectively.
2. Clear Loose Debris
Using a roof rake or a soft-bristled broom, gently sweep away loose debris. Start from the highest point of your roof and work your way down to avoid pushing debris into your gutters.
3. Check and Clean Gutters
Fireworks debris can easily clog gutters, leading to water damage. Clean your gutters thoroughly to ensure they are free of obstructions. Use a gutter scoop or a small trowel to remove larger pieces of debris, followed by flushing the gutters with water to clear smaller particles.
4. Inspect for Damage
Carefully examine your roof for any signs of damage caused by fireworks, such as:
- Burn Marks: Check for scorch marks or burn holes in the roofing material.
- Shingle Damage: Look for cracked, missing, or curled shingles.
- Structural Damage: Ensure that there are no visible signs of structural damage to the roof or support beams.
If you find any damage, it may be necessary to call a professional roofing contractor for repairs.
5. Remove Stubborn Debris
For debris that is stuck or difficult to remove, use a leaf blower to dislodge it gently. Be cautious not to use high-pressure settings that could damage roofing materials.
6. Fire Hazard Check
Fireworks remnants can be a fire hazard, especially if they are still smoldering. Check all debris for any signs of heat or smoke. Use a fire extinguisher or water to douse any potentially hazardous materials.
7. Final Inspection
After removing all visible debris, perform a final inspection to ensure nothing has been missed. Pay special attention to hidden areas, such as valleys and roof vents.
8. Maintenance Tips
Regular roof maintenance can help prevent future issues. Consider the following tips:
- Trim Overhanging Branches: This reduces the risk of debris accumulation and potential fire hazards.
- Install Gutter Guards: Gutter guards can help keep debris out and make future cleanups easier.
- Schedule Regular Inspections: Have a professional inspect your roof annually to identify and address any potential issues early.
Conclusion
Cleaning up after a fireworks celebration is crucial for maintaining the safety and longevity of your roof. By following these steps, you can ensure that your home remains protected from potential damage and hazards. If you are ever unsure about performing roof maintenance yourself, do not hesitate to contact a professional roofing contractor for assistance.
Sources:
Maurice Campbell brings over 20 years of extensive experience in the roofing and siding industry to his role as co-owner of Right Now Roofing. Maurice began his career in roofing installation, where his technical skills and problem-solving abilities set him apart. His career progressed into project management, where he successfully managed complex roofing and siding projects, ensuring they were completed on time and within budget.