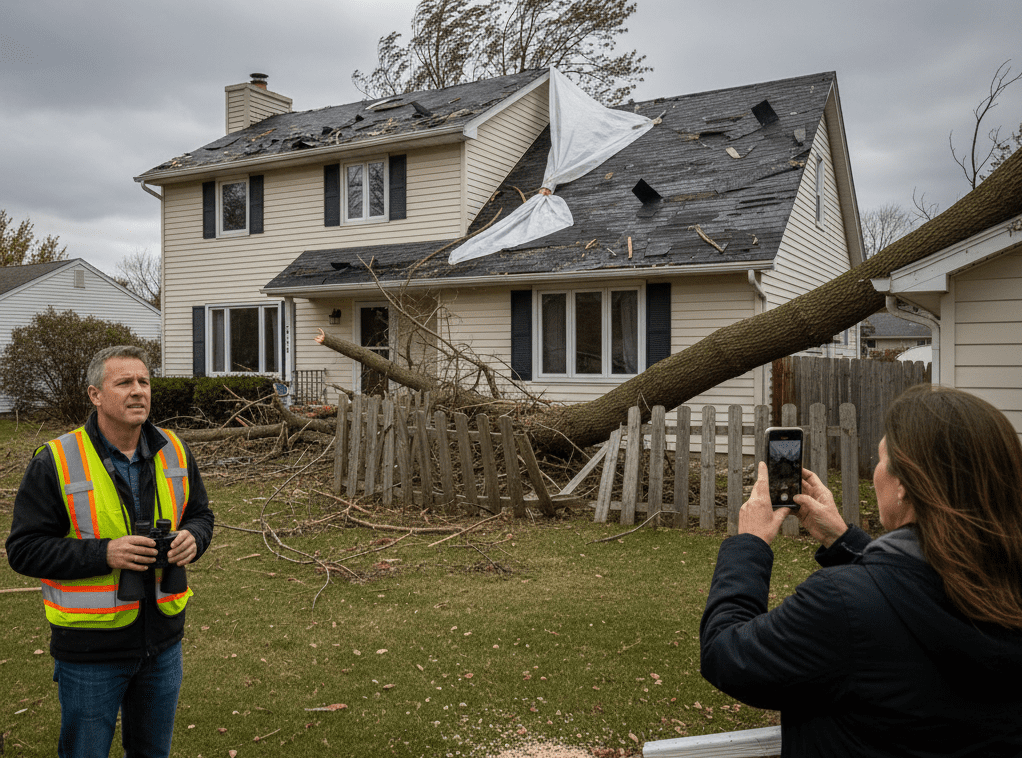
Commercial Roof Prep: How Property Managers Should Winterize Flat Roofs
When Minnesota winters roll in, flat roofs face some of the harshest conditions imaginable. Heavy snow, ice dams, fluctuating temperatures, and pounding winds put enormous stress on commercial roofing systems. For property managers, these seasonal challenges can mean the difference between a building that weathers the winter without issue—or one riddled with leaks, costly emergency repairs, and frustrated tenants.
The good news? With proactive preparation, you can prevent most winter roofing issues before they ever occur. Winterizing a flat roof isn’t just about shoveling snow—it’s a comprehensive strategy that includes inspection, maintenance, drainage improvements, and emergency readiness. In this post, we’ll walk through everything property managers should do to protect their flat roofs this winter.
Why Winterizing Flat Roofs Matters
Flat roofs are widely used in commercial buildings because they are affordable, practical, and provide space for HVAC units and other equipment. But winter introduces unique threats:
– Snow Load Stress: Accumulating snow can weigh thousands of pounds, risking structural damage.
– Freeze-Thaw Cycles: Melting and refreezing water creates cracks in membranes and expands small flaws.
– Ice Dams: Heat escaping from inside the building melts snow, which refreezes near edges, trapping water on the roof.
– Drainage Issues: Blocked drains lead to ponding water, which quickly freezes and worsens membrane damage.
Failing to prepare means facing higher repair costs, tenant complaints, and business disruptions. Proactive winterization protects not just the building—but also your investment, reputation, and bottom line.
Step 1: Conduct a Pre-Winter Roof Inspection
The first and most important step is a thorough inspection by a professional roofer. Even minor issues can become major problems once snow and ice arrive.
A pre-winter inspection should cover:
– Roof Membrane: Look for cracks, blisters, punctures, or loose seams.
– Flashing & Seals: Ensure flashing around penetrations (vents, HVAC, skylights) is tight and sealed.
– Drains & Gutters: Confirm they’re clear and undamaged.
– Roof Edges: Inspect for gaps where wind and moisture could infiltrate.
Pro Tip: Document your inspection with photos and written notes. Not only will this help prioritize repairs, but it also strengthens insurance claims if damage occurs later.
Step 2: Clean and Clear Debris
Leaves, branches, dirt, and trash may seem harmless, but they can clog drains and create ponding water that freezes into ice sheets. Clearing debris ensures water flows properly off the roof.
– Remove all organic material from the surface.
– Check downspouts and scuppers for clogs.
– Trim nearby tree branches to minimize ongoing debris buildup.
This step is quick and inexpensive but pays huge dividends by preventing water blockages during storms.
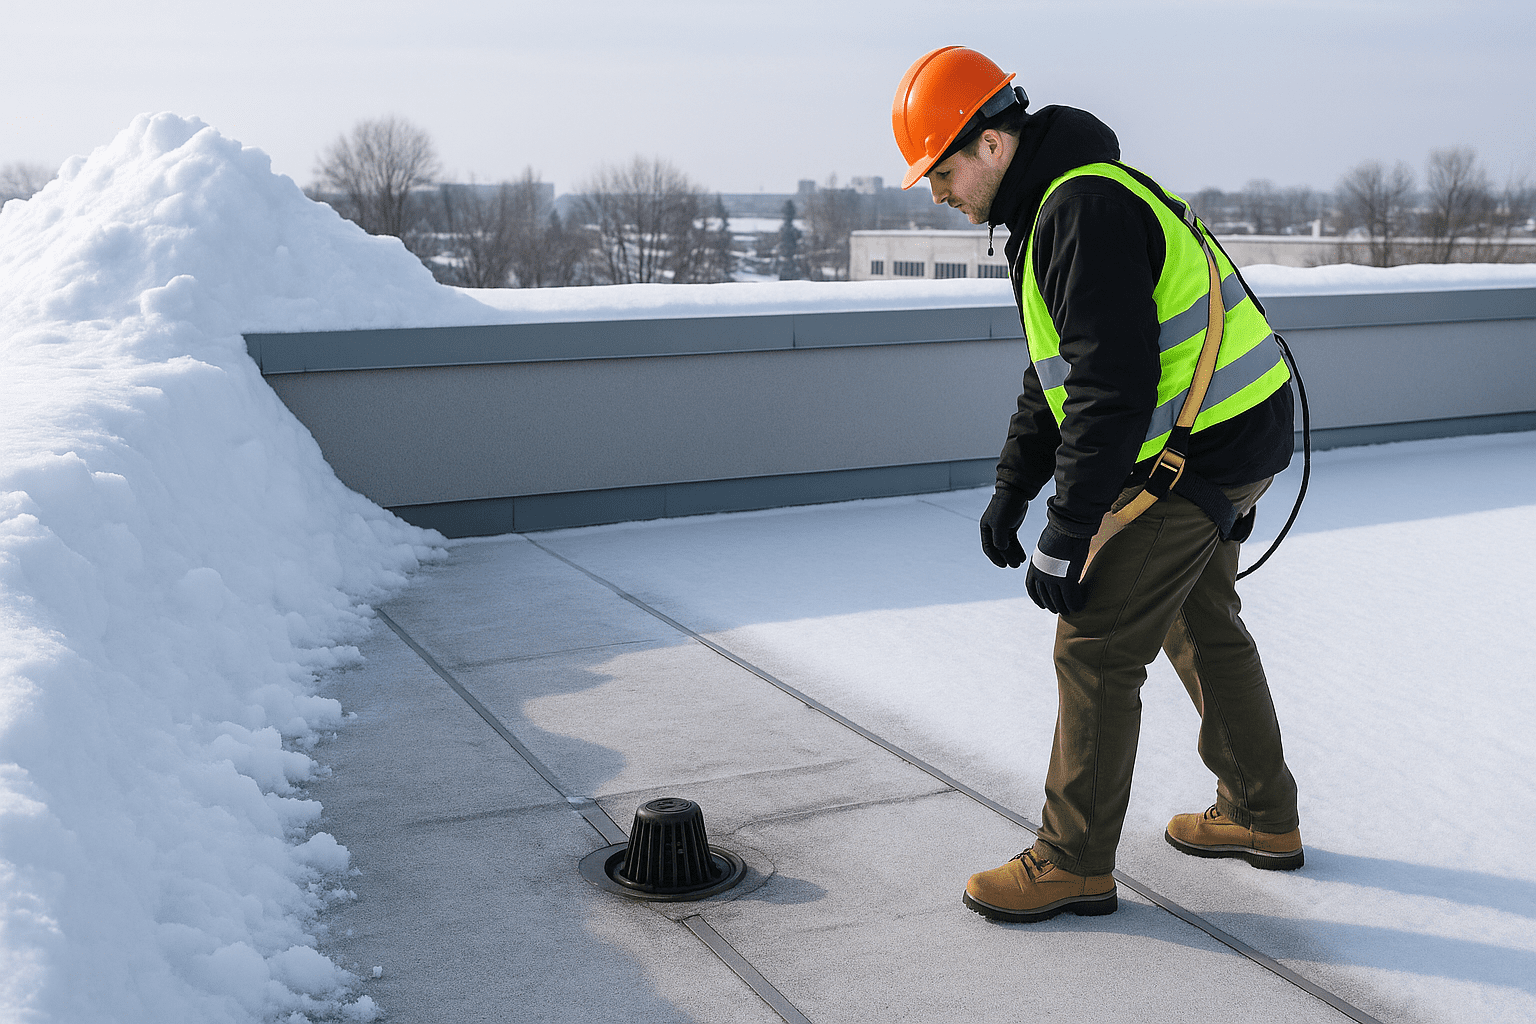
Step 3: Improve Drainage Systems
Flat roofs live and die by their drainage systems. If water can’t escape, it will pool, freeze, and cause leaks.
Drainage preparation includes:
– Inspecting internal drains, scuppers, and gutters for cracks, corrosion, or misalignment.
– Installing heating cables in gutters or downspouts to prevent ice blockages.
– Confirming slope is adequate for water runoff.
Pro Tip: If you’ve had ponding issues in past winters, consider installing tapered insulation systems to improve slope and reduce standing water.
Step 4: Check Insulation and Energy Efficiency
Winterization isn’t just about stopping leaks—it’s also about controlling heat flow. Poor insulation leads to heat loss, which increases energy bills and contributes to ice dam formation.
– Inspect roof insulation for damage or wet spots.
– Seal gaps around HVAC units and roof penetrations.
– Ensure roof hatches and skylights are airtight.
Improved insulation keeps warm air inside, snow frozen in place, and energy costs manageable.
Step 5: Plan for Snow and Ice Management
Minnesota winters guarantee snow—often a lot of it. That means property managers need a safe snow removal plan.
– Hire Professionals: Snow removal on flat roofs should never be done by untrained staff. Using shovels, salt, or heavy equipment improperly can damage membranes.
– Use Roof-Friendly Tools: Professionals use plastic shovels or snow blowers with non-abrasive blades.
– Know Your Load Limits: Every roof has a weight capacity. Partner with your roofer to monitor snow loads and schedule removal before weight exceeds safe limits.
Pro Tip: Create a written snow management agreement in advance with your roofing contractor. This ensures fast response when heavy storms hit.
Step 6: Emergency Preparedness
Even with the best planning, emergencies happen. Having a clear plan reduces downtime and protects tenants.
– Have a Roofer on Call: Establish a relationship with a local contractor before winter starts.
– Stock Emergency Supplies: Keep tarps, buckets, and wet/dry vacuums on hand.
– Tenant Communication: Have a notification process in place to update tenants if leaks occur.
– Insurance Documentation: Keep records of inspections, maintenance, and repairs to support claims.
Step 7: Partnering with a Professional Roofing Company
For property managers, one of the smartest decisions is to form a maintenance partnership with a trusted roofing company.
Benefits include:
– Scheduled inspections before and after winter.
– Priority emergency response during storms.
– Peace of mind knowing experts familiar with your building are on standby.
Right Now Roofing & Restoration specializes in flat roof systems built to withstand Minnesota’s toughest winters. Partnering with us means fewer surprises, lower repair costs, and confidence that your property is protected.
Winter is coming—don’t wait until the first snowfall to think about your commercial flat roof. By inspecting, cleaning, improving drainage, checking insulation, and creating snow and emergency plans, property managers can prevent costly issues and keep tenants happy.
Schedule your winter prep inspection today with Right Now Roofing & Restoration—and ensure your building is ready for everything a Minnesota winter throws at it.
Visual Aid Suggestion: Flat Roof Winter Prep Checklist
Create a simple checklist graphic for property managers, with items such as:
– Roof inspection complete
– Debris cleared
– Drains/gutters checked
– Insulation verified
– Snow removal plan in place
– Emergency contacts updated
This can double as a downloadable PDF lead magnet.
FAQs
Q: How often should I inspect my flat roof in winter?
A: At least once before winter, once after major snowstorms, and again in spring. More frequent inspections are ideal if your building has a history of leaks.
Q: Can my maintenance crew handle roof prep instead of hiring a roofer?
A: While basic cleaning can be done in-house, professional inspections and repairs are critical to catch hidden issues and ensure safety.
Q: What’s the average cost of winter prep vs. emergency repairs?
A: Preventative winter prep typically costs a fraction of emergency repairs. For example, a routine inspection and maintenance may cost a few hundred dollars, while emergency flat roof repairs can run into the thousands.
Q: Is snow removal always necessary?
A: Not always. It depends on the roof’s load capacity and the type of snow. Your roofing partner can determine when removal is required to prevent overload.

Justin Hansen is a seasoned professional in the roofing and siding industry, boasting over 15 years of hands-on experience. Starting his career in residential roofing, Justin quickly established a reputation for meticulous attention to detail and superior craftsmanship. His commitment to quality and excellence propelled him into more complex commercial projects, where he consistently delivered outstanding results.
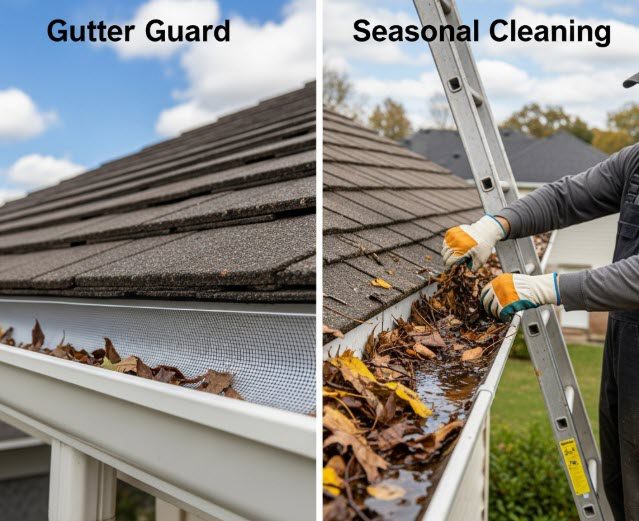
Gutter Guard vs. Seasonal Cleaning: What’s Best for Twin Cities Homes?
In the Twin Cities, our roofs and gutters face year-round challenges — from piles of fall leaves to heavy spring rains and melting winter snow. Keeping your gutters clear isn’t just about appearance; it’s about preventing water damage, protecting your foundation, and avoiding costly repairs. But here’s the big question: should you invest in gutter guards or stick with seasonal gutter cleaning?
Let’s break down the pros, cons, and costs so you can make the best choice for your Minnesota home.
Why Gutters Matter in Minnesota
- Protect Against Water Damage – Gutters keep rain and snowmelt flowing away from your foundation, preventing cracks and basement leaks.
- Stop Ice Dams Before They Form – Clogged gutters trap water, which freezes, leading to damaging ice dams.
- Save on Repairs – Water intrusion repairs can cost thousands. Regular gutter maintenance is a fraction of that.
Option 1: Seasonal Gutter Cleaning
What it is: Clearing leaves, twigs, and debris from your gutters 2–3 times per year, either DIY or by hiring a pro.
Pros:
– Low upfront cost
– Flexible (you only pay when you clean)
– Keeps gutters fully visible for inspection (leaks, pests, loose fasteners)
Cons:
– Needs to be done multiple times per year in Minnesota
– Labor-intensive or recurring service cost
– Ladder work can be dangerous, especially in icy conditions
Option 2: Gutter Guards
What they are: Mesh, screen, or helmet-style covers that block most debris while allowing water to pass through.
Pros:
– Reduces frequency of cleanings (often down to once a year)
– Prevents most leaf and pine needle clogs
– Helps minimize ice dam formation by improving drainage
– Safer since you’re not climbing ladders as often
Cons:
– Higher upfront cost
– Still require occasional rinsing and checks
– Effectiveness varies depending on debris type and roof slope
Minneapolis Area Gutter Guard Providers You Can Trust
If you’re considering installing gutter guards, here are some top local companies we’ve seen homeowners trust:
- Gutter Helmet of Minnesota – Their “Designer Series” system comes with a bold promise: if your gutters ever clog, they’ll clean them for free. Great peace-of-mind for Twin Cities weather.
- LeafFilter (Minneapolis) – Known for high-quality micro-mesh guards and lifetime warranties, designed specifically for local rainfall, foliage, and freeze–thaw cycles.
- Sela Gutter Connection – A well-established, family-run Minneapolis provider offering Leaf-X systems and seamless installation, with decades of trusted service.
- Gutter Filter – Offers a fully enclosed stainless-steel micro-screen, built to last and backed by a strong lifetime guarantee—ideal for homeowners tired of frequent clean-outs.
- Call The Gutter Guys – Local pros with knowledge of multiple guard options (EZ Gutter Guard, Leaf Blaster Pro, etc.), and helpful comparative advice to match your needs and price range.
Cost Comparison: Cleaning vs. Guards
- Seasonal Cleaning in Twin Cities: $150–$300 per visit, 2–3 times a year.
- Gutter Guards Installed: $7–$15 per linear foot installed (average home: $1,500–$3,000).
- Break-Even Point: Guards often pay for themselves in 5–7 years, depending on your home’s tree cover and cleaning frequency.
Which Is Best for Twin Cities Homes?
- Surrounded by Trees? Gutter guards are usually worth it.
- Few Trees or Tight Budget? Seasonal cleaning is perfectly fine.
- Commercial or Multifamily? Gutter guards reduce ongoing maintenance costs.
- Hybrid Approach: Many homeowners install guards but still schedule an annual pro cleaning for peace of mind.
Expert Advice from Right Now Roofing & Restoration
At Right Now Roofing & Restoration, we’ve seen it all: overflowing gutters that ruined siding, hidden ice dams causing attic mold, and clogged drains leading to flooded basements. Our advice? Don’t wait until you see water damage. Proactive gutter care is the best way to protect your biggest investment.
Whether you prefer seasonal cleaning or want to explore gutter guards, our team can help you choose what’s right for your home and budget.
Conclusion
Both gutter guards and seasonal cleaning have clear benefits — the right choice depends on your property and goals. The important thing is doing something before clogged gutters cause damage.
Schedule your free gutter and roof inspection today with Right Now Roofing & Restoration and find out which option is best for your Twin Cities home.
Do gutter guards prevent ice dams?
Not entirely, but by keeping water flowing they reduce the conditions that lead to ice dams. Proper attic insulation and ventilation are still key.
How often should gutters be cleaned in Minnesota?
Typically 2–3 times per year: once in spring, once in late fall, and sometimes mid-summer if you have lots of trees.
Can I install gutter guards myself?
Some types are DIY-friendly, but professional installation ensures better fit, performance, and warranty coverage.
Are gutter guards worth the cost?
If you have heavy tree cover or want a “set it and forget it” solution, they can pay for themselves over time. If you have minimal debris, seasonal cleaning may be more cost-effective.
Maurice Campbell brings over 20 years of extensive experience in the roofing and siding industry to his role as co-owner of Right Now Roofing. Maurice began his career in roofing installation, where his technical skills and problem-solving abilities set him apart. His career progressed into project management, where he successfully managed complex roofing and siding projects, ensuring they were completed on time and within budget.
Preparing Your Roof for Minnesota’s Harsh Winter: Fall Maintenance Checklist
Minnesota winters are no joke. Between heavy snow, ice dams, high winds, and freezing temperatures, your roof takes a beating each year. For homeowners in White Bear Lake, fall is the ideal time to inspect, repair, and prepare your roof before the snow flies. A little preventative maintenance now can save you thousands in repairs come spring.
Here’s your fall roofing checklist to help ensure your home stays protected all winter long.
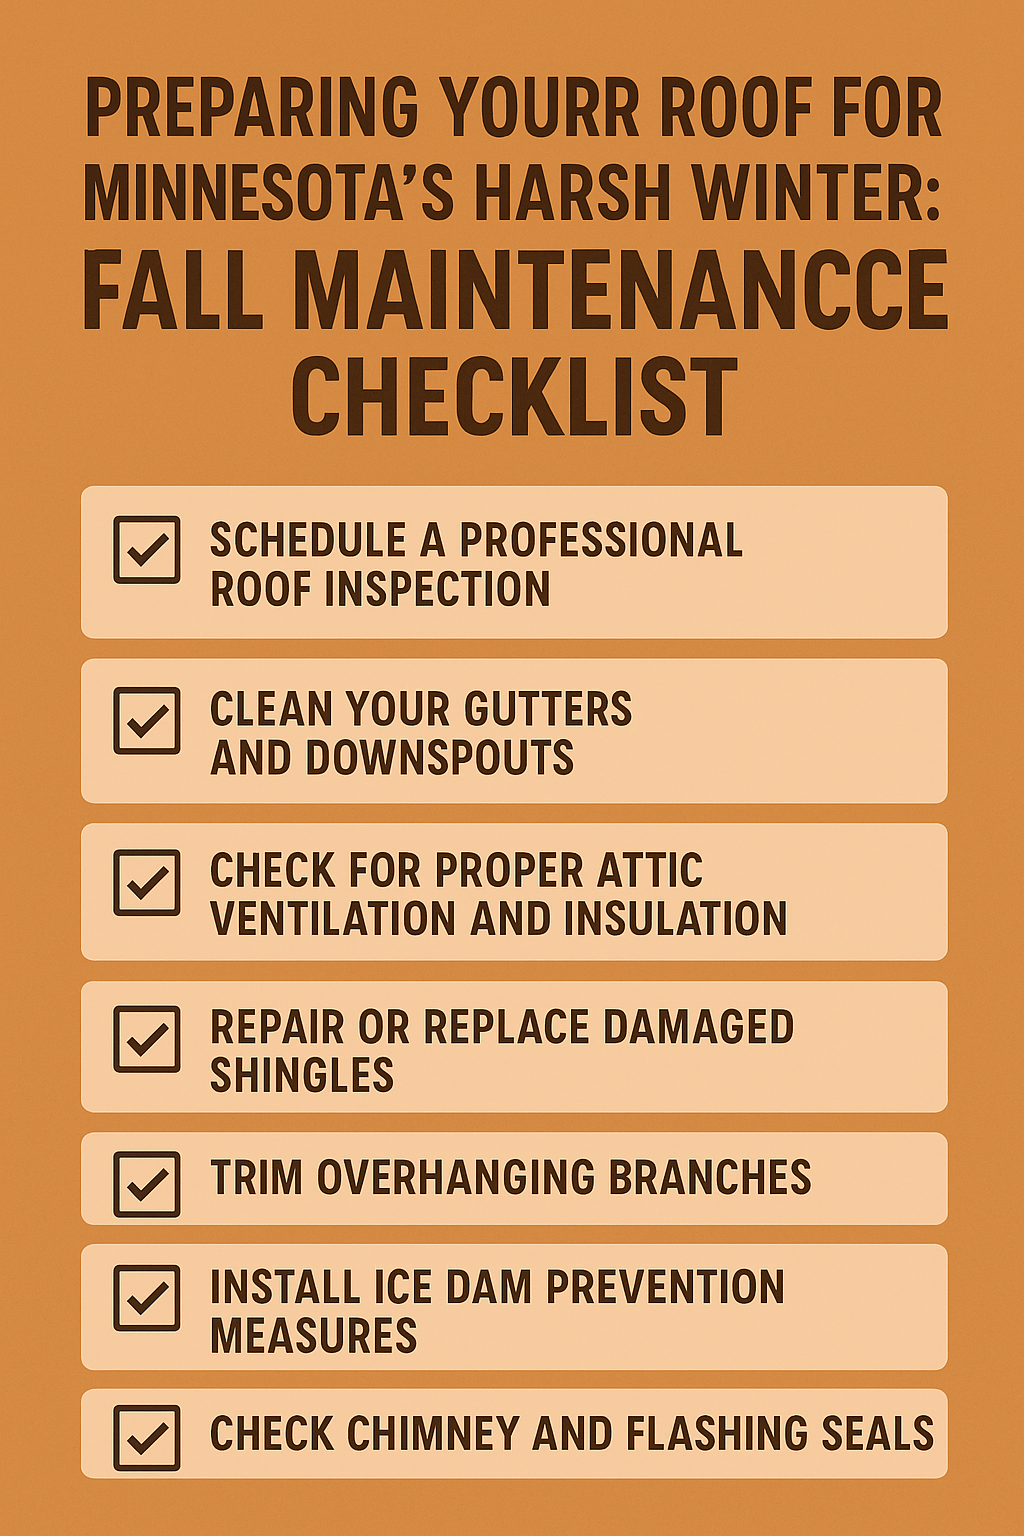
1. Schedule a Professional Roof Inspection
Even if your roof looks fine from the ground, hidden damage can lead to major problems once winter sets in. A professional roofing contractor will check for:
– Loose, cracked, or missing shingles
– Signs of water intrusion or rot
– Soft spots in the decking
– Flashing damage around chimneys, vents, and skylights
Pro Tip: Fall inspections allow you to make repairs before temperatures drop, which can make some roofing work more difficult.
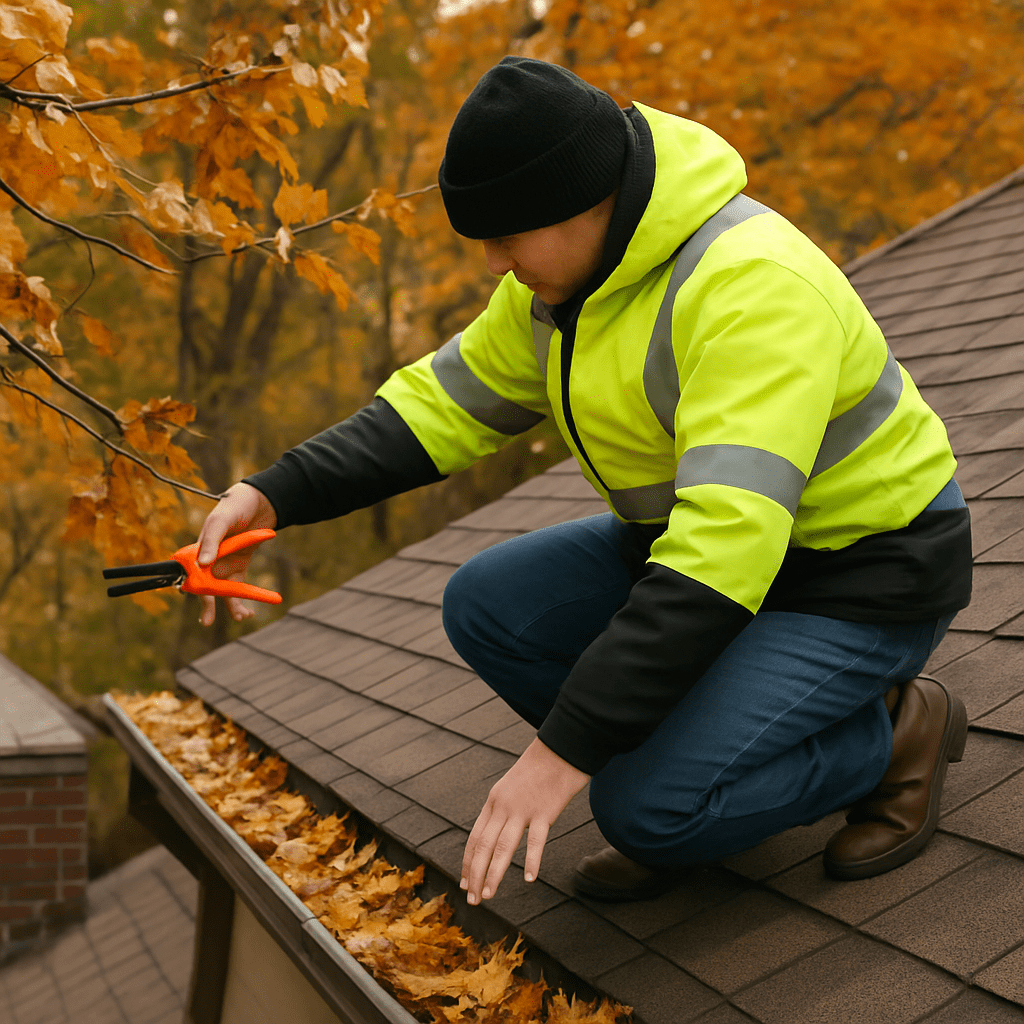
2. Clean Your Gutters and Downspouts
Clogged gutters can cause melting snow to back up under shingles, leading to leaks and ice dams.
– Remove leaves, sticks, and debris
– Check for sagging or damaged sections
– Make sure downspouts direct water at least 3–5 feet away from your foundation
3. Check for Proper Attic Ventilation and Insulation
Poor ventilation traps warm, moist air in your attic, which contributes to ice dam formation and mold growth. In Minnesota’s climate, you want:
– Intake vents at the eaves/soffits
– Exhaust vents at or near the roof ridge
– Sufficient attic insulation (typically R-49 to R-60 for Minnesota, per U.S. DOE recommendations)
4. Repair or Replace Damaged Shingles
High winds and heavy snow can tear away already loose shingles. Replacing them in the fall ensures a tight seal before winter weather hits. Look for:
– Curling edges
– Cracks or missing granules
– Entire shingles missing from the roof
5. Trim Overhanging Branches
Branches can scrape your roof or break under the weight of snow and ice, causing damage. Trim back any limbs at least six feet from the roof surface to reduce this risk.
6. Install Ice Dam Prevention Measures
If you’ve had ice dams in past winters, fall is the time to address the root causes. Solutions may include:
– Improving attic insulation and ventilation
– Installing a waterproof underlayment
– Adding heat cables in problem areas
7. Check Chimney and Flashing Seals
Water often sneaks in through deteriorating flashing. Seal any gaps and repair damaged chimney mortar to prevent leaks during freeze–thaw cycles.
FAQ: Preparing Your Roof for Winter in Minnesota
Q: When is the best time to schedule a fall roof inspection?
A: September through early November is ideal. You want to avoid the freezing conditions that can limit certain repair work.
Q: Can I clean my own gutters, or should I hire a pro?
A: If you have a single-story home and feel comfortable on a ladder, you can do it yourself. For multi-story homes or heavy debris buildup, it’s safer to hire a professional.
Q: What’s the #1 cause of winter roof damage in Minnesota?
A: Ice dams are one of the biggest culprits. They form when heat escapes from your attic, melting snow that refreezes at the roof edge. This can back up water under your shingles and cause leaks.
Q: How do I know if my attic insulation is enough?
A: In Minnesota, you generally want 16–20 inches of fiberglass or cellulose insulation (R-49 to R-60). A roofing contractor or energy auditor can measure and confirm.
Your roof is your home’s first line of defense against Minnesota’s harsh winter weather. By tackling this checklist in the fall, you’ll minimize the risk of leaks, ice dams, and costly repairs — keeping your family warm and dry until spring.
Sources:
- U.S. Department of Energy – Recommended Insulation Levels
- Minnesota Department of Commerce – Ice Dam Prevention
- Insurance Institute for Business & Home Safety – Winter Roof Maintenance Tips
Justin Hansen is a seasoned professional in the roofing and siding industry, boasting over 15 years of hands-on experience. Starting his career in residential roofing, Justin quickly established a reputation for meticulous attention to detail and superior craftsmanship. His commitment to quality and excellence propelled him into more complex commercial projects, where he consistently delivered outstanding results.
Ice Dams in Minneapolis: Everything You Need to Know to Protect Your Roof
Call Us Now (651) 352-2679
Ice dams are a common yet hazardous problem for homeowners in Minneapolis and other areas with harsh winter climates. These ridges of ice form along the edges of your roof and can cause serious damage to your home if not addressed properly. In this guide, we’ll explore everything you need to know about ice dams, from their causes to prevention tips, so you can keep your home safe and your roof in excellent condition.
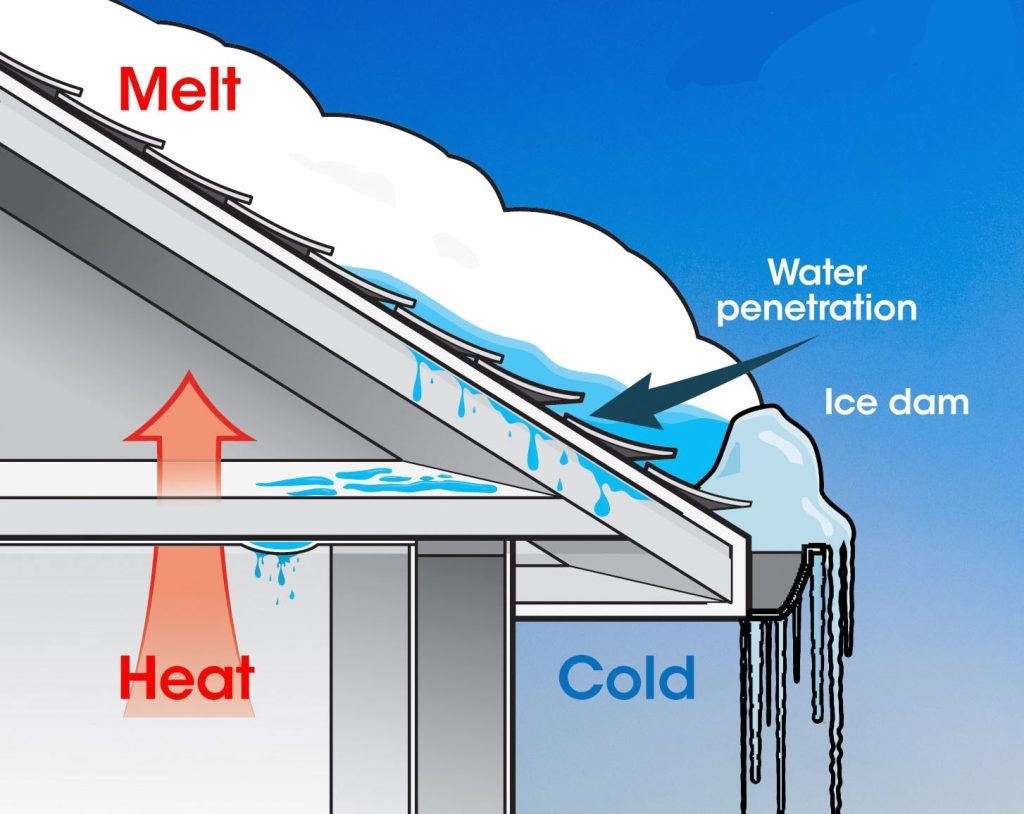
What Are Ice Dams?
Ice dams are barriers of ice that form at the edge of a roof, preventing melting snow from draining off. When the trapped water refreezes, it can damage shingles, gutters, and even your home’s interior.
Here’s how they form:
- Heat from inside the house escapes through the roof, melting the snow.
- The melted snow flows down the roof until it reaches the colder edges, where it refreezes.
- Over time, this creates a dam of ice that traps additional melting snow.
Signs of Ice Dams
Knowing the warning signs of ice dams can save you from costly repairs:
- Large icicles hanging from your roof’s edges.
- Water stains on interior walls or ceilings.
- Leaks or damp patches during the winter months.
If you notice any of these signs, it’s important to take action quickly to mitigate the damage.
Why Are Ice Dams a Problem?
Ice dams can cause a variety of issues, including:
- Roof Damage: The weight of the ice and trapped water can damage shingles and other roofing materials.
- Interior Water Damage: Water trapped by the ice dam can seep into your home, causing stains, peeling paint, or even mold growth.
- Higher Energy Costs: Heat loss through the roof not only contributes to ice dams but also increases heating bills.
Common Causes of Ice Dams
Several factors contribute to the formation of ice dams:
- Inadequate Attic Insulation:
- Warm air escaping into the attic heats the roof.
- Poor Ventilation:
- Without proper airflow, warm and cold spots develop on the roof.
- Snow Accumulation:
- Heavy snowfall provides the raw material for ice dams.
How to Prevent Ice Dams
Taking proactive steps can significantly reduce the likelihood of ice dams:
- Improve Attic Insulation: Ensure your attic has sufficient insulation to keep heat from escaping.
- Enhance Ventilation: Install ridge vents and soffit vents to maintain consistent attic temperatures.
- Clean Gutters: Keep gutters free of debris to allow for proper water drainage.
- Use Roof Rakes: Remove snow from your roof after heavy snowfall to prevent buildup.
DIY vs. Professional Solutions
While some homeowners attempt to tackle ice dams on their own, it’s important to consider the risks:
- DIY Methods:
- Chipping away at ice can damage shingles and lead to accidents.
- Salt-based deicers can corrode roofing materials and harm nearby plants.
- Professional Services:
- Steam-based ice dam removal is safe, effective, and prevents further damage.
Hiring professionals like Right Now Roofing ensures that the problem is addressed correctly and efficiently.
Real-Life Examples
One Minneapolis homeowner noticed water stains on their ceiling after a particularly snowy week. By contacting Right Now Roofing, they not only had the ice dam safely removed but also received tips on improving attic insulation, preventing future problems. Their quick action saved them thousands in potential repair costs.
How Right Now Roofing Can Help
At Right Now Roofing, we specialize in:
- Ice Dam Removal: Using steam to safely eliminate ice dams.
- Roof Inspections: Identifying areas of heat loss and other vulnerabilities.
- Insulation and Ventilation Improvements: Reducing the likelihood of future ice dams.
With years of experience in Minneapolis winters, our team understands the unique challenges local homeowners face.
FAQs
Q: How much does ice dam removal cost? A: The cost varies depending on the size and severity of the ice dam. Contact us for a free quote!
Q: Can ice dams damage my gutters? A: Yes, the weight of the ice can pull gutters away from the roofline and cause lasting damage.
Q: How quickly should I act if I notice an ice dam? A: As soon as possible. Early intervention can prevent extensive damage.
Don’t let ice dams put your home at risk this winter. Schedule a free roof inspection with Right Now Roofing today! Our experts are here to help you protect your home and stay warm all season long. Call us at [phone number] or visit [website link] to book your appointment.
Justin Hansen is a seasoned professional in the roofing and siding industry, boasting over 15 years of hands-on experience. Starting his career in residential roofing, Justin quickly established a reputation for meticulous attention to detail and superior craftsmanship. His commitment to quality and excellence propelled him into more complex commercial projects, where he consistently delivered outstanding results.
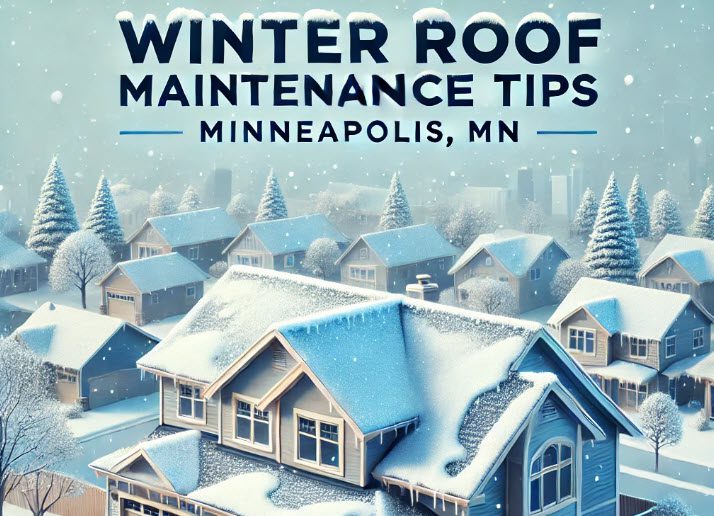
Winter Roof Maintenance Tips for Minneapolis Homeowners
Winter in Minneapolis, MN, brings its fair share of challenges, especially when it comes to your roof. Heavy snowfall, freezing temperatures, and ice accumulation can take a toll, making proper maintenance essential to avoid costly repairs. In this post, we’ll cover practical winter roof maintenance tips to protect your home during the cold months.
Why Winter Roof Maintenance is Crucial
- Prevention of Ice Dams: Ice dams can cause water to seep under shingles, leading to leaks and water damage inside your home.
- Prolonged Roof Life: Routine care reduces wear and tear, extending the lifespan of your roof.
- Energy Efficiency: A well-maintained roof improves insulation, reducing heating costs.
Essential Winter Roof Maintenance Tips
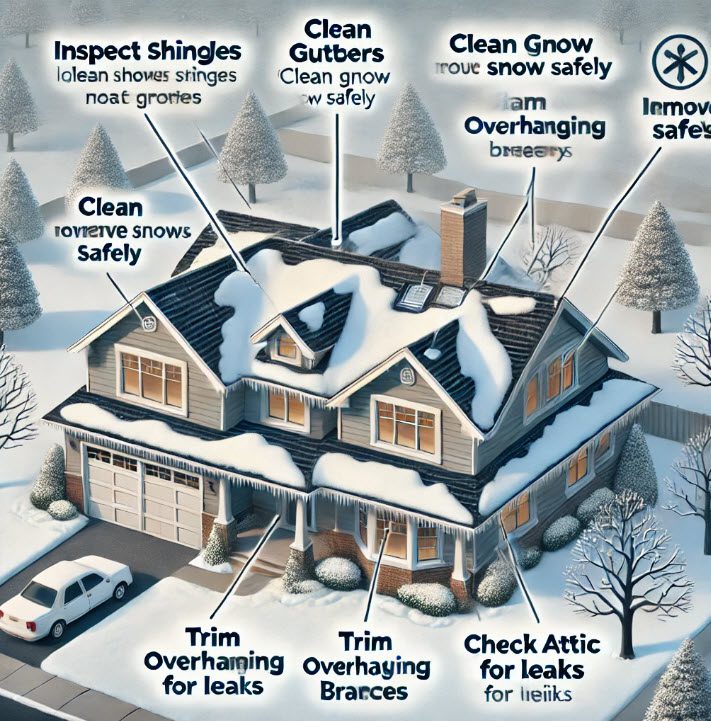
1. Inspect Your Roof Before the Snow Hits
Schedule a professional roof inspection in late fall to identify and address potential issues such as missing shingles, cracks, or weak spots.
2. Clean Gutters and Downspouts
Clogged gutters lead to water pooling and freezing, increasing the risk of ice dams. Clear leaves and debris regularly to maintain proper drainage.
3. Remove Snow Safely
Heavy snow can strain your roof structure. Use a roof rake to gently remove excess snow, starting from the edge and working upward. Avoid climbing onto your roof, as it can be slippery and dangerous.
4. Address Ice Dams
Consider installing heat cables along the roof’s edge to prevent ice dams. Additionally, ensure your attic is properly insulated and ventilated to regulate temperature and minimize ice buildup.
5. Trim Overhanging Branches
Snow-laden branches can break and damage your roof. Trim any trees close to your home to reduce the risk.
6. Check for Leaks Inside Your Home
Inspect your attic and ceilings for signs of water damage or leaks. Early detection can save you from more significant issues later on.
7. Schedule Routine Maintenance
Partner with a professional roofing company, like Right Now Roofing, to handle regular maintenance and repairs during the winter months.
Real-Life Example: Preventing Ice Dam Damage
One of our Minneapolis clients faced severe interior damage last winter due to ice dams. By adding attic insulation and installing heat cables, they avoided further issues this year. Their proactive approach saved them thousands of dollars in repair costs.
Winter Roof Maintenance FAQs
Q: How much snow is too much for my roof?
A: If snow accumulation exceeds 12 inches, it’s a good idea to remove it. Wet, heavy snow is particularly risky.
Q: How can I tell if I have an ice dam?
A: Look for icicles along your roof’s edge and water stains inside your home near exterior walls.
Q: Can I clear snow off my roof myself?
A: It’s best to use a roof rake or hire a professional. Climbing onto a snowy roof is unsafe.
Quick Tips Recap:
- Inspect your roof and clean gutters in the fall.
- Use a roof rake to remove excess snow.
- Ensure your attic is properly insulated.
- Trim overhanging branches.
- Address leaks promptly.
By following these winter roof maintenance tips, you can keep your Minneapolis home safe and sound all winter long. If you need expert help, Right Now Roofing is here to assist. Contact us today to schedule your winter maintenance service!
Maurice Campbell brings over 20 years of extensive experience in the roofing and siding industry to his role as co-owner of Right Now Roofing. Maurice began his career in roofing installation, where his technical skills and problem-solving abilities set him apart. His career progressed into project management, where he successfully managed complex roofing and siding projects, ensuring they were completed on time and within budget.

How Thermal Roof Imaging Detects Hidden Roof Issues Before They Cost You
TL;DR:
Thermal roof imaging uses infrared technology to detect hidden issues like moisture buildup, air leaks, and insulation problems in commercial roofs. This non-invasive process allows for early detection of potential problems, saving property owners from costly repairs and helping improve energy efficiency.
Introduction
When it comes to managing a commercial building, roof maintenance is one of the most critical, yet often overlooked, tasks. Standard visual inspections can only catch surface-level issues, leaving moisture and structural weaknesses undetected until they become major—and expensive—problems. For proactive business owners, thermal roof imaging offers an innovative, non-invasive way to assess roof health comprehensively.
In this post, I’ll explain what thermal roof imaging is, how it works, and why every commercial property owner should consider it. We’ll also cover specific scenarios where thermal imaging can save you money and time, ensuring your business stays protected.
What Is Thermal Roof Imaging?
Thermal roof imaging is a method of roof inspection that uses infrared (IR) technology to detect temperature variations across a roof’s surface. These temperature differences often point to underlying issues such as trapped moisture, deteriorating insulation, or air leaks. Unlike traditional inspections that rely solely on what the eye can see, thermal imaging provides a deeper look, identifying hidden problems that can’t be detected visually.
Since water retains heat longer than the surrounding roofing materials, infrared cameras can spot it easily, even if it’s buried under roofing membranes or insulation. This technology gives property owners an upper hand by catching early-stage issues that, left unchecked, could lead to major structural damage, mold growth, or energy loss.
How Thermal Imaging Works
Step 1: Infrared Cameras Scan the Roof
Technicians use handheld or drone-mounted infrared cameras to scan the roof. This process is quick, often taking just an hour or two for medium-sized roofs.
Step 2: Detecting Temperature Variations
The infrared camera captures a thermal image, highlighting areas of the roof where temperatures vary. Warm areas indicate moisture buildup, while cooler zones may reveal issues like missing insulation.
Step 3: Data Analysis and Reporting
Our trained professionals interpret the data collected from the thermal scans. A comprehensive report is generated, outlining the areas of concern and providing actionable recommendations.
Step 4: Scheduling Repairs (If Needed)
If the thermal scan detects any issues, we work with you to plan necessary maintenance or repairs. This proactive approach ensures that minor issues don’t develop into significant expenses.
Thermal imaging is especially helpful in situations where there are multiple layers of roofing material. Traditional inspections might miss moisture trapped between layers, but infrared technology can detect it effortlessly.
Benefits of Thermal Roof Imaging
1. Early Detection of Roof Leaks
By identifying leaks before they are visible to the naked eye, thermal imaging helps prevent water damage and mold formation. Even a small, undetected leak can cause severe damage if left unchecked for months.
2. Energy Savings and Improved Efficiency
Poor insulation and air leaks cause energy loss, leading to higher utility bills. Thermal roof imaging detects these weak points, allowing you to address them and cut energy costs. Over time, this can translate to significant savings, especially for large commercial buildings.
3. Non-Invasive and Safe for Business Operations
Thermal imaging doesn’t require removing roofing materials or disrupting your business operations. Our team can perform the inspection after hours or during downtime to avoid interfering with your day-to-day activities.
4. Proactive Maintenance Strategy
Thermal imaging makes it easier to develop a proactive maintenance schedule. Rather than waiting for an emergency, you can plan repairs and upgrades during the off-season, minimizing downtime and repair costs.
Ideal Situations for Thermal Imaging
Thermal roof imaging is particularly useful in the following scenarios:
1. Post-Storm Inspection
Severe weather like hail, high winds, or hurricanes can cause roof damage that might not be visible to the eye. A thermal scan ensures hidden moisture pockets or structural damage aren’t missed, preventing future issues.
2. Routine Preventative Maintenance
Including thermal imaging as part of your regular maintenance routine helps you catch problems early, minimizing downtime and repair costs in the future. This proactive strategy is particularly valuable for industries with high uptime requirements, such as manufacturing or retail.
3. Pre-Purchase Property Inspection
Before purchasing a commercial building, it’s essential to understand the roof’s condition. A thermal scan ensures there are no hidden problems that could turn into unexpected expenses after the purchase.
4. Energy Audit for Cost Control
If your business is struggling with high energy bills, thermal roof imaging can pinpoint areas where insulation needs improvement. By sealing leaks and upgrading insulation, you can reduce your energy costs and improve the building’s overall efficiency.
Custom Chart: Common Issues Detected by Thermal Roof Imaging
| Issue | How It Appears on a Thermal Scan | Impact | Recommended Action |
|---|---|---|---|
| Trapped Moisture | Warm spots | Water damage, mold growth | Repair or replace wet sections |
| Poor Insulation | Cool areas | Higher energy bills | Add or replace insulation |
| Air Leaks | Temperature fluctuation near seams | Energy loss | Seal leaks |
| Structural Deterioration | Irregular temperature patterns | Weakening of roof materials | Reinforce or repair affected areas |
FAQs About Thermal Roof Imaging
1. How often should I schedule a thermal roof scan?
We recommend annual thermal imaging as part of your maintenance routine and always after severe weather events, like hail or high winds.
2. Is thermal imaging expensive?
While the upfront cost varies depending on roof size, the long-term savings from early detection of problems make it a cost-effective investment.
3. Will the scan disrupt my business operations?
No, the process is non-invasive, and we can schedule it to minimize any disruption to your operations.
4. What types of roofs benefit most from thermal imaging?
Flat or low-slope roofs are ideal for thermal scans, but the technology is effective for metal, single-ply, and built-up roofs as well.
5. Can thermal imaging detect every potential issue?
While thermal imaging is excellent at identifying moisture and insulation issues, it works best in conjunction with a physical inspection to assess structural concerns.
Conclusion
Thermal roof imaging is an essential tool for commercial property owners looking to protect their investment. By identifying hidden issues early, thermal scans help you avoid unexpected repairs, reduce energy costs, and extend the life of your roof.
At Right Now Roofing, we specialize in thermal roof imaging and comprehensive roof maintenance. Schedule your scan today and take the first step toward proactive roof care that saves you money and keeps your business running smoothly!
Justin Hansen is a seasoned professional in the roofing and siding industry, boasting over 15 years of hands-on experience. Starting his career in residential roofing, Justin quickly established a reputation for meticulous attention to detail and superior craftsmanship. His commitment to quality and excellence propelled him into more complex commercial projects, where he consistently delivered outstanding results.