Top 3 Reasons for Roof Replacement
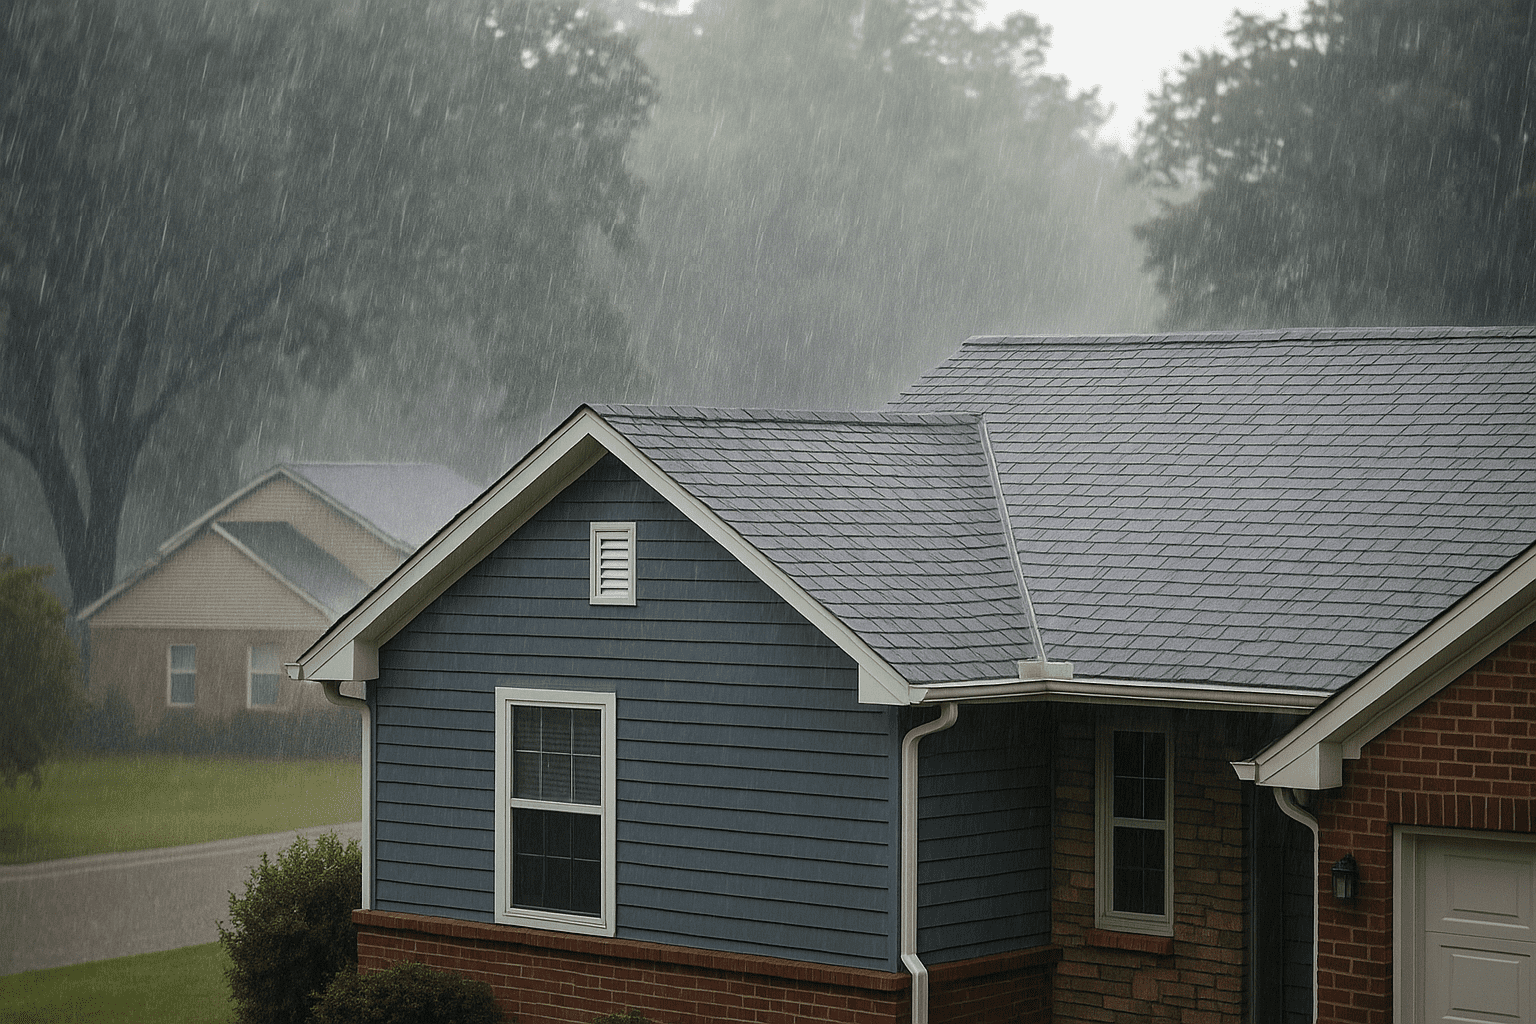
Is your roof looking a bit worse for wear? Understanding the reasons for roof replacement is crucial for every homeowner. Whether it’s due to old age, storm damage, or improper installation, knowing when it’s time to replace your roof can save you from costly repairs down the line. In this post, we’ll explore three common reasons why you might need a roof replacement and the telltale signs to watch out for.
Old Age: The Natural Lifespan of Your Roof
One of the most common reasons for roof replacement is simply the passage of time. Every roof has a natural lifespan, and once it reaches the end of that life, it’s time for a change. But how long should you expect your roof to last? Let’s break it down by material:
| Type of Roof | Time Frame Range | Signs You Need a New Roof |
|---|---|---|
| Asphalt Shingles | 15-30 years | Significant number of missing shingles, large amounts of granules in gutters, shingles curling or buckling |
| Wood Shingles | 20-25 years | Shingles splitting or decaying, visible mold or moss growth, frequent leaks during rain |
| Metal Roofing | 40-70 years | Noticeable rust or corrosion, loose or displaced panels, frequent leaks |
| Slate Roofing | 50-100 years | Cracked, broken, or missing slates, visible signs of water damage inside the home |
| Clay Tiles | 50-100 years | Cracked or broken tiles, sagging roof structure, persistent water infiltration |
| Concrete Tiles | 40-75 years | Cracked or broken tiles, visible water stains on ceilings or walls |
| Rubber Roofing | 30-50 years | Cracks, blisters, or tears in the material, persistent pooling of water on the roof |
| Cedar Shakes | 30-40 years | Shakes splitting or decaying, visible insect damage, frequent roof leaks |
Of course, these are just averages. The actual lifespan of your roof can vary based on factors like climate, maintenance, and installation quality. So how can you tell if your roof is nearing the end of its life?
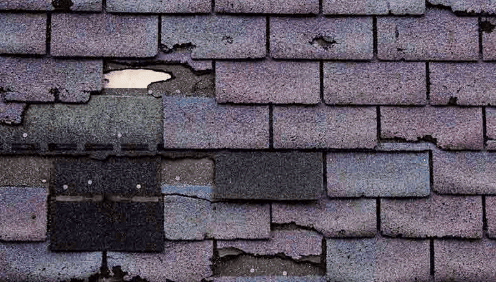
Signs of an Aging Roof
Even if you’re not sure about your roof’s age, there are several visual cues that can indicate it’s time for a replacement:
- Granule loss: For asphalt shingles, this is a big red flag. Check your gutters and splash guards for accumulating granules.
- Cracking shingles: As shingles age, they become brittle and prone to cracking.
- Color fading: If your once-vibrant roof has taken on a dull, grayish hue, it’s showing its age.
- Excessive vegetation growth: While a little moss isn’t unusual, excessive growth can indicate your roof is retaining moisture and deteriorating.
Replacing an aging roof isn’t all bad news. It’s a chance to upgrade to more durable materials, improve your home’s energy efficiency, and boost its curb appeal. Plus, you’ll have the peace of mind knowing your home is protected for years to come.
Storm Damage: When Mother Nature Strikes
Sometimes, roof replacement isn’t a matter of age but of sudden, severe damage. Extreme weather events like hailstorms, tornadoes, or hurricanes can wreak havoc on your roof, necessitating immediate action. Let’s look at some specific types of storm damage and how to identify them.
Hail Damage on Roofs
Hail can be particularly destructive to roofing materials. Here’s what to look for:
- Asphalt shingle bruising: Dark spots on shingles where hail has knocked off the protective granules.
- Dented soft metals: Check gutters, flashing, and ventilation covers for dents. Even outdoor furniture or grills can provide clues about the severity of the hailstorm.
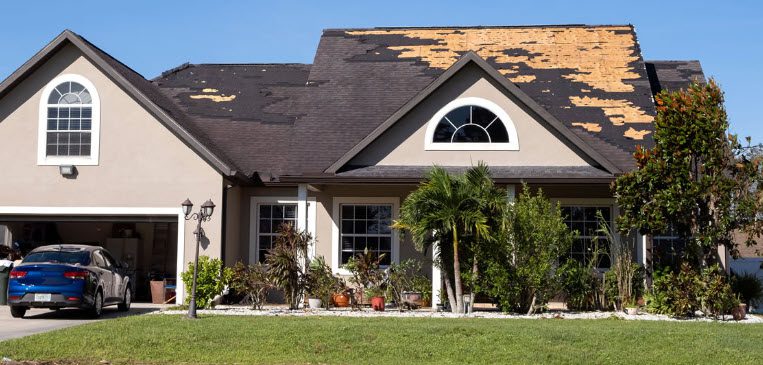
Wind Damage to Roofs
High winds can lift and tear shingles, leaving your roof vulnerable to leaks. Signs of wind damage include:
- Missing or torn shingles: Often leaving dark spots visible from the ground.
- Debris in the yard: Pieces of roofing material scattered around your property.
- Flapping shingles: If shingles are loose but not completely torn off, they may flap in the wind.
Insurance Claims for Storm Damage Roof Repair
If your roof has suffered storm damage, it’s crucial to act quickly. Many homeowners insurance policies cover roof replacement due to storm damage, but there’s often a time limit for filing claims. Here’s what to do:
- Document the damage with photos and videos as soon as it’s safe to do so.
- Contact your insurance company immediately to start the claims process.
- Get a professional roof inspection to assess the full extent of the damage.
- Work with a reputable roofing contractor who has experience dealing with insurance claims.
Remember, insurance companies can get overwhelmed after major storms. Filing your claim promptly can help ensure you don’t miss out on the coverage you’re entitled to.
Improper Installation: When Shortcuts Lead to Problems
The third common reason for roof replacement is, unfortunately, one that could have been avoided: improper installation. A poorly installed roof can fail prematurely, leading to leaks, energy inefficiency, and even structural damage.
Minor vs. Major Installation Errors
Not all installation errors are created equal. Minor issues, like a few misplaced nails, can often be repaired. But major problems, such as incorrect shingle placement or inadequate ventilation, may require a full roof replacement.
The Risks of Hiring Out-of-State Contractors
After major storms, it’s common for out-of-state contractors to swoop in, offering quick repairs. While some may be reputable, others might prioritize speed over quality. This can lead to shoddy workmanship and a roof that fails long before its time.
Signs of Improper Roof Installation
How can you tell if your roof was installed incorrectly? Look out for these red flags:
- Frequent leaks: While an occasional leak might be repairable, constant leaks often indicate systemic problems.
- Sliding shingles: If your shingles are slipping out of place, they weren’t secured properly.
- Uneven appearance: A well-installed roof should have a uniform look. Waviness or inconsistent coloration can signal problems.
- Excessive granule loss: While some granule loss is normal, excessive amounts in new roofs indicate poor-quality materials or installation.
Recourse for Homeowners with Improperly Installed Roofs
If you suspect your roof was installed incorrectly, here are some steps you can take:
- Get a professional inspection to confirm the extent of the problem.
- Contact the original installer if possible. Reputable companies will often fix their mistakes.
- Check your warranty. Many roofing materials come with warranties that may cover improper installation.
- Consider legal action if the installer refuses to address major issues.
- For future projects, always choose licensed, insured, and local contractors with a solid reputation.
Remember, a properly installed roof is an investment in your home’s longevity and your family’s safety. It’s worth taking the time to choose the right contractor and materials.
The Importance of Regular Roof Inspections
Whether your roof is brand new or approaching the end of its lifespan, regular inspections are key to catching problems early. Here’s why they matter:
- Early detection of minor issues before they become major problems
- Extend the life of your roof through timely maintenance
- Ensure your warranty remains valid (many require regular inspections)
- Peace of mind knowing your roof is in good condition
Aim to have your roof inspected at least once a year, or after any major storm event. A professional roofer can spot potential issues that might not be visible from the ground.
Benefits of Hiring Reputable Roofing Contractors
When it comes time for a roof replacement, choosing the right contractor is just as important as selecting quality materials. Here’s why working with a reputable roofer matters:
- Quality workmanship: Experienced contractors know how to install roofs that last.
- Proper materials: Reputable roofers use high-quality materials and know which ones are best for your climate.
- Warranty protection: Many top contractors offer workmanship warranties in addition to manufacturer warranties.
- Code compliance: A good roofer will ensure your new roof meets all local building codes.
- Peace of mind: You’ll know the job was done right, protecting your home for years to come.
Don’t be afraid to ask for references, check reviews, and verify licenses and insurance when choosing a roofing contractor. A little due diligence upfront can save you a lot of headaches down the road.
Understanding the reasons for roof replacement and knowing the signs to watch for can help you protect one of your home’s most important components. Whether it’s due to old age, storm damage, or improper installation, addressing roofing issues promptly can save you money and stress in the long run. Regular inspections and working with reputable contractors are your best bets for ensuring a long-lasting, protective roof over your head.
FAQ (Frequently Asked Questions)
How often should I replace my roof?
The frequency of roof replacement depends on the material used. Asphalt shingles typically last 20-30 years, while metal roofs can last 50 years or more. Regular inspections can help determine when replacement is necessary.
Can I replace my roof myself?
While DIY roof replacement is possible, it’s not recommended. Roofing is a complex job that requires specialized skills and knowledge. Improper installation can lead to leaks, voided warranties, and potentially costly damage to your home.
How much does a roof replacement cost?
Roof replacement costs vary widely depending on factors like material choice, roof size, and complexity. On average, homeowners might spend between $5,000 and $15,000 for a new roof. Always get multiple quotes from reputable contractors.
Will my insurance cover roof replacement?
Most homeowners insurance policies cover roof replacement if it’s due to sudden, accidental damage like storms. However, they typically don’t cover replacement due to normal wear and tear. Check your policy or speak with your insurance agent for specifics.
How long does a roof replacement take?
The duration of a roof replacement project depends on factors like the size of your roof, the material being used, and weather conditions. Most residential roof replacements can be completed in 1-3 days, but more complex projects may take longer.

Justin Hansen is a seasoned professional in the roofing and siding industry, boasting over 15 years of hands-on experience. Starting his career in residential roofing, Justin quickly established a reputation for meticulous attention to detail and superior craftsmanship. His commitment to quality and excellence propelled him into more complex commercial projects, where he consistently delivered outstanding results.
Should I Call a Roofer Before Calling My Insurance Company? Yes, and Here’s Why
Hi, I’m Justin, the owner of Right Now Roofing, and today I want to address a question we often get from our customers: “Should I have my roof looked at before calling my insurance company?” The answer is a resounding yes, and here’s why.
Understanding the Importance of a Roof Inspection
First, let’s talk about the purpose of a roof inspection. When you notice a potential issue with your roof, whether it’s after a severe storm or just over time, it can be tempting to call your insurance company right away. However, having a professional roofing inspection before making that call can save you time, stress, and potentially a lot of money.
Why Have a Professional Roof Inspection?
1. Accurate Damage Assessment
As roofing specialists in the Twin Cities area, we know that weather in Minnesota can be unpredictable, leading to various types of roof damage. A professional inspection ensures that all damages are accurately identified and documented. Sometimes, damage isn’t visible from the ground or to the untrained eye. Our experienced team can spot issues that might be overlooked, such as subtle signs of water damage, shingle deterioration, or structural weaknesses.
2. Detailed Documentation
Insurance companies require detailed evidence of any damage before they process claims. By having us inspect your roof first, you get a comprehensive report with photographs and descriptions of the damage. This documentation is invaluable when filing a claim, as it provides concrete proof that can help speed up the process and support your case.
3. Avoiding Unnecessary Claims
Not all roof damage warrants an insurance claim. Minor issues might be more cost-effective to repair out-of-pocket rather than going through the insurance process and potentially facing increased premiums. Our inspection can help you determine whether the damage is significant enough to justify a claim or if it can be managed with a simple repair.
The Inspection Process
When you call Right Now Roofing for an inspection, here’s what you can expect:
- Initial Consultation
- We discuss any concerns you have and gather information about the potential damage.
- We’ll also review any history of previous repairs or claims to better understand your roof’s condition.
- Comprehensive Inspection
- Our team conducts a thorough examination of your roof, looking at shingles, flashing, gutters, and any other critical components.
- We use advanced tools and techniques to ensure no damage goes unnoticed.
- Detailed Report
- After the inspection, we provide a detailed report, complete with photographs and descriptions of any damage.
- We also include our professional recommendations for repairs or replacements.
- Guidance on Next Steps
- Based on our findings, we advise you on whether to proceed with an insurance claim or handle the repairs directly.
- If you decide to file a claim, we can guide you through the process and even work with your insurance adjuster to ensure everything is covered.
Why Choose Right Now Roofing?
Being a local roofing company based in the Twin Cities area, we understand the specific challenges that Minnesota weather can pose. Our familiarity with the region’s climate means we know what to look for and how to best address any roofing issues you might encounter.
Local Expertise
We live and work in the same community as you, so we’re invested in ensuring our neighbors have safe, secure roofs. Our knowledge of local building codes and weather patterns allows us to provide tailored solutions that you can trust.
Friendly, Professional Service
At Right Now Roofing, we pride ourselves on offering friendly, professional service. We’re here to answer your questions, address your concerns, and provide the highest quality roofing services possible. When you work with us, you’re not just a customer; you’re part of our community.
Commitment to Quality
Our team is dedicated to using the best materials and techniques to ensure your roof is in top condition. Whether you need a minor repair or a full replacement, you can count on us to deliver exceptional results.
Conclusion
In conclusion, having your roof inspected before calling your insurance company is a smart move. It ensures an accurate assessment, provides detailed documentation for your claim, and can help you avoid unnecessary claims. As a local roofing expert in the Twin Cities area, Right Now Roofing is here to help you navigate this process with ease.
If you have any concerns about your roof or need an inspection, don’t hesitate to contact us. We’re here to provide the expertise and support you need to keep your roof—and your home—in the best possible condition.
Feel free to reach out to us at Right Now Roofing. We’re always here to help our Minnesota neighbors with all their roofing needs.
Stay safe, and remember, we’ve got you covered!
Best regards,
Justin
Owner, Right Now Roofing
Justin Hansen is a seasoned professional in the roofing and siding industry, boasting over 15 years of hands-on experience. Starting his career in residential roofing, Justin quickly established a reputation for meticulous attention to detail and superior craftsmanship. His commitment to quality and excellence propelled him into more complex commercial projects, where he consistently delivered outstanding results.
The Ultimate Guide to Dealing with Emergency Roof Repair
Hey there, I’m Maurice, one of the owners at Right Now Roofing. Today, I’m here to guide you through one of the most stressful situations a homeowner can face: an emergency roof repair. Picture this: It’s the middle of the night, and you find yourself staring at a leaking ceiling. Panic sets in. But fear not! With a little know-how and a calm approach, you can navigate this situation like a pro. Let’s dive in and ensure you’re well-prepared for any roofing emergency.
What Qualifies as a Roof Repair Emergency?
So, what exactly makes a roofing situation an emergency? Well, if your home’s interior or attic is exposed to the elements due to roof damage, that’s a clear sign. For example, if you can see daylight through your roof where you shouldn’t or water is pouring in, it’s time to act fast. Immediate attention is required if there’s structural damage that could worsen quickly.
Let me give you a scenario: Imagine a small trickle of water pouring directly onto your fuse box. Even a tiny amount of water can be a major hazard in this case, so don’t wait—call a roofer immediately. But if it’s just a minor drip in the living room, it might not be as urgent, though it still needs attention soon.
Types of Emergency Roof Leaks and Damage
Different types of damage can lead to emergency repairs. Here are some common scenarios:
- Pests and Animals: Believe it or not, those cute little squirrels can cause big problems. If they’ve chewed through your roof and a storm is coming, it’s an emergency. However, if it’s just a minor issue, you can wait until regular business hours.
- Neglect: Roofs that haven’t been maintained can develop serious leaks. Regular check-ups can prevent these emergencies.
- Fire Damage: If your roof has been exposed to flames, it’s likely compromised and needs immediate attention.
- Tree Damage: A fallen tree can be devastating. Even if it looks minor, always have it checked out.
- High Winds and Lightning Strikes: These can cause significant damage, leaving your home vulnerable.
- Other Weather Events: Hurricanes, tornadoes, and major storms can wreak havoc on your roof. Always inspect your roof after such events.
- Structural Collapse: Severe water damage or too much snow can lead to collapse risks. This is definitely an emergency.
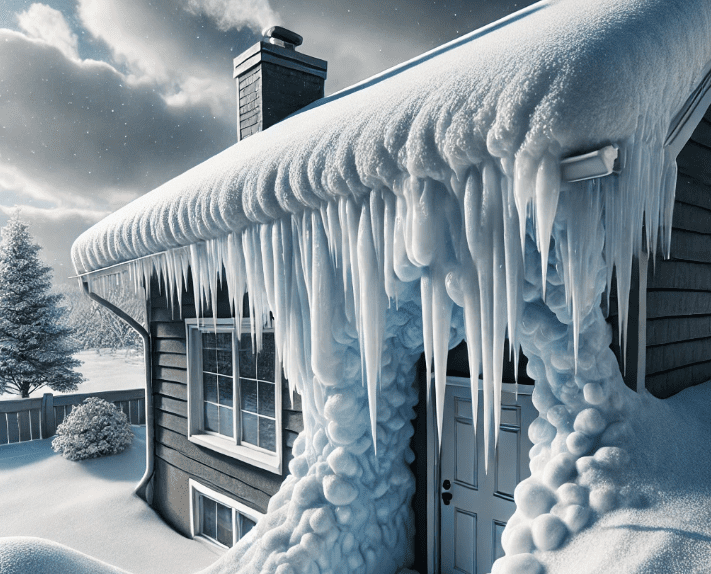
- Ice Dams: These can cause leaks that may quickly become a big problem.
- Mold: Extreme mold growth due to poor ventilation can be an emergency. Improving ventilation is key here.
- Clogged Gutters: Severe clogs can cause leaks. Regular cleaning helps prevent this.
Non-Emergency Roof Damage
Not all roof issues are emergencies. Here’s a list of situations that can usually wait:
- Minor leaks or gaps in flashing.
- Hail damage.
- A few missing or broken shingles.
- Limited condensation in the attic.
- Small skylight leaks.
- Moss or algae growth.
Even though these aren’t immediate emergencies, they shouldn’t be ignored. Schedule a professional repair to prevent them from becoming bigger problems.
Helpful Table for Emergency Situations
| Situation | Emergency | Non-Emergency | Immediate Actions |
|---|---|---|---|
| Exposure to Elements | Yes | No | Call a roofer, use tarps to cover exposed areas |
| Structural Damage | Yes | No | Evacuate if necessary, call a roofer |
| High Risk of Major Damage | Yes | No | Call a roofer immediately, avoid using DIY fixes |
| Pests and Animals | Yes (severe) | No (minor) | Call a roofer if severe, address minor infestations during business hours |
| Neglect | Yes (serious leaks) | No (minor leaks) | Schedule a professional inspection |
| Fire Damage | Yes | No | Call a roofer, document damage for insurance |
| Tree Damage | Yes | No | Call a roofer, avoid the area if there are downed power lines |
| High Winds | Yes | No | Call a roofer, use temporary patches if safe |
| Lightning Strikes | Yes | No | Call a roofer, document damage |
| Other Weather Events | Yes | No | Call a roofer, use temporary measures to limit damage |
| Structural Collapse | Yes | No | Evacuate, call a roofer |
| Ice Dams | Yes (major) | No (minor) | Call a roofer, use de-icing measures |
| Mold | Yes (extreme) | No (minor) | Call a roofer, improve ventilation |
| Seriously Clogged Gutters | Yes (severe leak) | No (minor) | Clear gutters if safe, call a roofer if severe |
| Minor Leaks or Gaps | No | Yes | Schedule a professional repair |
| Hail Damage | No | Yes | Schedule a professional inspection |
| Missing or Broken Shingles | No | Yes | Schedule a professional repair |
| Limited Condensation in Attic | No | Yes | Improve ventilation, schedule inspection |
| Small Skylight Leaks | No | Yes | Schedule a professional repair |
| Moss or Algae Growth | No | Yes | Schedule a cleaning and inspection |
What To Do in an Emergency Roof Repair Situation
Finding yourself in an emergency roof situation can be overwhelming, but here’s a step-by-step guide to help you through it:
- Assess Danger: First and foremost, make sure everyone is safe. If the damage is severe and poses a risk of collapse, evacuate your home. Safety first, always.
- Do Not Attempt Repairs: I know it’s tempting to fix things yourself, but DIY repairs can be dangerous and might void your insurance. Leave it to the professionals.
- Call the Professionals: Many roofers, including us at Right Now Roofing, offer 24/7 emergency services. We’re just a call away, ready to help you out at any hour.
- Limit Damage Inside: While waiting for us to arrive, use buckets to catch water, run dehumidifiers, and move valuables to safer locations.
- Speak with Insurance: Document the damage with photos and inform your insurance agent. This helps smooth out the claims process.
What Will Roofers Do in an Emergency?
When you call us, here’s what you can expect:
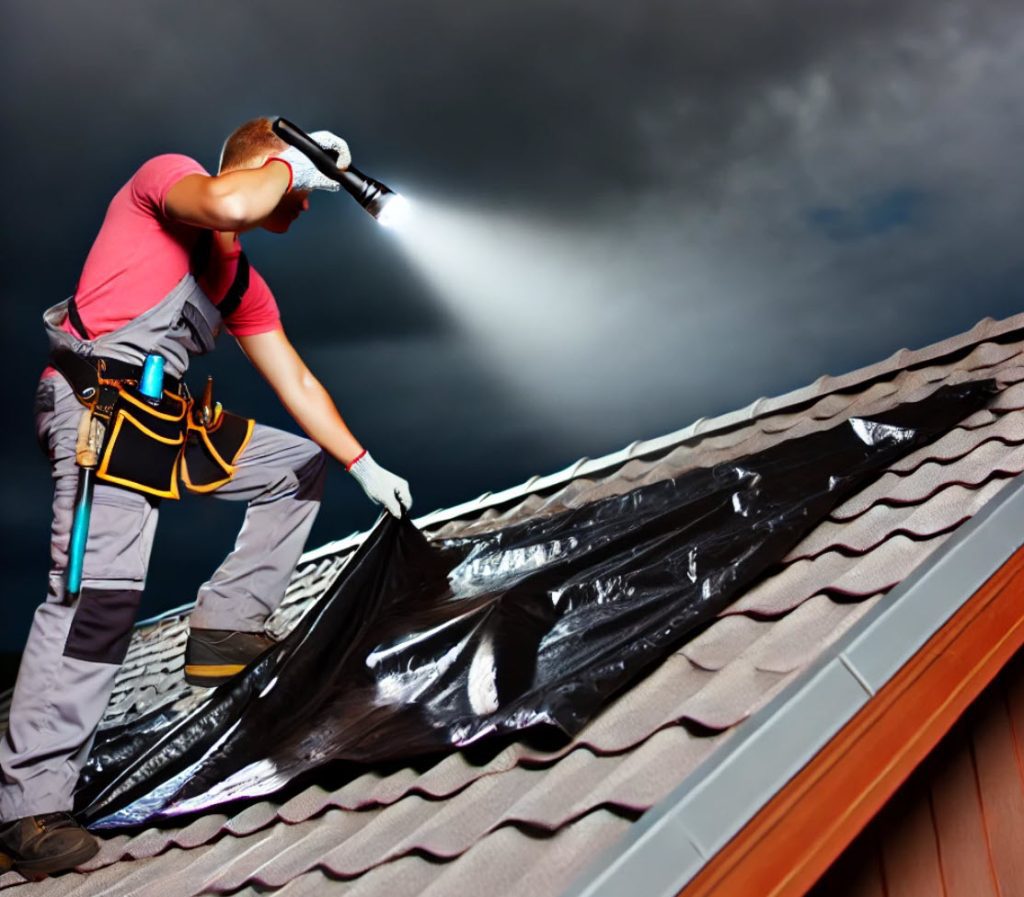
- Assess the Damage: We’ll thoroughly inspect your roof to identify the damage and determine the best course of action.
- Add a Temporary Patch: To prevent further damage, we’ll place a tarp or temporary patch over the affected areas. This buys us time to plan and schedule the necessary repairs.
- Provide a Quote: You’ll receive a detailed estimate for the repairs needed. If you’re filing an insurance claim, we’ll provide photos and any other documentation required.
- Schedule Repairs: We’ll work with you to schedule the repairs as soon as possible. After major storms, we prioritize homes with the most severe damage.
Financing Your Roof in Emergencies
Emergency repairs can be costly, but don’t worry—there are financing options available:
- Personal Lines of Credit: These can provide immediate funds.
- Emergency Roof Repair Grants: Look into available grants. See the Dept of Agriculture link here.
- Roofer Financing: Many roofers offer financing through third parties. We can discuss these options to find the best fit for you.
Ways to Avoid Emergency Repairs
Preventative maintenance is your best defense:
- Regular Inspections: Have professionals inspect your roof annually to catch potential issues early.
- Gutter Cleaning: Keep your gutters clear to prevent water backflow.
- Familiarize Yourself with Your Roof: Knowing how your roof should look can help you spot issues early.
Conclusion
Dealing with emergency roof repairs can be daunting, but with the right knowledge and approach, you can manage it effectively. Remember, we’re here to help at Right Now Roofing. Stay safe, stay calm, and let’s keep that roof over your head in tip-top shape!
Maurice Campbell brings over 20 years of extensive experience in the roofing and siding industry to his role as co-owner of Right Now Roofing. Maurice began his career in roofing installation, where his technical skills and problem-solving abilities set him apart. His career progressed into project management, where he successfully managed complex roofing and siding projects, ensuring they were completed on time and within budget.
Insulated Vinyl Siding: The Ultimate Guide for Homeowners
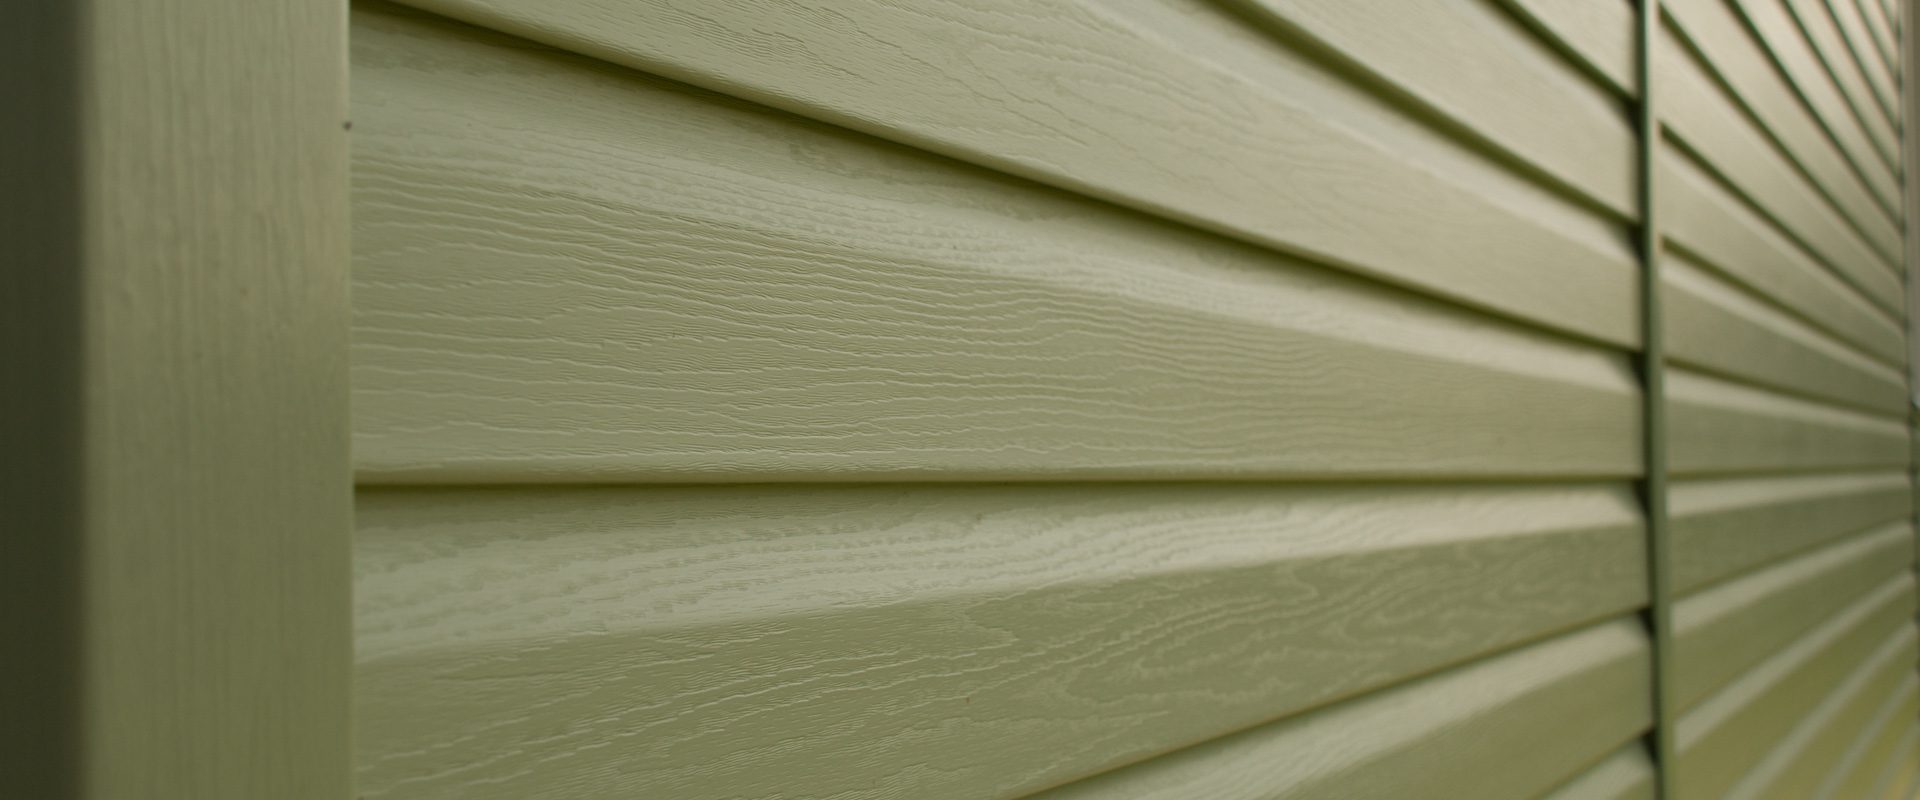
When it comes to choosing the right siding for your home, the options can be overwhelming. Each type of siding has its unique benefits, costs, and drawbacks. In this guide, we’ll explore the various types of siding available, with a special focus on insulated vinyl siding.
What is Insulated Vinyl Siding?
Insulated vinyl siding is an enhanced version of traditional vinyl siding, incorporating a layer of foam insulation that is bonded to the back of the vinyl. This added layer of insulation improves the siding’s energy efficiency, durability, and impact resistance.
Benefits of Insulated Vinyl Siding
- Energy Efficiency: The foam insulation helps reduce heat loss, keeping your home warmer in winter and cooler in summer. This can lead to significant savings on your energy bills.
- Durability: Insulated vinyl siding is more robust and can withstand impacts better than traditional vinyl siding, making it an excellent choice for areas prone to storms and hail.
- Low Maintenance: Vinyl siding requires minimal upkeep. It does not need painting and can be easily cleaned with a hose.
- Aesthetic Appeal: Available in various colors and styles, insulated vinyl siding can enhance the curb appeal of any home.
- Storm Damage Prevention: The additional insulation layer provides extra strength, helping the siding to resist dents and cracks caused by hail or debris during storms.
How Insulated Vinyl Siding Stands Up to Storms
In regions prone to severe weather, choosing siding that can withstand the elements is crucial. Insulated vinyl siding offers several advantages:
- Impact Resistance: The foam backing absorbs impact, reducing the likelihood of damage from hail or wind-blown debris.
- Reduced Noise: The insulation layer also acts as a sound barrier, reducing noise from heavy rain or wind.
- Improved Structural Integrity: The added insulation layer helps maintain the shape and integrity of the siding, preventing warping or sagging.
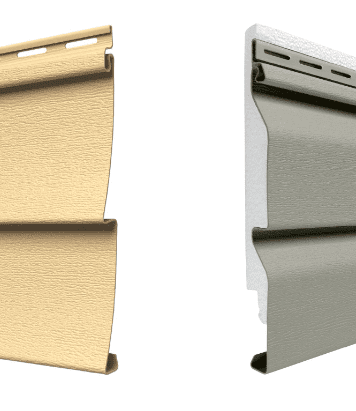
Insulated Vinyl Siding vs. Traditional Siding
Traditional Vinyl Siding:
- Cost: Generally cheaper than insulated vinyl siding.
- Installation: Easier and quicker to install due to its lighter weight and simpler structure.
- Maintenance: Low maintenance but can be prone to cracking in extremely cold weather.
- Energy Efficiency: Provides minimal insulation value.
Insulated Vinyl Siding:
- Cost: Higher initial cost due to the added insulation layer.
- Installation: Slightly more complex to install due to the foam backing, but still manageable for professional installers.
- Maintenance: Also low maintenance, with enhanced durability against impacts and weather conditions.
- Energy Efficiency: Significantly better insulation properties, leading to energy savings and improved home comfort.
How Attractive is Insulated Vinyl Siding?

Insulated vinyl siding is available in a wide range of colors, textures, and styles. Whether you prefer the look of traditional wood grain, smooth finishes, or more contemporary styles, there are options to suit every taste. The insulation layer also helps the siding maintain its shape and appearance over time, preventing issues like warping and sagging.
Does Insulated Vinyl Siding Help Insulate?
Yes, the foam insulation in insulated vinyl siding adds a layer of thermal resistance to your home. This can reduce heat transfer through the walls, making your home more energy-efficient. According to the U.S. Department of Energy, improving insulation can significantly reduce heating and cooling costs, making insulated vinyl siding a smart investment for long-term energy savings .
How Easy is Insulated Vinyl Siding to Install?
While slightly more complex to install than traditional vinyl siding due to the foam backing, insulated vinyl siding can still be installed relatively quickly by professional contractors. The key is to ensure that the insulation layer is properly aligned and secured to maximize its benefits. For DIY enthusiasts, it’s recommended to consult with professionals or thoroughly research installation techniques to avoid common pitfalls.
How Long Does Insulated Vinyl Siding Last?
Insulated vinyl siding is designed to be durable and long-lasting. With proper maintenance, it can last 20-40 years or more. The added foam insulation not only improves energy efficiency but also enhances the siding’s structural integrity, making it more resistant to impacts, weathering, and wear over time .
Does Insulated Vinyl Siding Affect Resale Value?
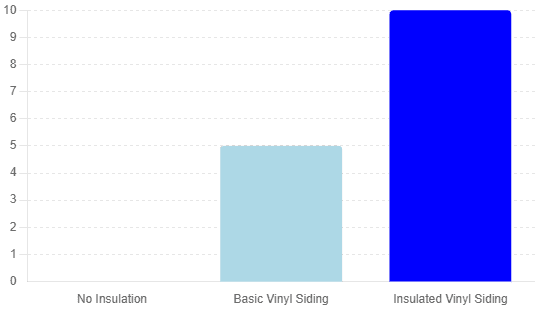
Yes, insulated vinyl siding can positively impact your home’s resale value. Potential buyers often look for homes with energy-efficient features, and insulated siding can be a major selling point. Additionally, its durability and low maintenance requirements make it an attractive option for homebuyers looking to avoid future renovation costs.
See chart below. By investing in insulated vinyl siding, you could gain up to 10% more on the resale of your home.
- National Association of Home Builders (NAHB) – Cost of Siding Materials
- Remodeling Magazine – Cost vs. Value Report
- U.S. Department of Energy – Insulation and Air Sealing
How Much Does Vinyl Siding Cost?
Here’s a comprehensive table comparing various types of siding, including insulated vinyl siding:
| Siding Type | Price per Square Foot | Pros | Cons |
|---|---|---|---|
| Insulated Vinyl | $4 – $12 | Energy efficient, durable, low maintenance, aesthetic | Higher initial cost than traditional vinyl |
| Traditional Vinyl | $2 – $7 | Affordable, low maintenance, variety of styles | Less impact resistant, can crack in extreme cold |
| Steel | $7 – $15 | Extremely durable, fire resistant, low maintenance | Can be prone to rust, higher cost |
| Wood | $6 – $12 | Natural look, can be painted/stained, good insulation | High maintenance, susceptible to pests and rot |
| LP SmartSide | $5 – $10 | Durable, impact resistant, treated to resist pests | Requires periodic painting, can be more expensive |
| James Hardie | $6 – $13 | Fire resistant, durable, aesthetic, low maintenance | Higher cost, requires professional installation |
| Fiber Cement | $5 – $10 | Durable, fire resistant, low maintenance | Heavy, requires professional installation, can crack |
| Aluminum | $3 – $6 | Lightweight, rust-resistant, low maintenance | Can dent easily, color may fade over time |
Understanding the R1 vs. R2 Rating System
The R-value is a measure of thermal resistance, indicating how well a material can resist heat flow. The higher the R-value, the better the material insulates. In the context of insulated vinyl siding, the R1 vs. R2 rating system is used to denote the insulation effectiveness of different siding products.
What is R1 Rating?
R1 Rating: This rating indicates that the siding provides an R-value of 1. This level of insulation offers basic thermal resistance, which is better than traditional, non-insulated siding but not as effective as higher-rated insulation materials.
Applications and Benefits:
- Basic Insulation: Suitable for climates where extreme temperatures are less common.
- Cost-Effective: Typically more affordable than higher R-value sidings.
- Energy Efficiency: Provides a moderate improvement in energy efficiency compared to non-insulated siding.
What is R2 Rating?
R2 Rating: This rating signifies that the siding provides an R-value of 2. This level of insulation offers significantly better thermal resistance compared to R1-rated siding, making it more effective at insulating a home.
Applications and Benefits:
- Enhanced Insulation: Ideal for regions with more extreme temperature fluctuations.
- Energy Efficiency: Offers better energy savings by reducing heat loss in winter and heat gain in summer.
- Comfort: Contributes to a more consistent indoor temperature, improving overall home comfort.
Comparison of R1 and R2 Ratings
| Feature | R1 Rating | R2 Rating |
|---|---|---|
| Thermal Resistance | Basic (R-value of 1) | Enhanced (R-value of 2) |
| Energy Efficiency | Moderate improvement | Significant improvement |
| Cost | More affordable | Higher upfront cost |
| Suitability | Mild climates | Extreme climates |
| Comfort Level | Moderate improvement in comfort | Higher improvement in comfort |
Why Choose Higher R-Value Siding?
Choosing a higher R-value siding, such as R2, provides several advantages:
- Energy Savings: Higher R-value sidings reduce the amount of energy needed to heat or cool your home, leading to lower utility bills.
- Increased Comfort: Better insulation helps maintain a consistent indoor temperature, enhancing comfort.
- Environmental Impact: Reducing energy consumption lowers your carbon footprint, contributing to environmental sustainability.
- Resale Value: Homes with better insulation can be more attractive to potential buyers, potentially increasing resale value.
Summary
Choosing the right siding for your home involves considering various factors, including cost, durability, maintenance, and aesthetics. Insulated vinyl siding stands out as an excellent choice for homeowners looking for a balance of energy efficiency, durability, and low maintenance. Its added benefits in preventing storm damage make it particularly appealing for those in regions prone to severe weather.
To see insulated vinyl siding in action and learn more about its benefits, watch our embedded video below.
For more information on siding options or to get a quote, contact Right Now Roofing today!
Justin Hansen is a seasoned professional in the roofing and siding industry, boasting over 15 years of hands-on experience. Starting his career in residential roofing, Justin quickly established a reputation for meticulous attention to detail and superior craftsmanship. His commitment to quality and excellence propelled him into more complex commercial projects, where he consistently delivered outstanding results.

Winter Proof Your Roof Now: Beat the Cold in Minneapolis/St. Paul
One of the biggest questions we get as a roofing contractor is:
“Should I start thinkging about the winter-proofing my roof even though it’s summer?”
As we enjoy the summertime here in Minneapolis/St. Paul, the last thing on most people’s minds is the freezing winter ahead. However, summer is the perfect time to prepare your roof for the harsh winter conditions that come with living in the Twin Cities. By taking proactive steps now, you can save yourself from costly repairs and ensure your home remains warm and cozy all winter long. Let’s dive into some fun yet informative tips to winter-proof your roof!
1. Inspect Your Roof Thoroughly
Why Inspect Now? Summer weather provides optimal conditions for a thorough roof inspection. Plus, any repairs needed are easier to handle without the risk of ice and snow.
What to Look For:
- Shingles: Check for any missing, cracked, or curling shingles.
- Flashing: Ensure the flashing around chimneys, vents, and skylights is secure and undamaged.
- Attic: Inspect the attic for signs of leaks or water damage.
2. Clean Your Gutters and Downspouts
Why Gutters Matter: Clean gutters help prevent water buildup that can lead to ice dams—a common winter headache.
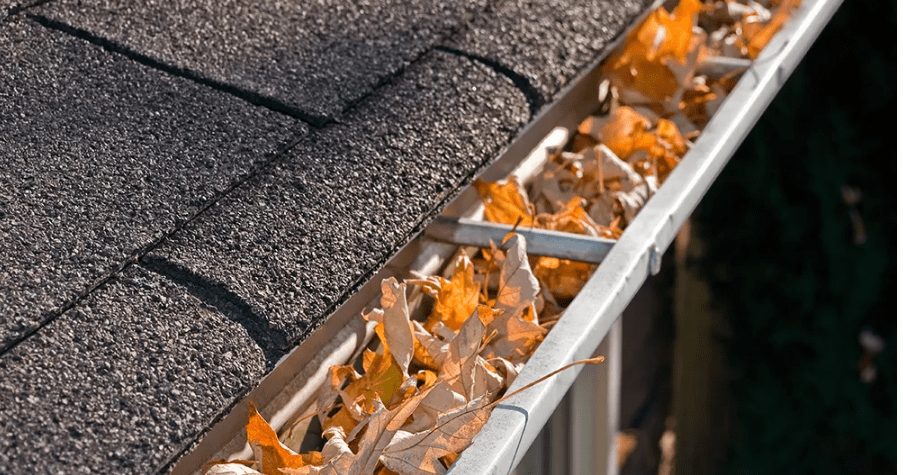
Gutter Cleaning Tips:
- Remove Debris: Clear out leaves, twigs, and other debris.
- Check Drainage: Ensure water flows freely through your downspouts and away from your home’s foundation.
3. Trim Overhanging Branches
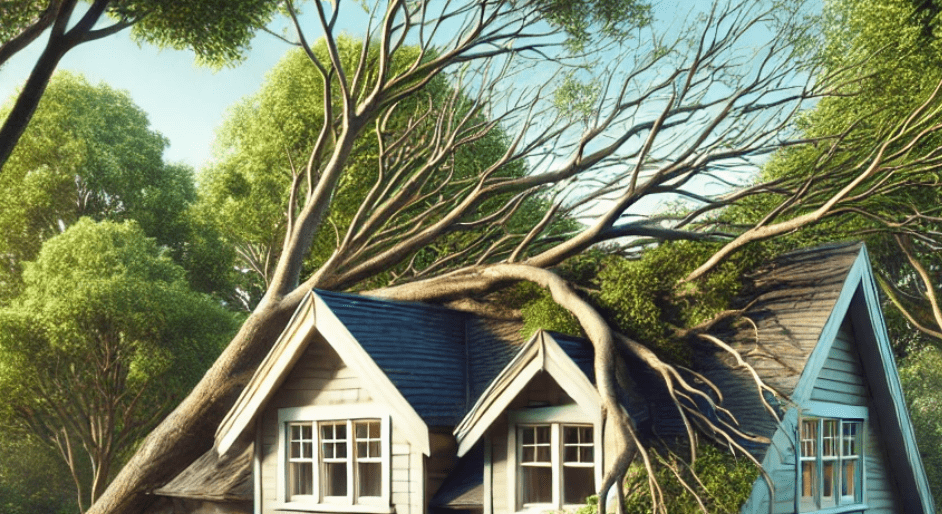
Why Trim Trees?: Prevent branches from breaking off during winter storms and causing roof damage. Plus, it reduces the debris that clogs gutters.
4. Seal Roof Penetrations
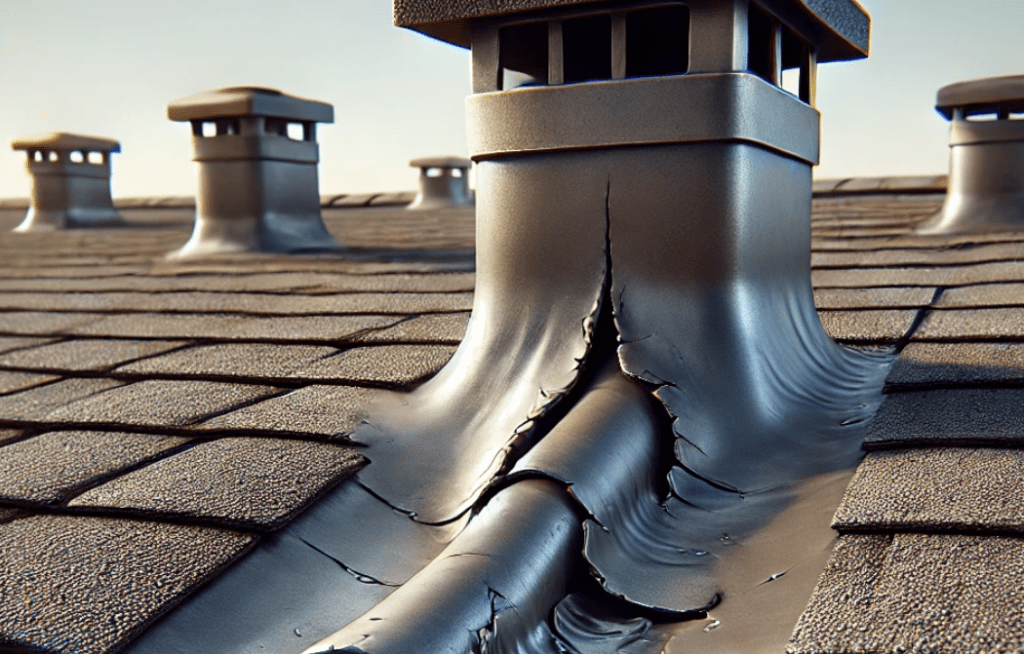
Seal It Up: Inspect areas where vents, chimneys, and skylights penetrate the roof. Reseal any gaps with roofing cement or silicone caulk to prevent leaks.
5. Insulate and Ventilate Your Attic

Keep it Cozy: Proper insulation and ventilation keep your attic temperature stable, preventing ice dams and reducing heating costs.
Key Actions:
- Insulate: Ensure your attic is well-insulated.
- Ventilate: Maintain adequate ventilation to keep the attic cold and dry.
6. Install Heat Cables
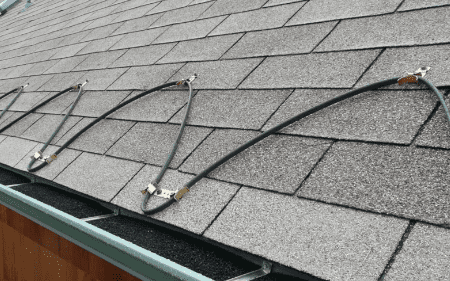
Melt the Ice: Heat cables can prevent ice dams by melting snow and ice along your roof’s edges. Professional installation is recommended for safety and effectiveness.
7. Prepare for Snow Removal
Tools of the Trade: Invest in a roof rake to safely remove snow buildup. Avoid climbing on your roof—safety first!
8. Schedule a Professional Roof Inspection
Expert Insight: A professional roofer can spot potential issues you might miss. Regular maintenance can extend your roof’s lifespan and prevent major problems.
Call Today (651) 372-4404
9. Prepare an Emergency Repair Kit
Be Ready: Have a basic repair kit with roofing tarps, a hammer, roofing nails, and roof sealant for quick fixes during winter storms.
Winter Roofing Facts
- Fact 1: Ice dams form when the roof’s surface temperature is uneven, causing snow to melt and refreeze at the eaves.
- Fact 2: Proper attic insulation can save up to 15% on heating and cooling costs (EnergyStar).
- Fact 3: Roof leaks are more common in winter due to freeze-thaw cycles.
- Fact 4: Heat cables can reduce ice dams by 90% when properly installed (US Department of Energy).
Comparison Chart: Roof Maintenance Costs vs. Repair Costs
| Maintenance Task | Cost (Approx.) | Potential Repair Cost (If Ignored) |
|---|---|---|
| Roof Inspection | $150 – $300 | $500 – $3,000 (major repairs) |
| Gutter Cleaning | $70 – $200 | $500 – $2,000 (water damage) |
| Trimming Trees | $200 – $700 | $1,000 – $5,000 (roof damage) |
| Attic Insulation | $1,000 – $3,000 | $5,000 – $10,000 (ice dam repair) |
| Heat Cable Installation | $500 – $1,500 | $2,000 – $5,000 (ice dam damage) |
Conclusion
Winter may feel far away, but summer is the ideal time to prepare your roof for the cold months ahead. By following these tips, you can ensure your home remains safe, warm, and damage-free all winter long. Don’t wait until the first snowfall—start your roof winter-proofing today!
For a professional roof inspection and maintenance services, contact Right Now Roofing. We’re here to help you stay one step ahead of winter’s chill!
Sources:
- EnergyStar. “Sealing and Insulating.” https://www.energystar.gov
- U.S. Department of Energy. “Preventing Ice Dams.” https://www.energy.gov
Justin Hansen is a seasoned professional in the roofing and siding industry, boasting over 15 years of hands-on experience. Starting his career in residential roofing, Justin quickly established a reputation for meticulous attention to detail and superior craftsmanship. His commitment to quality and excellence propelled him into more complex commercial projects, where he consistently delivered outstanding results.
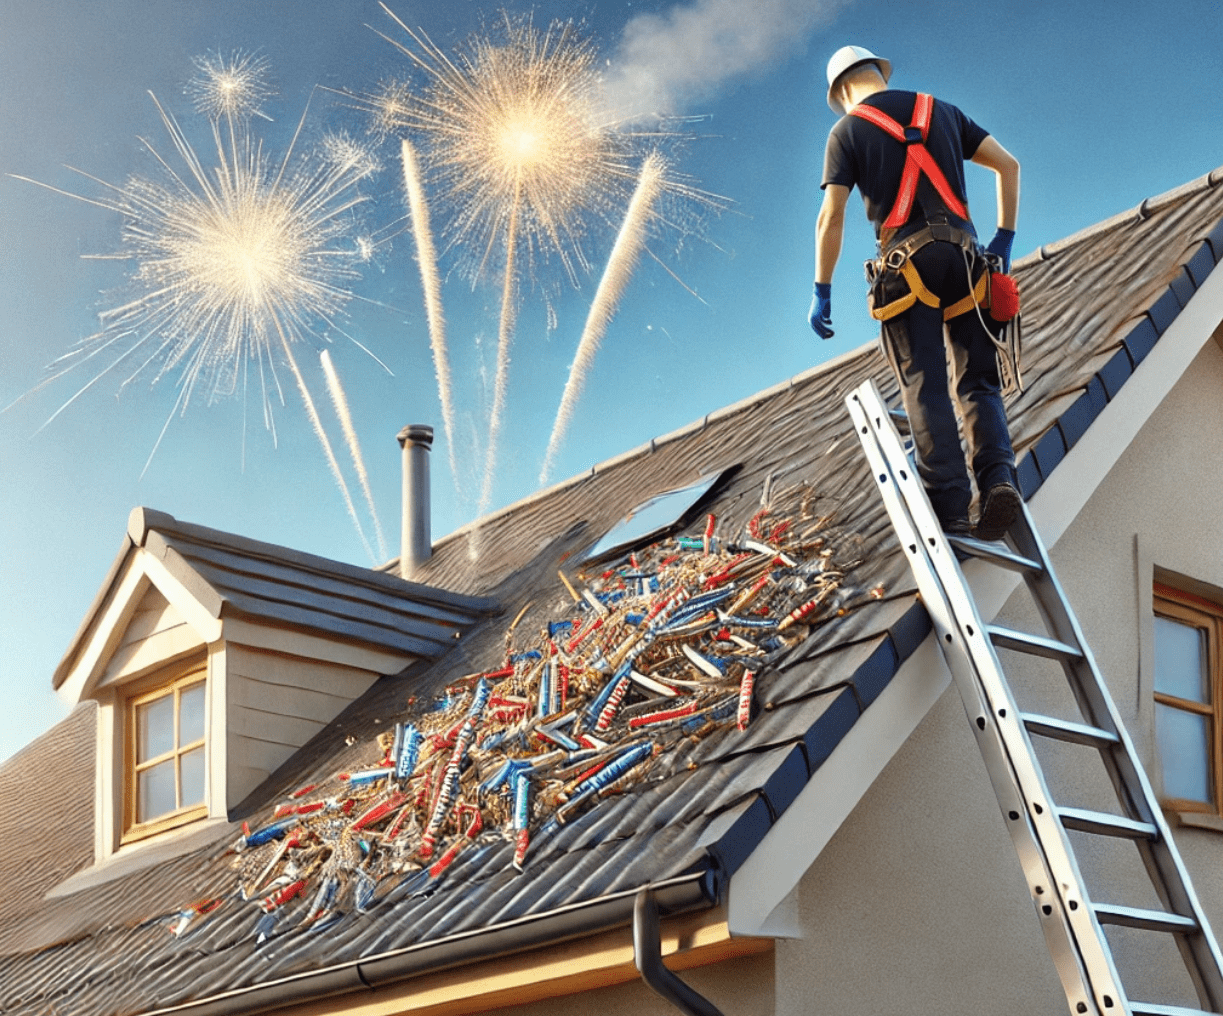
The Ultimate Guide to Cleaning Up Fireworks from Your Roof After the Fourth of July
The Fourth of July is a time for celebration, and fireworks are an integral part of the festivities. However, once the excitement dies down, homeowners may find themselves with a new concern: cleaning up the remnants of fireworks from their roofs. Firework debris can be hazardous, potentially causing damage or posing fire risks if not properly managed. In this guide, we will cover essential steps and best practices for safely cleaning your roof after a fireworks celebration.
Why Clean Your Roof After Fireworks?
Fireworks can leave behind various types of debris, including paper, plastic, and metal fragments. These remnants can clog gutters, damage roofing materials, and even start fires if they are not removed promptly. Cleaning your roof ensures that your home remains safe and maintains its structural integrity.
Safety First: Precautions Before Cleaning
- Wait for Daylight: Ensure that you perform the cleanup during the daytime for better visibility.
- Wear Protective Gear: Use gloves, safety goggles, and non-slip shoes to protect yourself from sharp debris and slips.
- Check Weather Conditions: Avoid cleaning on windy or rainy days to prevent accidents.
- Use Proper Equipment: Have a sturdy ladder, a roof rake, a broom, and a leaf blower handy.
Step-by-Step Cleanup Guide
1. Inspection
Start by inspecting your roof from the ground using binoculars. Look for visible debris, scorch marks, or any signs of damage. This initial inspection will help you plan your cleanup process more effectively.
2. Clear Loose Debris
Using a roof rake or a soft-bristled broom, gently sweep away loose debris. Start from the highest point of your roof and work your way down to avoid pushing debris into your gutters.
3. Check and Clean Gutters
Fireworks debris can easily clog gutters, leading to water damage. Clean your gutters thoroughly to ensure they are free of obstructions. Use a gutter scoop or a small trowel to remove larger pieces of debris, followed by flushing the gutters with water to clear smaller particles.
4. Inspect for Damage
Carefully examine your roof for any signs of damage caused by fireworks, such as:
- Burn Marks: Check for scorch marks or burn holes in the roofing material.
- Shingle Damage: Look for cracked, missing, or curled shingles.
- Structural Damage: Ensure that there are no visible signs of structural damage to the roof or support beams.
If you find any damage, it may be necessary to call a professional roofing contractor for repairs.
5. Remove Stubborn Debris
For debris that is stuck or difficult to remove, use a leaf blower to dislodge it gently. Be cautious not to use high-pressure settings that could damage roofing materials.
6. Fire Hazard Check
Fireworks remnants can be a fire hazard, especially if they are still smoldering. Check all debris for any signs of heat or smoke. Use a fire extinguisher or water to douse any potentially hazardous materials.
7. Final Inspection
After removing all visible debris, perform a final inspection to ensure nothing has been missed. Pay special attention to hidden areas, such as valleys and roof vents.
8. Maintenance Tips
Regular roof maintenance can help prevent future issues. Consider the following tips:
- Trim Overhanging Branches: This reduces the risk of debris accumulation and potential fire hazards.
- Install Gutter Guards: Gutter guards can help keep debris out and make future cleanups easier.
- Schedule Regular Inspections: Have a professional inspect your roof annually to identify and address any potential issues early.
Conclusion
Cleaning up after a fireworks celebration is crucial for maintaining the safety and longevity of your roof. By following these steps, you can ensure that your home remains protected from potential damage and hazards. If you are ever unsure about performing roof maintenance yourself, do not hesitate to contact a professional roofing contractor for assistance.
Sources:
Maurice Campbell brings over 20 years of extensive experience in the roofing and siding industry to his role as co-owner of Right Now Roofing. Maurice began his career in roofing installation, where his technical skills and problem-solving abilities set him apart. His career progressed into project management, where he successfully managed complex roofing and siding projects, ensuring they were completed on time and within budget.