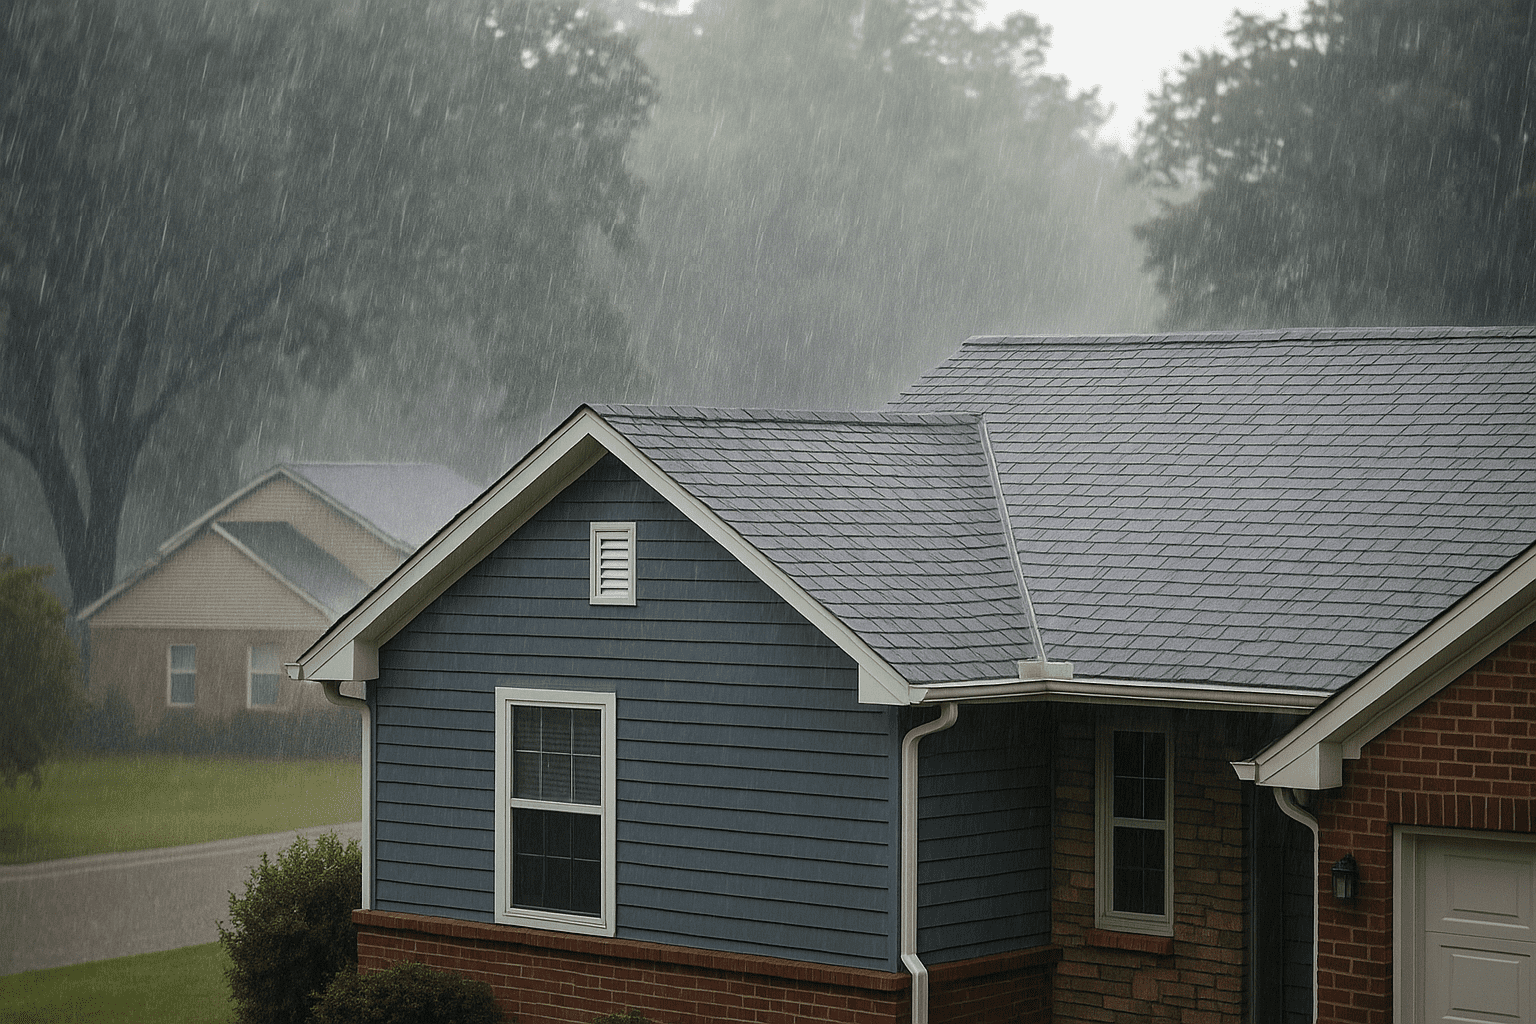
After a Hailstorm in the Twin Cities: 10 Steps to Protect Yourself and Your Roof from Scammers
After a severe hailstorm in the Twin Cities, many homeowners find themselves scrambling to assess the damage. Unfortunately, this is also when disreputable contractors try to take advantage of people in need of roof repairs. At Right Now Roofing, we’ve heard the horror stories, and we want to make sure you’re informed and protected. Here are 10 steps you can take to safeguard your home and avoid being scammed.
1. Understand the Scope of Damage to Your Home
In Minnesota, severe hail can damage your roof, siding, and windows. Before calling in an insurance claim, inspect the damage yourself or have a reputable contractor provide photo documentation. Make sure you agree with their findings. Filing unnecessary claims could harm you in the future and raise your premiums.
2. Verify the Company You’re Considering
Do a quick Google search and check reviews for any roofing company you’re considering in the Twin Cities. Look them up on the Better Business Bureau (BBB) to check for complaints or negative history. If they’re not a member of the BBB, that’s a red flag. Additionally, platforms like Angi and Nextdoor can provide valuable local insights from your neighbors.
3. Ask for Local References
Be sure to ask for references specific to the Twin Cities area and take the time to contact them. Ask about their experience, the quality of the work, and if the company fulfilled their promises. A company that regularly works in your local area should have plenty of references.
4. Clarify the Role of the Salesperson
In Minnesota’s storm restoration industry, it’s common for salespeople to serve multiple roles, such as job supervisor or production manager. Ask your salesperson what their role will be during your project and ensure there’s clear accountability for overseeing the work.
5. Carefully Read Contracts
Never feel pressured into signing an “insurance proceeds agreement” without fully understanding it. In Minnesota, you have the legal right to cancel any contract within three days of signing. Make sure you take the time to read the contract thoroughly and don’t be rushed by any high-pressure tactics.
6. Confirm Insurance Coverage
Ensure that the roofing company and any subcontractors have both workers’ compensation and liability insurance. This protects you as a homeowner if accidents occur on your property. You can ask for proof of insurance and verify it before any work begins.
7. Review Your Insurance Loss Statement
Your insurance loss statement will detail what’s covered, but sometimes items can be left off that are necessary for code compliance in Minnesota. Contractors may need to supplement for these items. Make sure you understand what is being covered and ask questions if anything is unclear.
8. Don’t Pay Until Materials Are Delivered
In Minnesota, it’s not uncommon for roofing projects to be delayed due to weather. Don’t hand over your Actual Cash Value (ACV) check before materials arrive on your property. The safest approach is to provide a down payment on the day the project starts, after confirming that materials are on-site and work has begun.
9. Secure Lien Waivers Before Final Payment
Before making your final payment, ensure you receive unconditional lien waivers from both the material suppliers and subcontractors. These waivers guarantee that all bills have been paid, protecting you from future legal claims on your property.
10. Ensure Supervision Throughout Installation
A reputable roofing company will have a supervisor present throughout the project. This person should:
- Be there at the start of the tear-off to inspect the decking.
- Oversee the installation of the ice and water shield, especially important for Minnesota’s harsh winters.
- Perform a final inspection upon completion to ensure the job was done to code and no property was damaged.
Having a dedicated supervisor helps identify underlying issues and ensures proper communication with your insurance company.
Conclusion
By following these steps, you’ll protect yourself from scammers and ensure your roofing project goes smoothly. Right Now Roofing is proud to serve homeowners in the Twin Cities area with integrity and professionalism. If you’ve been affected by a recent storm, contact us today for a free consultation.
FAQs
Q: What is an “insurance proceeds agreement”?
A: An insurance proceeds agreement allows the contractor to manage the insurance claim process on your behalf. However, it’s essential to fully understand the terms before signing to avoid surprises down the road.
Q: How do I check a roofing company’s reputation in Minnesota?
A: Look up the company on Google, the BBB, and ask for local references. Platforms like Angi and Nextdoor can also provide insights from other Minnesota homeowners.
Justin Hansen is a seasoned professional in the roofing and siding industry, boasting over 15 years of hands-on experience. Starting his career in residential roofing, Justin quickly established a reputation for meticulous attention to detail and superior craftsmanship. His commitment to quality and excellence propelled him into more complex commercial projects, where he consistently delivered outstanding results.
Tips for Documenting Roof Damage for Insurance in Minnesota
When a storm hits or a tree falls, the last thing homeowners want to think about is insurance paperwork. However, documenting roof damage correctly can make all the difference when it comes to filing a successful insurance claim. In Minnesota, certain rules and procedures can help ensure that you’re properly covered for any roof-related incidents. Here’s what you need to know.
Step 1: Understand Minnesota’s Insurance Requirements
In Minnesota, most homeowners’ insurance policies cover damage caused by storms, hail, wind, or falling objects such as trees. However, the coverage for the cost of repairs largely depends on the policy specifics. Minnesota law requires that claims for damage be filed within a reasonable amount of time after the incident occurs. Some policies may have a statute of limitations, so check your policy for specific time frames.
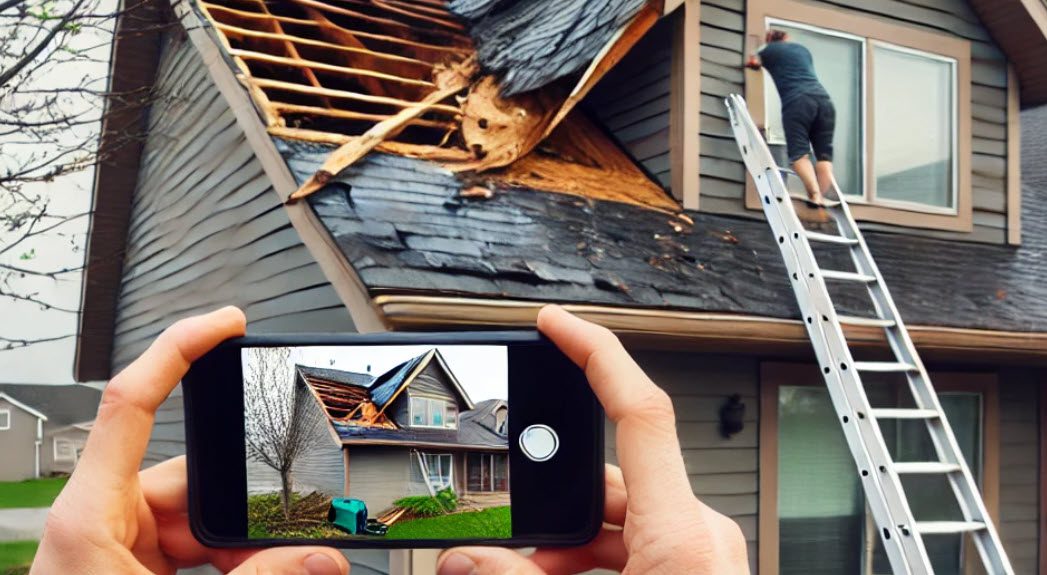
Step 2: Start by Documenting the Damage Immediately
After ensuring your home is safe, your first step is to take clear and comprehensive photos of the roof damage. Include wide shots of the roof and close-up photos of any visible issues like missing shingles, punctures, or debris. It’s also important to:
- Use timestamps on photos: Minnesota insurance adjusters often require proof of when the damage occurred. Most smartphones will automatically do this, but make sure the settings are enabled.
- Document from multiple angles: Take photos from ground level and, if safe, a ladder or drone.
- Capture the environment: Minnesota weather can be unpredictable, so be sure to document the conditions during and after the damage occurred (e.g., fallen trees, snow, hail).
Step 3: Write a Detailed Incident Report
Beyond photos, write down the events leading up to and following the incident. Include:
- The date and time of the event.
- Weather conditions before and after the damage (e.g., severe winds, heavy snowfall).
- Any actions you took to mitigate further damage (such as placing a tarp).
Step 4: Preserve Evidence for the Insurance Adjuster
Insurance companies in Minnesota may send an adjuster to evaluate the damage, so avoid making permanent repairs until after the inspection. However, it’s wise to take temporary measures, such as placing a tarp, to prevent further damage. Keep any receipts for temporary repairs, as these can sometimes be reimbursed.
Step 5: Be Aware of Minnesota’s “Right to Repair” Laws
Minnesota homeowners have the right to choose their own contractor for repairs. Your insurance company might suggest certain contractors, but you’re not obligated to use them. At Right Now Roofing, we frequently work with insurance companies to ensure repairs meet all necessary requirements.
Comparison Chart: Roof Damage Documentation Tips
| Documenting Step | Why It’s Important | Best Practices |
|---|---|---|
| Photographs | Proof of damage and timing | Take wide shots and close-ups, use timestamps |
| Incident Report | Provides context for insurance | Include weather details and the sequence of events |
| Temporary Repairs | Prevent further damage | Use tarps, keep all receipts for reimbursement |
| Preserving Evidence | For adjuster evaluation | Don’t make permanent repairs until after inspection |
FAQs
1. What type of roof damage is typically covered by insurance in Minnesota?
Most policies cover damage from storms, wind, hail, and falling debris. However, pre-existing damage or damage due to poor maintenance may not be covered.
2. How long do I have to file a claim in Minnesota?
While most policies don’t have a strict deadline, it’s advisable to file as soon as possible after the damage occurs to avoid complications.
3. Can I choose my own contractor for repairs?
Yes, under Minnesota’s “Right to Repair” laws, homeowners can choose their own contractor for roofing repairs.
4. Should I make temporary repairs before the adjuster arrives?
Yes, temporary repairs like placing a tarp can prevent further damage. Just be sure to document everything and keep receipts.
By following these tips, you can ensure a smoother insurance process and get your roof back to its best condition. If you need help with roof repairs or have questions about documenting damage, feel free to reach out to us at Right Now Roofing.
Sources:
Minnesota Insurance and Documentation Requirements: Homeowners in Minnesota typically need to document storm-related roof damage carefully to ensure successful insurance claims. Minnesota insurance policies generally cover damage from natural events like wind, hail, and falling trees. Homeowners should take photos with timestamps and provide detailed documentation. Always ensure any temporary repairs are documented and receipts kept for insurance reimbursement(
A. Fricker Roofing and Waterproofing
FEMA Guidelines on Hazardous Trees: If the damage involves hazardous trees, such as large branches or fallen trees, FEMA guidelines may apply if the event was declared a disaster. FEMA typically covers the removal of hazardous trees larger than six inches in diameter if they pose an imminent threat(
Justin Hansen is a seasoned professional in the roofing and siding industry, boasting over 15 years of hands-on experience. Starting his career in residential roofing, Justin quickly established a reputation for meticulous attention to detail and superior craftsmanship. His commitment to quality and excellence propelled him into more complex commercial projects, where he consistently delivered outstanding results.
A Tree Just Fell On My Roof: What Are My Next Steps?
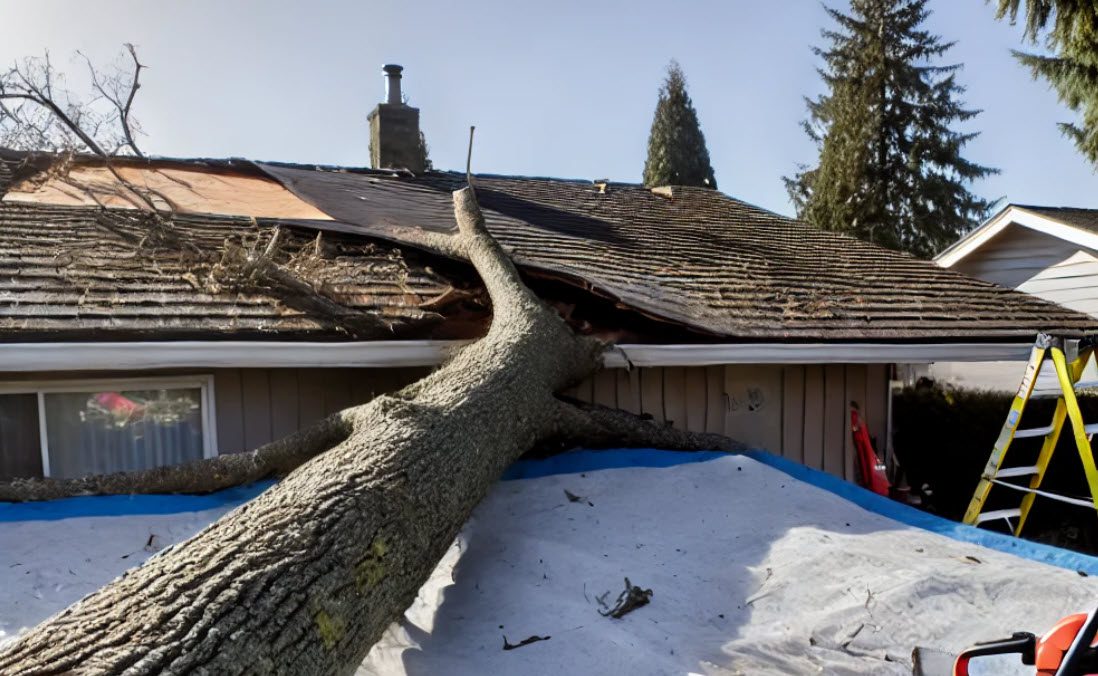
There’s nothing quite as unsettling as a tree crashing onto your roof. Whether it’s from one of our many Minnesota wind, rain, hail or snow storms or an unexpected fall, it can leave you feeling overwhelmed and unsure of what to do next. Having helped homeowners through similar situations, I wanted to provide a clear guide on the steps you should take immediately after a tree falls on your roof. Here’s what you need to know:
Step 1: Ensure Safety First
Before anything else, ensure everyone inside your home is safe. If the tree has caused structural damage, there’s a risk of further collapse, so evacuate the house if necessary. Do not attempt to inspect the damage yourself right away, especially if power lines are involved or the tree is large enough to affect multiple areas of your home.
Step 2: Contact Emergency Services (If Necessary)
If the tree has brought down power lines, there is immediate structural danger, or someone is injured, call 911. Electrical hazards and structural instability can be deadly, so always prioritize safety.
Step 3: Document the Damage!
Before any repairs begin, document the damage by taking photos and videos of the tree, the roof, and any additional parts of the house that may have been affected. This documentation will be essential when dealing with your insurance company.
Step 4: Contact a Trusted Roofing Company FIRST, Then Your Insurance Company
In our opinion, this is where many people go wrong. First you should contact a trusted roofing company before contacting the insurance company. Why? Because the roofing company will become your educated buffer to make sure that you get everything covered financially that you need to remove the tree and to fix the damage. Then, contact the insurance company to report the incident. Be prepared to provide them with the documentation and knowledge youve gained & gathered from the roofing company and follow their process for filing a claim. They will likely send an adjuster to assess the damage.
Step 5: Prevent Further Damage
If it’s safe, you’ll want to take immediate steps to prevent further damage. This might include covering the damaged area of your roof with a tarp to avoid water damage, especially if rain is expected. Most roofing companies, including ours at Right Now Roofing, can assist with temporary repairs while you wait for the insurance adjuster.
Step 6: Hire a Professional Roofing Company
Once you’ve spoken with your insurance company, it’s time to hire a professional roofing company to assess and repair the damage. At Right Now Roofing, we’ve handled countless cases like this, and we’ll work with your insurance adjuster to make sure the repairs are covered and done right. Our goal is to restore your roof and your peace of mind as quickly as possible.
Comparison Chart: Tree Damage vs. Other Common Roof Emergencies
| Type of Emergency | Immediate Action Required | Potential Roof Damage | Repair Time | Insurance Coverage |
|---|---|---|---|---|
| Tree Falling on Roof | Evacuate if unsafe, call a roofer | Structural, punctures, leaks | 1-3 weeks | Often covered |
| Hail Damage | Inspect, document, call roofer | Dents, cracks, missing shingles | 1-2 weeks | Covered if severe |
| Wind Damage | Check for loose shingles/debris | Missing shingles, leaks | 1-2 weeks | Often covered |
| Water Leaks | Prevent further water entry | Water damage to attic/ceiling | 1-2 weeks | Covered if sudden |
FAQs
1. Will my insurance cover tree damage to my roof?
Most homeowners’ insurance policies cover damage from fallen trees if the tree fell due to a covered peril (e.g., storm, wind). However, damage caused by lack of maintenance or negligence might not be covered.
2. How long will it take to repair my roof?
Repair times vary depending on the extent of the damage and the availability of materials, but typically it takes between 1 to 3 weeks for full roof restoration.
3. Do I need to remove the tree myself?
No, it’s essential to hire professionals to safely remove the tree. Trying to remove it yourself could cause more damage to your home or even personal injury.
4. Can you help with the insurance claim process?
Yes, at Right Now Roofing, we work closely with your insurance adjuster to make sure the claims process is smooth and that all necessary repairs are covered.
Maurice Campbell brings over 20 years of extensive experience in the roofing and siding industry to his role as co-owner of Right Now Roofing. Maurice began his career in roofing installation, where his technical skills and problem-solving abilities set him apart. His career progressed into project management, where he successfully managed complex roofing and siding projects, ensuring they were completed on time and within budget.

TPO vs. EPDM Roofing: Which is Better for Your Commercial Building?
The main difference between TPO and EPDM roofing lies in their material composition and energy efficiency. TPO is a single-ply membrane known for its reflective white surface, which helps reduce cooling costs in hot climates. In contrast, EPDM is a synthetic rubber membrane, typically black, known for its durability and proven track record, making it ideal for buildings in regions with extreme temperature fluctuations.
| Feature | TPO Roofing | EPDM Roofing |
|---|---|---|
| Material Composition | Thermoplastic Olefin, a blend of polypropylene and ethylene-propylene rubber. | Synthetic rubber made from ethylene and propylene. |
| Energy Efficiency | Highly reflective white surface reduces cooling costs in hot climates. | Typically black, absorbs heat; white options or coatings available to improve reflectivity. |
| Durability | Good durability with heat-welded seams; newer material with evolving long-term data. | Proven durability with over 50 years of performance data; highly resistant to extreme temperatures. |
| Installation & Maintenance | Easy installation with heat-welded seams; lower maintenance with resistance to dirt and algae. | Simple installation with adhesive or mechanical fasteners; easy to repair with patches. |
When it comes to selecting the right roofing material for your commercial building, the choice can often feel overwhelming. With so many options on the market, it’s essential to understand the differences between materials and how they can impact your building’s longevity, energy efficiency, and overall costs. Two of the most popular commercial roofing materials today are Thermoplastic Olefin (TPO) and Ethylene Propylene Diene Monomer (EPDM). Each has its strengths and weaknesses, making it crucial to understand which might be better suited for your specific needs.
Understanding TPO Roofing
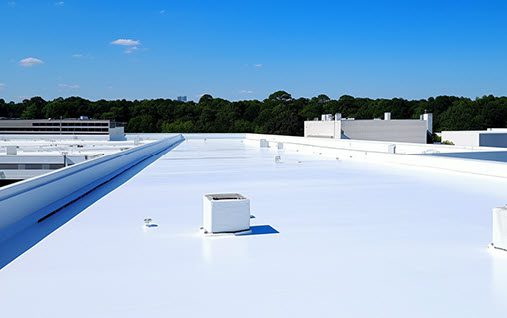
TPO roofing is a relatively new roofing material, gaining popularity due to its energy efficiency and cost-effectiveness. It is a single-ply membrane composed primarily of a blend of polypropylene and ethylene-propylene rubber, which gives it flexibility and strength. TPO membranes are typically white, reflecting the sun’s UV rays, making them an energy-efficient option for commercial buildings, especially in warmer climates.
One of the key advantages of TPO is its ability to resist dirt, algae, and mildew growth, which can be particularly beneficial for buildings located in humid or coastal areas. Additionally, TPO roofs are known for their heat-welded seams, which provide superior strength and durability compared to adhesive-based systems.
However, TPO is not without its challenges. Because it is a newer material, the long-term durability and performance of TPO roofs are still being studied. Some earlier formulations had issues with seam failures and cracking under extreme temperature fluctuations, but many manufacturers have since improved their products to address these concerns.
Understanding EPDM Roofing
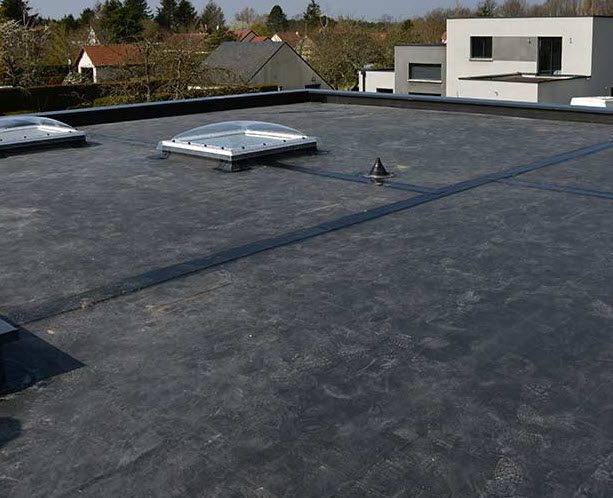
EPDM roofing has been a staple in the commercial roofing industry for decades. It is a synthetic rubber membrane made primarily of ethylene and propylene derived from oil and natural gas. EPDM roofs are typically black, though white EPDM is available for those seeking a more reflective surface.
One of the most significant advantages of EPDM is its proven track record. With over 50 years of performance data, EPDM has demonstrated its ability to withstand a wide range of weather conditions, from extreme heat to freezing temperatures. Its flexibility makes it highly resistant to thermal shock, and its simple installation process makes it a cost-effective option for many commercial building owners.
EPDM roofs are also known for their ease of maintenance and repair. Punctures and tears can often be repaired with simple patches, and the material’s long life expectancy makes it a popular choice for low-slope commercial roofs.
However, EPDM’s black surface can absorb heat, leading to higher cooling costs in warmer climates. This issue can be mitigated by using a white EPDM membrane or by applying a reflective coating, but these solutions can add to the overall cost.
Real-Life Story #1: The Warehouse Dilemma
A few years ago, we were approached by a client who owned a large warehouse in an area downtown Minneapolis that had zero shade or other buildings around it to allow the roof to cool in the summer. The building had an aging EPDM roof that had been in place for over 25 years. While the EPDM roof had served the building well, the client was facing skyrocketing cooling costs during the summer months. The black surface of the EPDM was absorbing the sun’s heat, making it nearly impossible to keep the warehouse cool without running the air conditioning constantly.
After assessing the situation, we recommended replacing the old EPDM roof with a new TPO roof. The reflective white surface of the TPO membrane promised to reduce the building’s cooling costs significantly. The client was initially hesitant due to concerns about TPO’s long-term durability, but after discussing the advancements in TPO technology and offering a solid warranty, they decided to make the switch.
The result? The client reported a noticeable decrease in cooling costs during the first summer after the installation. The TPO roof not only helped lower energy bills but also provided a clean, modern look to the building. This experience reinforced our belief in the effectiveness of TPO for buildings in hot climates.
Real-Life Story #2: The Manufacturing Facility
On the other side of the spectrum, we worked with a manufacturing facility located in St. Paul. The owner was very particular about having a roof that can withstand our harsh winters. He wanted it to withstand our crazy Minnesota temperature extremes without frequent maintenance or repairs.
Given the facility’s location and the owner’s desire for a long-lasting, low-maintenance roof, we recommended sticking with an EPDM membrane. The flexibility and durability of EPDM made it the ideal choice for a building that would be exposed to such a wide range of temperatures. Additionally, the black EPDM surface would help melt snow and ice more quickly during the winter months, reducing the risk of leaks or damage.
Several years after the installation, the owner reported that the EPDM roof had performed exceptionally well, withstanding heavy snow, ice, and summer heat without any significant issues. The decision to go with EPDM proved to be a wise investment for the facility, providing peace of mind and protecting the building for years to come.
Which Roofing Material is Right for You?
When deciding between TPO and EPDM for your commercial building, there are several factors to consider:
- Climate: If your building is located in a hot climate where cooling costs are a concern, TPO’s reflective properties may offer significant energy savings. On the other hand, if your building is in a region with extreme temperature fluctuations or heavy snowfall, EPDM’s proven durability might be the better choice.
- Budget: Both TPO and EPDM are cost-effective options, but TPO may offer better energy efficiency, potentially lowering long-term operational costs. However, EPDM’s long track record and ease of maintenance can also provide excellent value.
- Aesthetics: If the appearance of your roof is important, TPO’s clean, white surface might be more appealing, particularly for modern or minimalist designs. EPDM, while typically black, can also be installed in white or coated to achieve a similar look.
- Longevity: EPDM has a proven lifespan of 20-30 years, while TPO is newer and still accumulating long-term performance data. However, advancements in TPO technology suggest it may also provide excellent durability.
Ultimately, the best choice for your commercial roof depends on your specific needs, location, and budget. At Right Now Roofing, we’re here to help you navigate these options and choose the roofing material that will best protect your building for years to come.
If you have any questions or would like to discuss your roofing project, feel free to reach out to us. We’re always here to help you make the right decision for your commercial property.
See Our Roof Replacement Calculator Here
Justin Hansen is a seasoned professional in the roofing and siding industry, boasting over 15 years of hands-on experience. Starting his career in residential roofing, Justin quickly established a reputation for meticulous attention to detail and superior craftsmanship. His commitment to quality and excellence propelled him into more complex commercial projects, where he consistently delivered outstanding results.
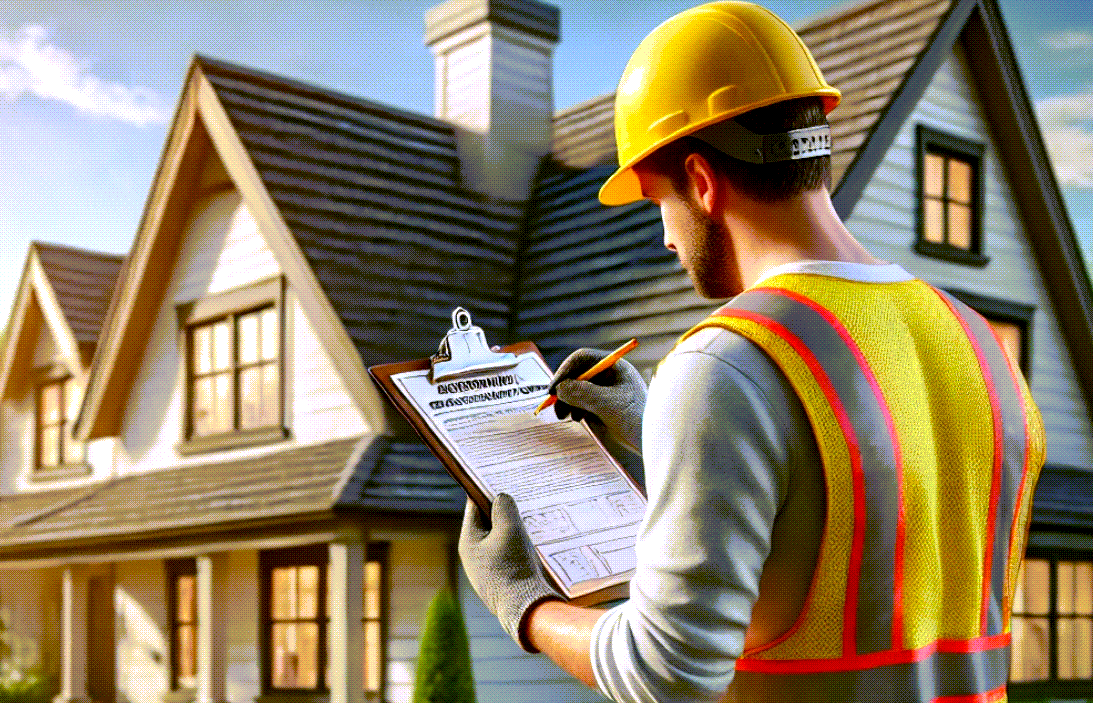
The Top 5 Reasons Why You Should Have the Roof Inspected When Purchasing a New Home
Hey there, future homeowner! Justin here, from Right Now Roofing, ready to share some valuable insights with you. Buying a new home is an exciting journey, filled with dreams of decorating, gardening, and settling into your new space. But before you start imagining those cozy movie nights, let’s talk about something that often gets overlooked—the roof. It’s like the unsung hero of your home, quietly keeping you safe from the elements. Here’s why you should make sure to give it the attention it deserves during the buying process.
1. Identify Hidden Issues Before They Become Big Problems
When you walk through a prospective new home, it’s easy to get swept away by the beauty of the kitchen or the potential of the backyard. But have you considered what’s over your head? A roof inspection can uncover hidden issues that aren’t immediately visible, such as leaks, mold, or structural damage. Catching these problems early on can save you from costly repairs down the road and prevent any nasty surprises after you’ve moved in.
Why It Matters: A leaky roof can lead to water damage, which can affect the integrity of your entire home. Repairing water damage can be expensive and time-consuming, so it’s better to address these issues before they escalate.
2. Negotiate Better Terms with the Seller
Imagine you’ve fallen in love with a house but discover through a roof inspection that it needs significant repairs. While this might initially seem like a deal-breaker, it can actually work in your favor. Armed with the information from the inspection, you can negotiate with the seller to lower the price or have them cover the cost of repairs.
Pro Tip: Use the inspection report as leverage in your negotiations. Sellers are often willing to make concessions to ensure a sale goes through smoothly.
3. Ensure Safety and Peace of Mind
There’s nothing quite like the peace of mind that comes with knowing your home is safe and sound. A thorough roof inspection ensures that your new home is structurally secure and can withstand the elements. Roofs play a crucial role in protecting your home from rain, wind, and extreme temperatures, so it’s essential to know they’re in good shape.
Feel Good Factor: By investing in a roof inspection, you’re investing in your family’s safety and well-being. It’s a small step that brings a lot of comfort.
4. Plan for Future Maintenance
Even if the roof inspection reveals that the roof is in great condition, it provides you with a baseline for future maintenance. Knowing the age and current state of the roof helps you plan for eventual repairs or replacements. You can create a maintenance schedule and budget accordingly, ensuring that your roof remains in top condition for years to come.
Long-Term Benefits: Regular maintenance prolongs the life of your roof, saving you money and preventing unexpected issues.
5. Boost Home Value and Resale Potential
Let’s say you eventually decide to sell this beautiful home you’re about to buy. A well-maintained roof is a significant selling point and can increase your home’s value. Potential buyers will appreciate that you’ve taken care of this crucial aspect of the property, making it more attractive in a competitive market.
Investment Perspective: A healthy roof is an investment in your home’s future, making it easier to sell and potentially fetching a higher price.
Justin Hansen is a seasoned professional in the roofing and siding industry, boasting over 15 years of hands-on experience. Starting his career in residential roofing, Justin quickly established a reputation for meticulous attention to detail and superior craftsmanship. His commitment to quality and excellence propelled him into more complex commercial projects, where he consistently delivered outstanding results.
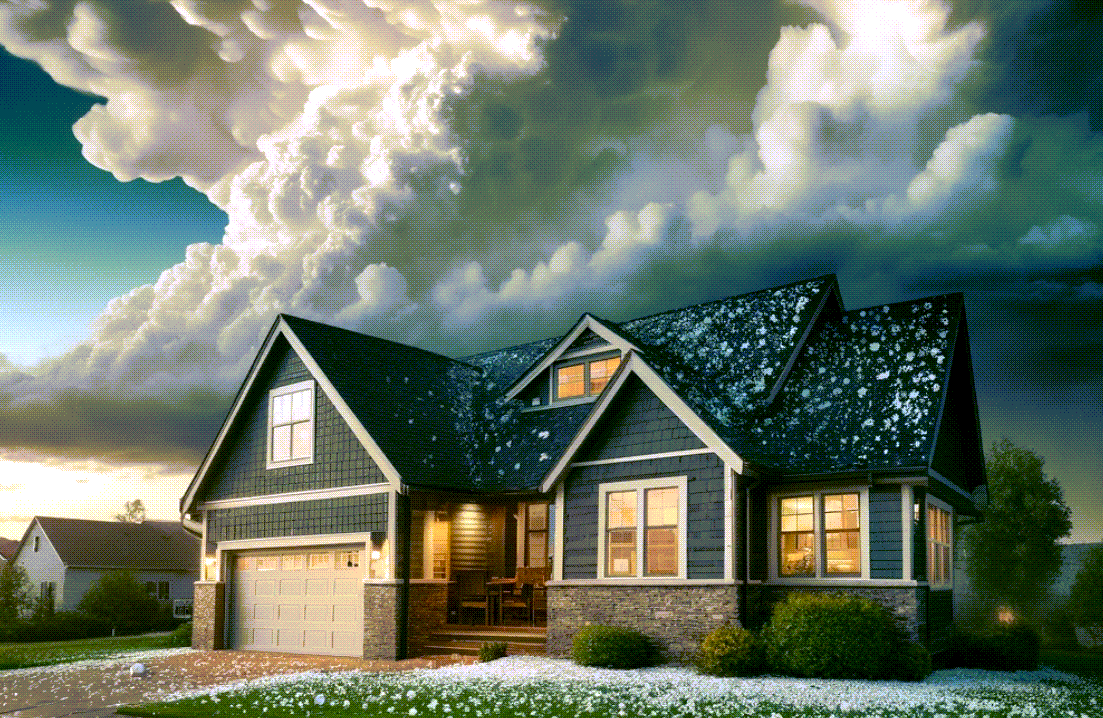
Will My Homeowners Insurance Cover Hail Damage in Minnesota?
TLDR: In short, the anwser is: most likely.
Understanding Hail Damage Coverage
1. Coverage Basics:
Most standard homeowners insurance policies cover hail damage as part of the dwelling protection or “Coverage A.” This means that if a hail storm damages your roof, siding, windows, or other parts of your home, your insurance should help pay for the repairs. However, the specific terms can vary significantly between different insurance providers and policies.
2. Deductibles and Limits:
Your policy will likely have a deductible, which is the amount you must pay out of pocket before insurance kicks in. Some policies also have specific deductibles for wind and hail damage, which can be a percentage of your home’s insured value rather than a fixed amount. It’s essential to know your deductible amount and how it applies to hail damage claims.
What to Do After Hail Damage
If you suspect hail damage after a storm, take the following steps to ensure a smooth claims process:
1. Document the Damage:
Take photos and videos of the damage to your property as soon as it’s safe. This documentation will be crucial when filing your insurance claim.
2. Contact Your Insurance Company:
Report the damage to your insurance company promptly. Many insurers have time limits on how long you have to file a claim after an incident.
3. Get an Inspection:
Consider having a professional roofing contractor inspect the damage. They can provide an expert assessment and help you understand the extent of the repairs needed.
Common FAQs About Hail Damage and Insurance
Q1: Does my policy cover damage to other structures like garages or sheds?
Most likely. Most homeowners insurance policies cover other structures on your property under “Coverage B.” This includes detached garages, sheds, and fences.
Q2: What if my roof is old? Will insurance still cover it?
Insurance companies may reduce the payout for damage to older roofs or roofs in poor condition. Some policies might have actual cash value coverage for roofs older than 10-15 years, meaning the payout will be based on the roof’s depreciated value rather than the cost of a new roof.
Q3: What is an “exclusion,” and how does it affect my coverage?
An exclusion is a specific condition or circumstance that is not covered by your insurance policy. For example, some policies may exclude coverage for cosmetic damage to roofing materials like metal or tile.
Q4: Can I get coverage for my personal belongings damaged by hail?
Personal belongings are generally covered under “Coverage C” in a standard homeowners policy. This means if hail damages items inside your home, such as electronics or furniture, your insurance should cover them, subject to your policy’s limits and deductibles.
Tips to Ensure Adequate Coverage
1. Review Your Policy Regularly:
Make sure you understand your coverage, deductibles, and exclusions. If necessary, discuss your policy with your insurance agent to clarify any uncertainties.
2. Consider Additional Coverage:
If your policy has significant exclusions or high deductibles for hail damage, consider purchasing additional coverage or endorsements that provide broader protection.
3. Keep Your Roof Maintained:
Regular maintenance can prevent minor issues from becoming major problems during a storm. Some insurers offer discounts for homes with newer or more resilient roofing materials.
Conclusion
In Minnesota, where hailstorms are frequent, having adequate homeowners insurance coverage is vital. By understanding your policy and taking proactive steps, you can protect your home and financial well-being. If you have any questions or need a professional roof inspection, don’t hesitate to contact us at Right Now Roofing. We’re here to help you safeguard your home against the elements.
Justin Hansen is a seasoned professional in the roofing and siding industry, boasting over 15 years of hands-on experience. Starting his career in residential roofing, Justin quickly established a reputation for meticulous attention to detail and superior craftsmanship. His commitment to quality and excellence propelled him into more complex commercial projects, where he consistently delivered outstanding results.